Docs › Administrator Guide
PanelFi Administrator Guide
Everything in the server panel, from installing PanelFi to running a hosting business on it: accounts, packages and resellers, DNS and DNS clustering, SSL, PHP, security, backups, cPanel migration, mail, databases, the API and WHMCS. Each section has step-by-step instructions and screenshots.
Getting started
Requirements and installation
Where to find it: Command line on the server (root shell)
PanelFi installs on a fresh 64-bit Linux server with one command. This page lists what the server needs, the supported operating systems, what the installer does and how to upgrade.
What you need
- A fresh server: a new VPS or dedicated machine with a 64-bit
x86_64orarm64CPU. The installer refuses to run next to another control panel (cPanel, CyberPanel, Plesk, DirectAdmin, Hestia, Vesta or Webmin). - Root access. The installer must run as root.
- A fully qualified hostname with at least two dots, for example
server.example.com. If the server's hostname is not one, set it first withhostnamectl set-hostname server.example.comor pass--hostname server.example.comto the installer. - A public IPv4 address. IPv6 is optional.
- Open ports: 53 (TCP and UDP, DNS), 80 and 443 (web), 2083 (Customer panel) and 2087 (Server panel). If you install the mail server, also 25, 465, 587, 993 and 995. The installer opens the panel, web and DNS ports itself when
ufworfirewalldis active.
| Sizing | CPU | RAM | Disk |
|---|---|---|---|
| Minimum | 1 vCPU | 2 GB | 20 GB SSD |
| Recommended | 2+ vCPU | 4 GB | 40+ GB SSD |
Supported operating systems
The installer accepts Ubuntu 22.04, 24.04 and 26.04; Debian 12 and 13; AlmaLinux, Rocky Linux and CloudLinux 8, 9 and 10; CentOS Stream 9 and 10; and Red Hat Enterprise Linux 8, 9 and 10. The install and licensing basics page lists which versions were tested end to end. On the RHEL family the installer sets SELinux to permissive; AlmaLinux, Rocky Linux and RHEL lists everything it changes there, and CloudLinux OS covers CloudLinux mode (LVE, CageFS, PHP Selector, MySQL Governor). Another system can be tried with --force, at your own risk.
Install
- Log in to the new server as root over SSH.
- Make sure
hostname -fprints a name with at least two dots. - Run the one-line installer from the Downloads page. It detects the operating system and CPU, downloads the matching release and runs the installer.
- Wait for it to finish. The installer asks no questions unless you pass
--confirm. Progress is logged to/var/log/panelfi-install.log. - When it ends it prints the Server panel and Customer panel addresses and the
rootpassword. If you did not choose one, a password is generated and saved in/root/panelfi-login.txt. - Open
https://your-hostname:2087and continue with first sign-in and the setup wizard. Your browser warns about the self-signed certificate on the first visit; that is expected until the hostname certificate is issued.
What gets installed
MariaDB, PowerDNS, certbot, nftables and the web server, plus the panel itself and its background service. Unless you opt out, it also installs the mail server (Postfix, Dovecot, Roundcube), the FTP server (Pure-FTPd) and phpMyAdmin. The web server is OpenLiteSpeed by default.
Installer options
Options go after the install command or to install.sh in an extracted release. Run it with --help to print them.
| Option | Effect |
|---|---|
--confirm | Ask for confirmation before installing. |
--engine ols|nginx | Web server to install. Default ols (OpenLiteSpeed). LiteSpeed Enterprise is an upgrade from the panel afterwards; see Web server. |
--hostname FQDN | Set the server hostname first. |
--email ADDRESS | Server contact email (otherwise asked in the setup wizard). |
--admin-password PASS | Password for the root panel administrator (generated if omitted). |
--php "82 83 84" | PHP versions to install. Default 81 82 83 84. |
--ns "ns1.x ns2.x" | Nameservers for new zones (otherwise asked in the setup wizard). |
--no-mail, --no-ftp | Skip the mail server or the FTP server. |
--force | Install on an unsupported OS version. |
Upgrade
Run the same one-line command again. The web server, settings, accounts and passwords are kept, and an upgrade never adds a mail or FTP server to a machine installed without one. You can also update from the panel; see Licensing and updates.
Notes
PanelFi takes over ports 53, 80, 443, 2083 and 2087, so use a server with nothing else on it. To bring accounts from a cPanel server, install PanelFi on a new machine and use the Transfer Tool.
AlmaLinux, Rocky Linux and RHEL
Where to find it: Command line on the server (root shell)
PanelFi installs on AlmaLinux, Rocky Linux, CloudLinux, CentOS Stream and Red Hat Enterprise Linux with the same one-line installer as on Ubuntu and Debian. This page covers what the installer changes on these systems, which versions were tested, and how to go from AlmaLinux to CloudLinux.
Supported versions
| Distribution | Versions | Tested end to end |
|---|---|---|
| AlmaLinux | 8, 9, 10 | 9 |
| CloudLinux OS | 8, 9, 10 | 9 (9.8) |
| Rocky Linux | 8, 9, 10 | — |
| CentOS Stream | 9, 10 | — |
| Red Hat Enterprise Linux | 8, 9, 10 | — |
All of them use the same installer and code paths, on x86_64 and arm64. Versions without a tick are expected to work but were not run end to end for this release, so try a fresh server before you rely on one.
Install
- Start from a fresh, minimal install and log in as root.
- Set a fully qualified hostname:
hostnamectl set-hostname server.example.com. - Run the one-line installer from the Downloads page. Minimal images that lack
curl,tarorgzipget them installed first. - Continue with first sign-in and the setup wizard.
What the installer changes on these systems
- EPEL and CRB. Enables EPEL and the CodeReady Builder repository (
crbon 9 and 10,powertoolson 8), which provide PowerDNS and other packages. On Red Hat Enterprise Linux this needs an active subscription. - SELinux. Set to permissive (now and after reboots), as other hosting control panels require. SELinux still logs what it would have blocked.
- firewalld. If firewalld is running, the installer opens the panel, web and DNS ports (and the mail and FTP ports when those are installed). PanelFi's own Firewall uses nftables alongside it.
- Packages. MariaDB comes from the distribution, so its version follows the release (10.5 on 9, for example). With OpenLiteSpeed, PHP comes from LiteSpeed's repository as
lsphp81tolsphp84; with NGINX, PHP-FPM comes from the Remi repository. The mail server is Postfix and Dovecot from the distribution; PowerDNS comes from EPEL.
From AlmaLinux to CloudLinux
CloudLinux OS is AlmaLinux with CloudLinux's kernel and tools. Convert an AlmaLinux server with CloudLinux's installer and a CloudLinux key (or trial key), before or after installing PanelFi:
dnf install -y wget
curl -O https://repo.cloudlinux.com/cloudlinux/sources/cln/cldeploy
sh cldeploy -k YOUR_CLOUDLINUX_KEY
reboot
Then install CageFS and alt-php and turn on CloudLinux mode in PanelFi. CloudLinux OS has every step.
Notes
- The installer refuses to run next to another control panel (cPanel, CyberPanel, Plesk, DirectAdmin, Hestia, Vesta or Webmin). To move from cPanel on AlmaLinux or CloudLinux, install PanelFi on a new server and use the Transfer Tool.
- An unlisted release can be tried with
--force, at your own risk.
First sign-in and the setup wizard
Where to find it: Server panel > Server Configuration > Initial Setup Wizard ; Basic Setup
After installing, you sign in to the Server panel as root, complete the Initial Setup Wizard (contact email, hostname, IP addresses, nameservers, optional license key) and then create your first account.
Sign in to the Server panel
- Open
https://your-hostname:2087(orhttps://server-ip:2087). Accept the browser warning about the self-signed certificate on the first visit. - Enter the username
rootand the password printed at the end of the install (also in/root/panelfi-login.txtwhen it was generated). - Click Log in. Until setup is finished the panel opens the wizard with no menu.
If two-factor authentication is on for the login, a second screen asks for the 6-digit code from your authenticator app. If you lost your phone, enter one of your recovery codes in the same field. See Two-factor and security. Repeated failed sign-ins from one address are rate limited.
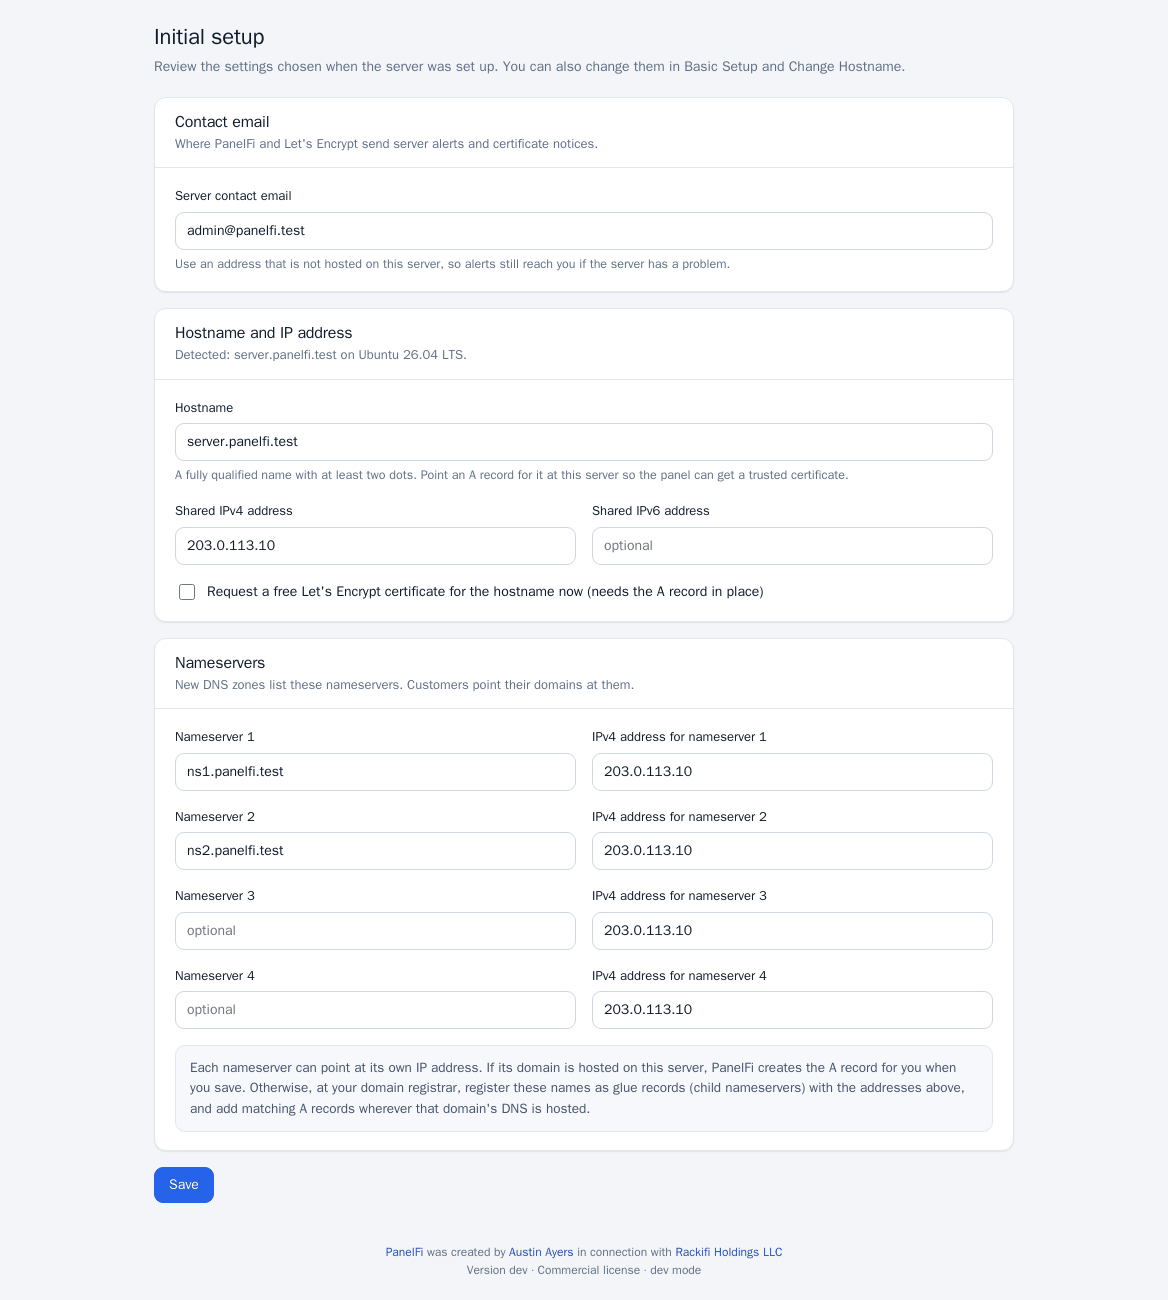
Complete the Initial Setup Wizard
The wizard is one page with four parts. Everything in it can be changed later in Basic Setup and Change Hostname.
- License. Tick I have read the license notice. Optionally paste a license key; leave it blank to run PanelFi Free (up to 3 hosting accounts). You can add a key later under Licensing & Billing.
- Contact email. The address PanelFi and Let's Encrypt use for server alerts and certificate notices. Use an address that is not hosted on this server.
- Hostname and IP address. The hostname must be fully qualified with at least two dots. Enter the shared IPv4 address (and optionally IPv6); the wizard shows what it detected. Create an A record for the hostname at your DNS provider first, then tick Request a free Let's Encrypt certificate for the hostname now to replace the self-signed certificate.
- Nameservers. The names that new DNS zones list, for example
ns1.example.comandns2.example.com, each with an IPv4 address. Customers set these at their registrar.
Click the save button at the bottom. PanelFi saves the settings, applies the hostname if it changed, requests the certificate in the background if you asked for it, and opens the dashboard. Check SSL/TLS > Manage AutoSSL a minute later to see the certificate.
Basic Setup afterwards
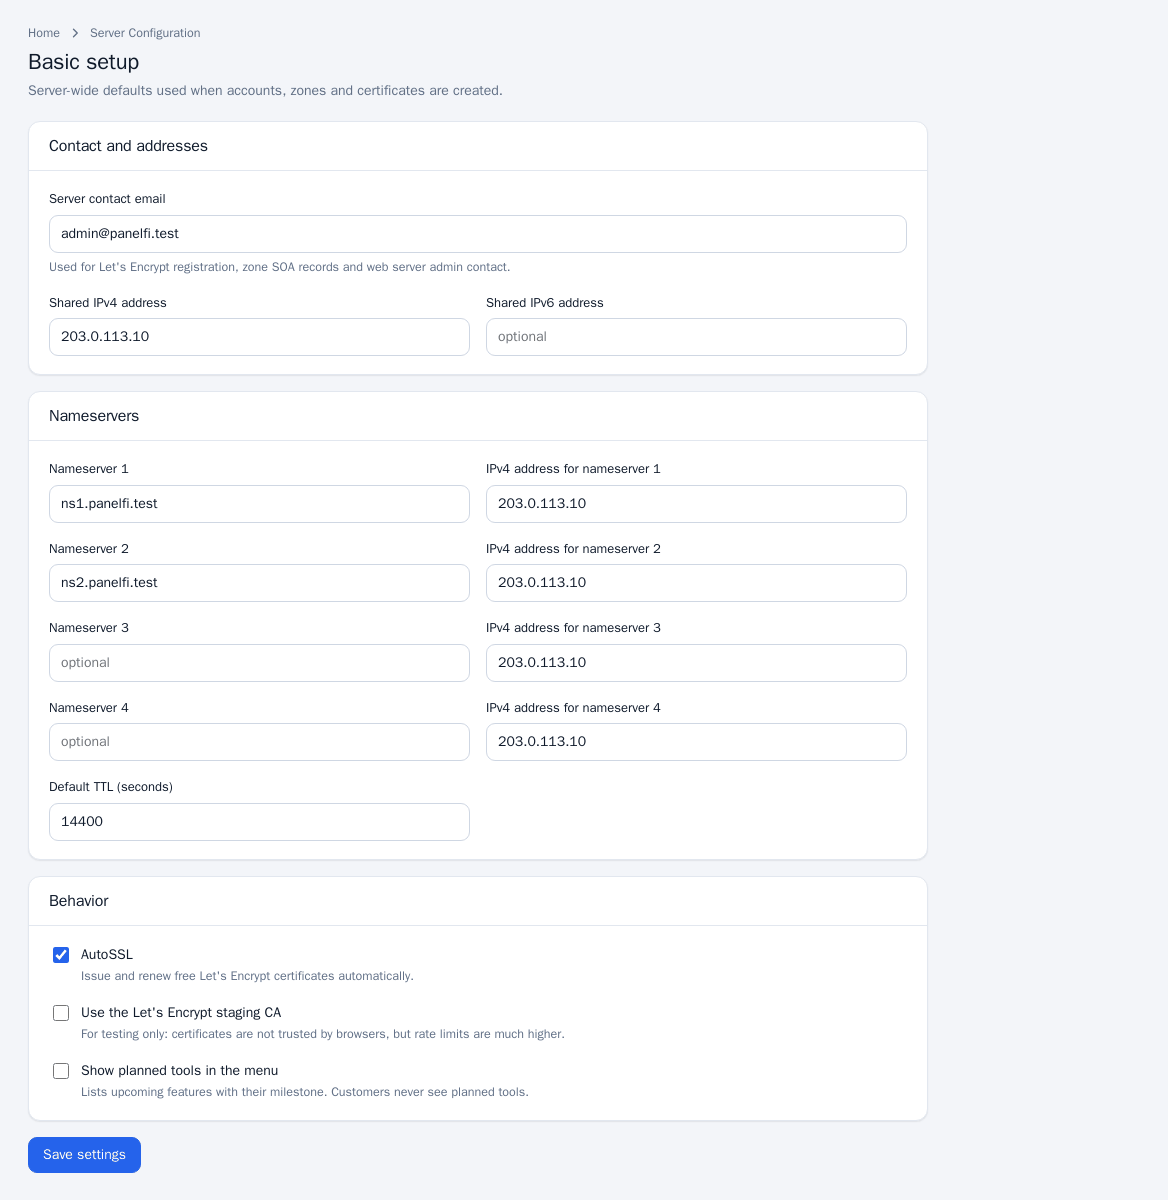
Open Server Configuration > Basic Setup any time to change the contact email, shared IPv4/IPv6 address, the four nameservers with their addresses, the default zone TTL, whether AutoSSL is on, and the Let's Encrypt staging option (for testing only).
Next steps
- Review the sample packages and make your own: Packages.
- Create your first hosting account: Create an account.
- Set up backups and two-factor authentication for the root login: Backups, Two-factor and security.
Notes
The Server panel is on port 2087 and the Customer panel on port 2083. Customers sign in on 2083 with their hosting username, not on the Server panel.
The two panels, resellers and customers
Where to find it: Server panel (port 2087) and Customer panel (port 2083)
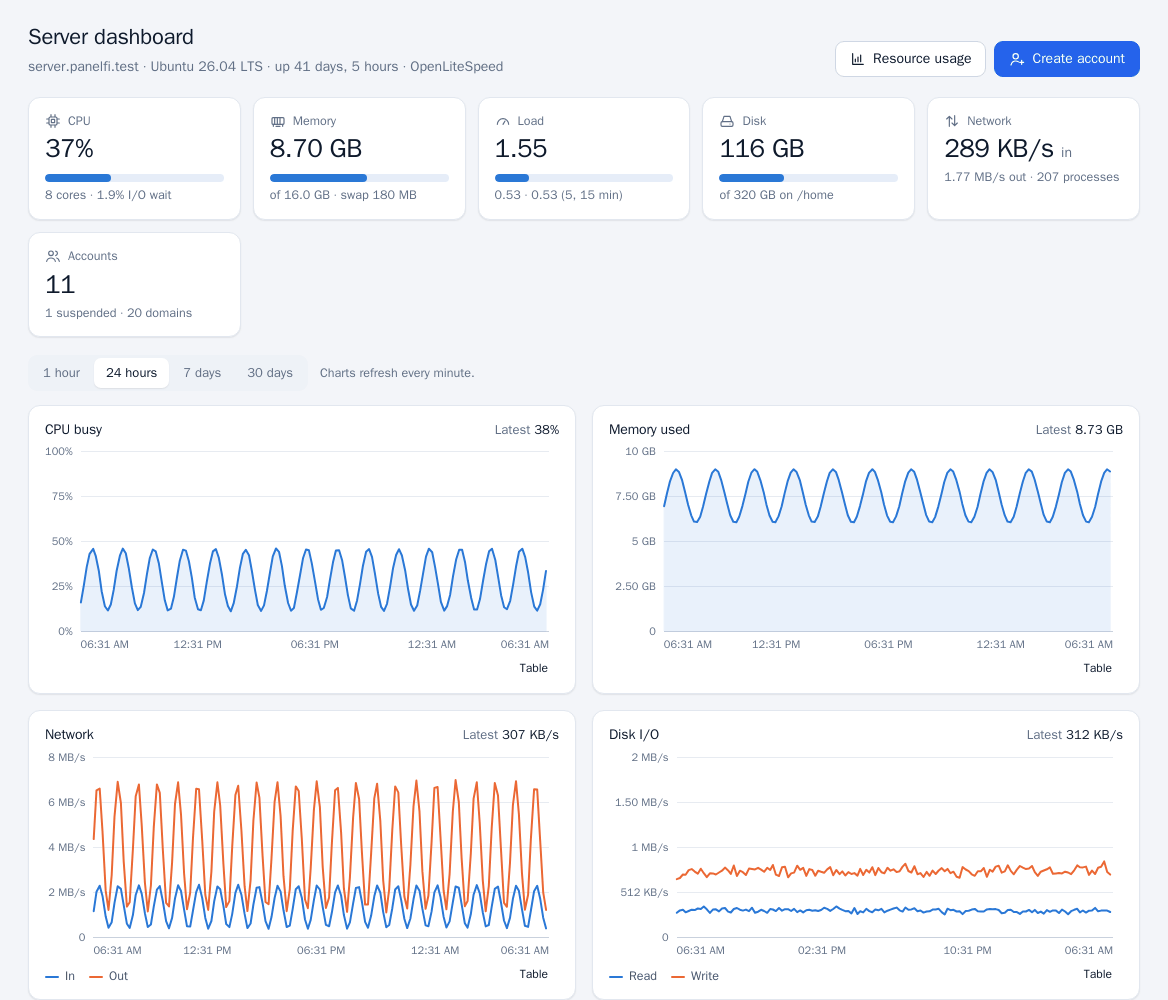
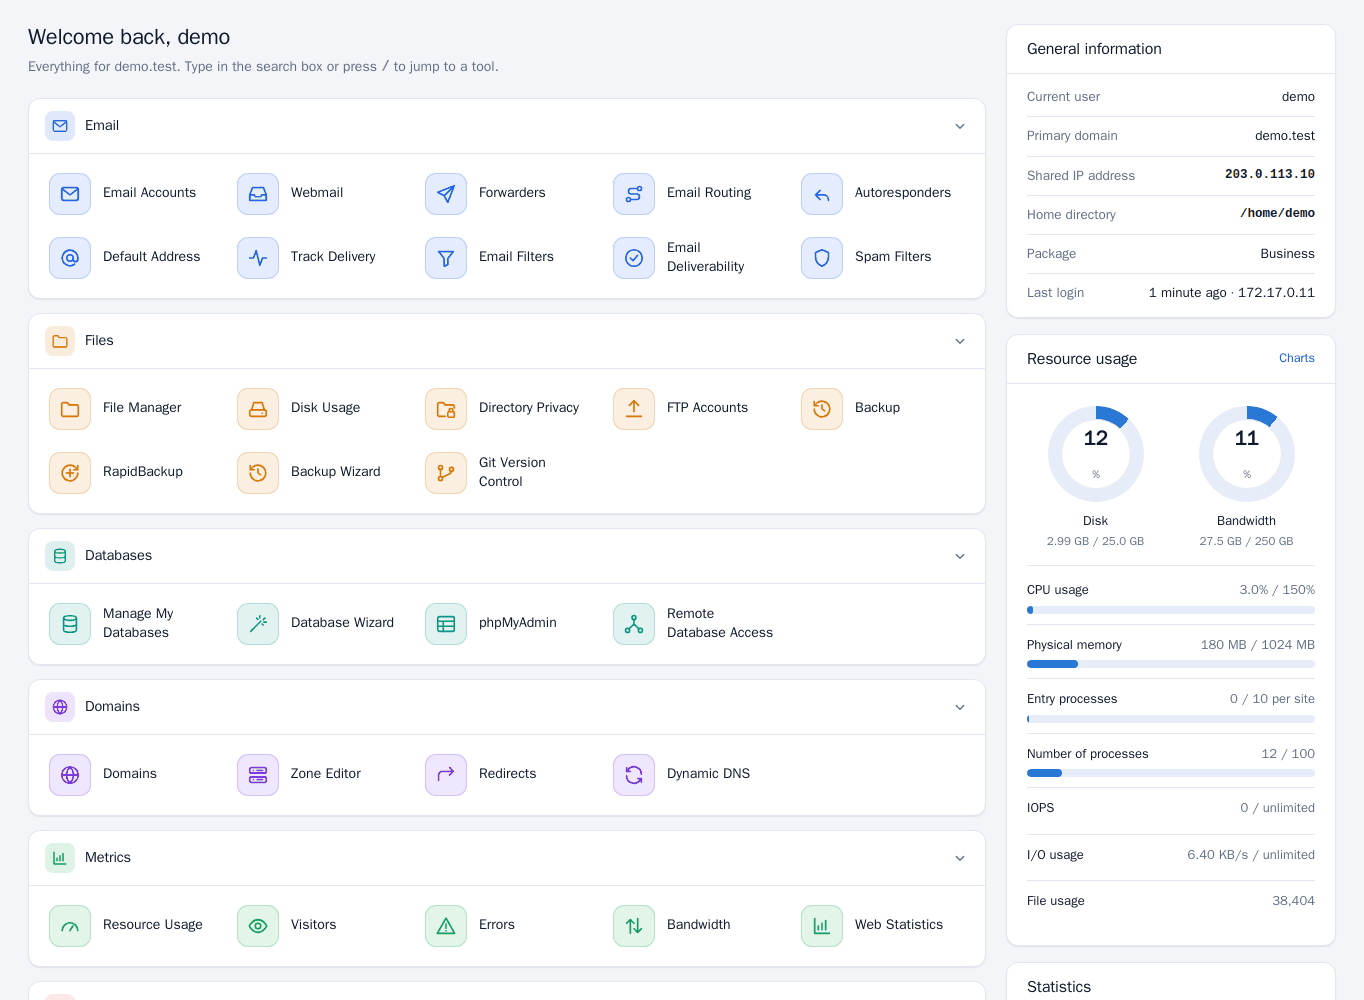
PanelFi has two panels: the Server panel on port 2087 for the server owner and resellers, and the Customer panel on port 2083 for each hosting account. This page explains who signs in where and how the roles relate.
Who uses which panel
| Server panel | Customer panel | |
|---|---|---|
| Address | https://hostname:2087 | https://hostname:2083 |
| Who signs in | The root administrator, other administrators and resellers | The owner of a hosting account (and people they give access) |
| Username | Administrator or reseller username | The account's hosting username |
| What it manages | The whole server: accounts, packages, DNS, SSL, web server, PHP, security, backups, transfers, mail server, API | One hosting account: files, domains, email, databases, apps, backups, stats |
The two panels use separate logins. An administrator username does not work on port 2083, and a hosting username does not work on port 2087. The sign-in page of each panel says which one it is.
Administrators
The root administrator has full access. Under Server Configuration > Administrators & Password you can add other administrators with full access, change their passwords and remove them. See Two-factor and security for protecting these logins.
Resellers
A reseller signs in to the Server panel on port 2087 with their own login but sees a reduced menu: only their own customers' accounts, packages, DNS zones, certificates, usage and the audit log. Administrators create resellers and give them limits in the Reseller Center. Resellers require a Professional license. See Resellers.
Customers
Every hosting account has a Customer panel. What a customer sees depends on the account's package: the Feature Manager switches individual tools off per package. A customer can also give colleagues access without sharing the password with User Manager and Manage Team.
Log in as a customer
To see what a customer sees, open the account list (Account Information > List Accounts) and click Log in on the account, or use Log in to panel on the account's page. PanelFi creates a one-time sign-in link that is valid for one minute and opens the Customer panel in that account, without needing the customer's password. Resellers can do this for their own accounts.
Notes
If the server's license is suspended or the server is over its edition's account limit for more than 7 days, the panels lock while hosting keeps running. See Licensing and updates.
Licensing and updates
Where to find it: Server panel > Support > Licensing & Billing ; Server panel > Server Configuration > Update Preferences
PanelFi is licensed per server. Free allows 3 hosting accounts with no key; Professional (monthly, annual or perpetual) is unlimited. A license problem only ever locks the control panels: websites, email, FTP, databases and cron keep running. This page covers the Licensing and Billing page, the lock behaviour and updating PanelFi.
Editions
| Free | Professional | |
|---|---|---|
| Hosting accounts | Up to 3 | Unlimited |
| License key | None needed | Required |
| Resellers, white-label branding, commercial API | No | Yes |
Professional comes as a monthly or annual subscription (with a free trial) or as a perpetual license. A perpetual license includes updates for the entitlement period; releases beyond it need maintenance, while the version you have keeps working. See Pricing for current prices and terms.
Check your license
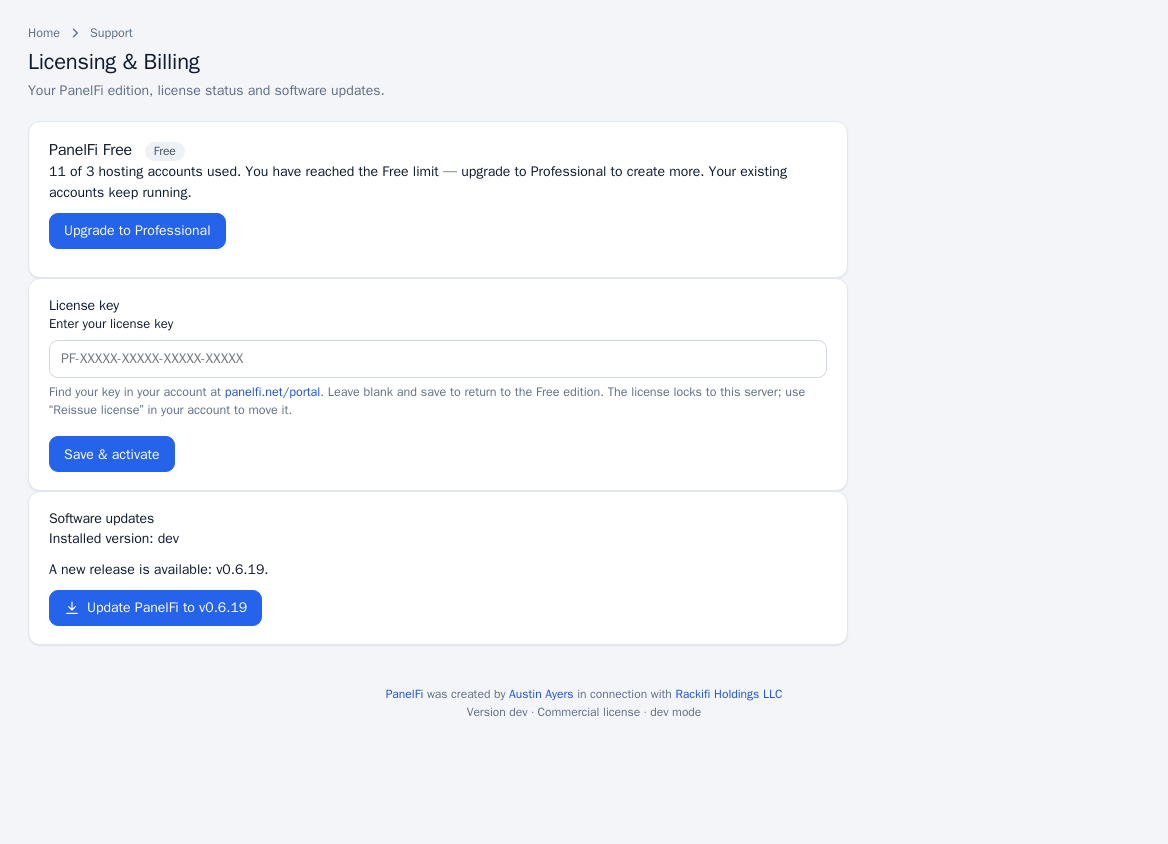
Open Support > Licensing & Billing. The page shows the edition (PanelFi Free or PanelFi Professional), the status, how many hosting accounts are used against the cap, the key in masked form, and when a trial ends, a subscription renews or updates and support run until.
Add or change a license key
- Copy the key from your account at my.panelfi.net.
- In the Server panel open Licensing & Billing, paste it into License key and click Save & activate. PanelFi checks it with the license server straight away and reports what the server said.
- To go back to Free, leave the key blank and click Save & activate. The server then runs the Free edition.
A key is locked to the server it is activated on. To move it, use Reissue license in your account and paste the key into the new server. If the same key is seen on several servers at once, the page warns that the license is running on more than one server: shut down the copies (for example a cloned VM), reissue the license and paste the key again. Your websites keep running meanwhile.
If the license server cannot be reached, the server keeps using its last license for 7 days (perpetual licenses indefinitely) before falling back to Free.
What happens when a license lapses
Hosting never stops because of a license. Websites, email, FTP, SSH, cron and databases keep running whatever the license says. Only the control panels lock, in two situations:
- Suspended license (an unpaid invoice past its grace period). The Server panel opens only Licensing & Billing, backups, transfers and the account list, so nothing is held hostage. In the Customer panel, customers see a license notice instead of their tools. The API refuses changes. New accounts cannot be created. The suspension is stored as a signed token on the server, so blocking the license server does not lift it.
- More accounts than the edition allows. A cancelled, expired or revoked license falls back to Free, which covers 3 accounts. If the server has more, the panel shows a notice with a deadline and after 7 days locks the same way. Removing the key does not help, and a server that was suspended gets no new 7-day notice.
The lock lifts within a minute of paying, entering a valid key, or getting back within the account limit. See section 6 of the Terms for the commercial terms.
On Free, once the third account exists the Create account page refuses another one: PanelFi Free allows up to 3 hosting accounts. Existing accounts keep running.
Update PanelFi
PanelFi updates in place and keeps your web server, settings, accounts and passwords.
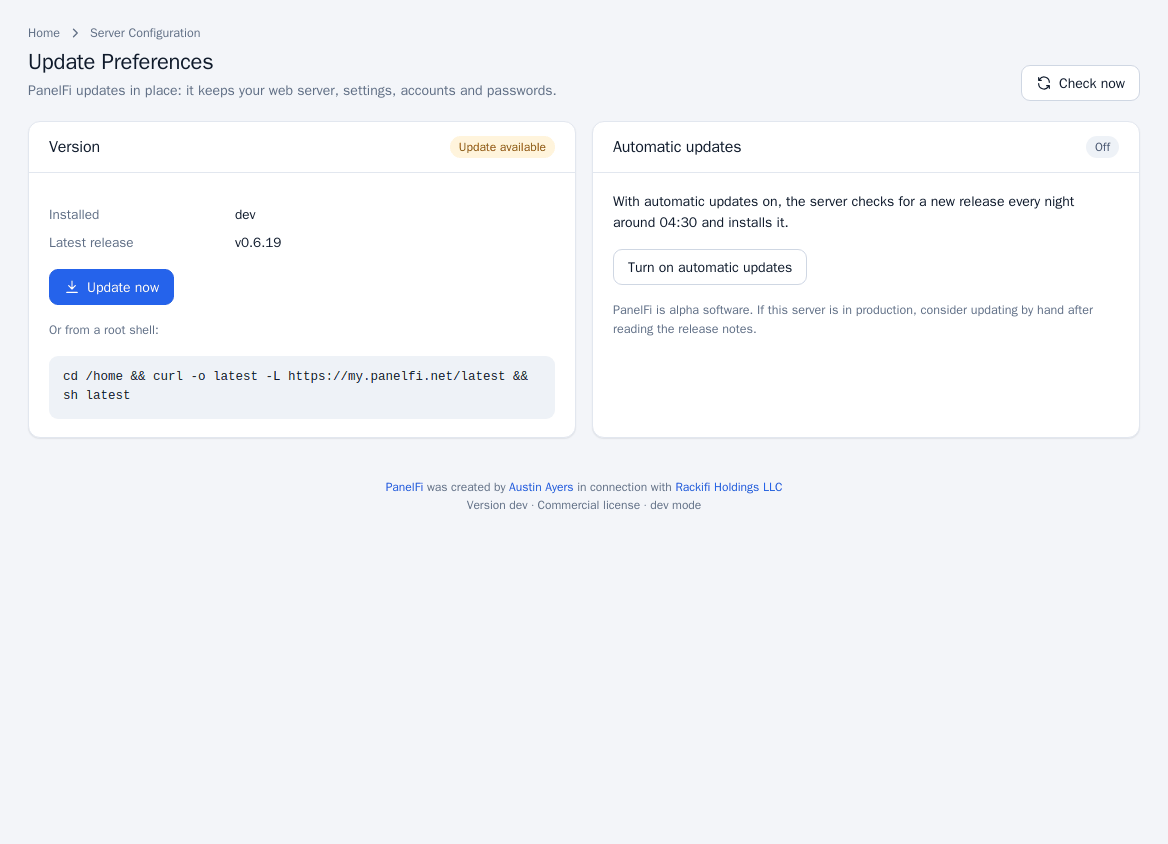
- Open Server Configuration > Update Preferences (the Software updates card on Licensing & Billing has an update button too).
- Click Check now. The page shows the installed version and the latest release.
- If an update is available, click Update now. The update runs on the server by itself and the progress page can be closed; the panel restarts near the end, so the screen may pause for a few seconds.
Before touching anything, PanelFi downloads the release's signed manifest and refuses a release that cannot be verified. If the release is newer than your maintenance entitlement (perpetual licenses), the update is refused with a message and the current version keeps working.
You can also update from a root shell by running the same one-line command used to install; see Downloads.
Automatic updates
On Update Preferences you can turn Automatic updates on. The server then checks for a new release every night around 04:30 and installs it. Leave it off if you prefer to read the release notes first.
Notes
- Licensing is per server, not per account, domain or customer.
- Installing PanelFi on a fresh server is covered in Requirements and installation.
- Partners who resell licenses: Partner program and licensing.
Partner program and licensing
Where to find it: my.panelfi.net > Portal > Partner
Partners buy PanelFi licenses in volume and issue them to their own customers. Partner licenses are locked to an IP address, and the partner API and a WHMCS licensing module let you automate issuing them.
What partners get
- Volume pricing on licenses.
- IP-locked licenses: each license is tied to the IP address of the server it is issued for.
- A partner API to create and manage those licenses from your own systems.
- A WHMCS licensing module that uses the partner API.
Get started
- Sign in to your account at my.panelfi.net.
- Open the partner area at my.panelfi.net/portal/partner.
- Issue licenses there, or call the partner API from your billing system.
Partner API
The partner API lives under /api/v1/partner on my.panelfi.net. The endpoints are:
| Method and path | Purpose |
|---|---|
GET /api/v1/partner/licenses | List your licenses |
POST /api/v1/partner/licenses | Create a license |
GET /api/v1/partner/licenses/{id} | Show one license |
DELETE /api/v1/partner/licenses/{id} | Delete a license |
POST /api/v1/partner/licenses/{id}/ip | Set or change the license's IP address |
GET /api/v1/partner/account | Show your partner account |
Notes
- This is separate from the API of each server, which provisions hosting accounts on a PanelFi server: see API tokens, API shell and endpoints.
- Once a license is on a server, it is entered under Licensing & Billing like any other key: Licensing and updates.
- To automate licensing from WHMCS, see WHMCS module.
Server panel: accounts and resellers
Create an account
Where to find it: Server panel > Account Functions > Create a New Account
Creating a hosting account sets up a system user, a home directory, a website, a DNS zone, MySQL access for phpMyAdmin and a free SSL certificate in one step. Administrators and resellers can both create accounts.
Create an account
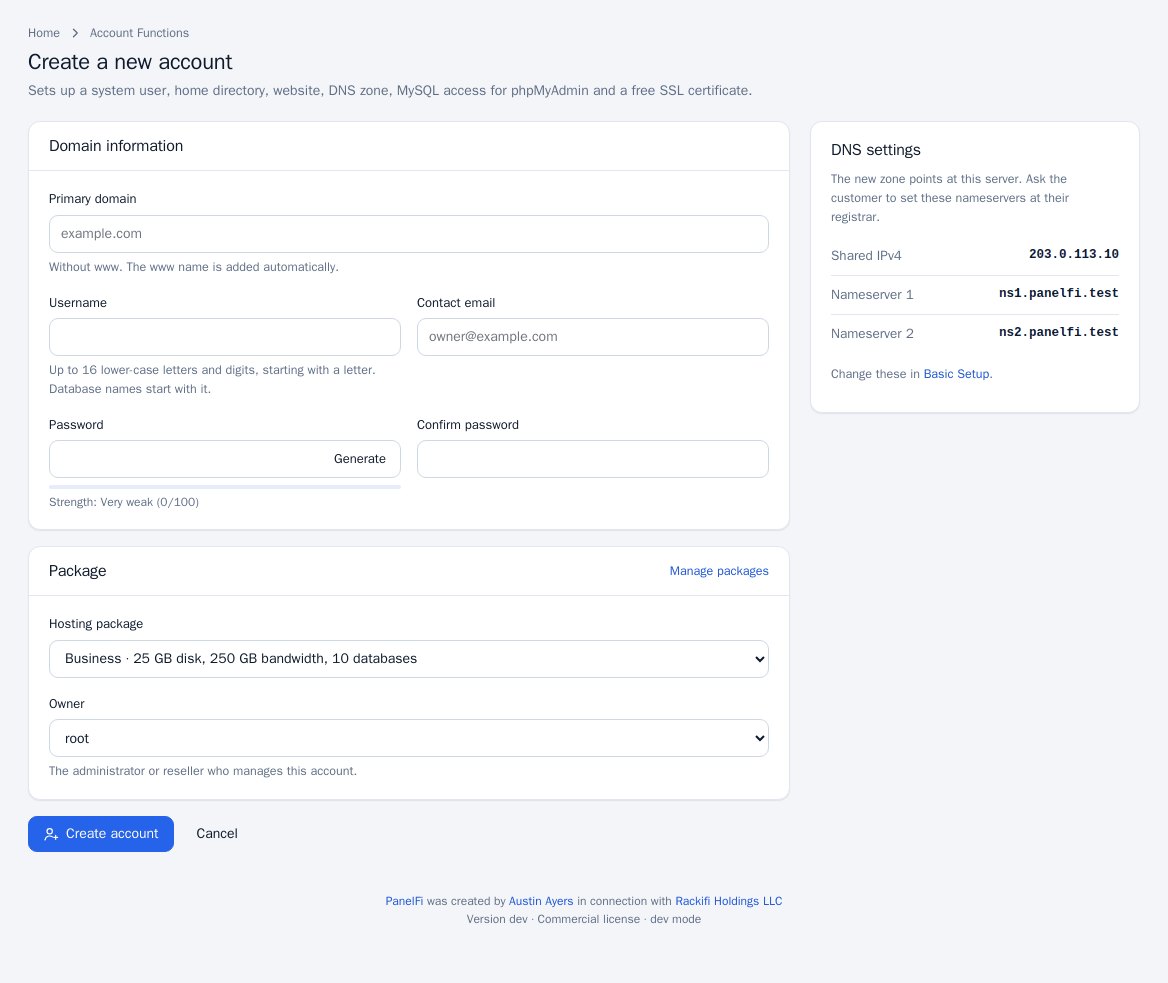
- In the Server panel open Account Functions > Create a New Account, or click Create account on the account list.
- Enter the Primary domain without
www; thewwwname is added automatically. - Enter a Username: up to 16 lower-case letters and digits, starting with a letter. Database names for the account start with it.
- Optionally enter the Contact email (used for notices to the customer; the account also appears in Email All Users only if it has one).
- Enter a Password and confirm it, or click Generate. Passwords must be at least 8 characters and cannot equal the username.
- Pick the Hosting package. The package decides the limits and which tools the customer sees; see Packages.
- Administrators can set the Owner: themselves or a reseller. Resellers always own the accounts they create.
- Click Create account. A live log shows each step. When it finishes you land on the account's page.
What the panel sets up
- A system user and home directory, a website and a DNS zone for the domain pointing at the server's shared IPv4 address (or a dedicated address if the package gives one).
- MySQL access through phpMyAdmin and a free SSL certificate (AutoSSL; it is issued once the domain's DNS points at the server).
- Files from the Skeleton Directory, if you set one; otherwise PanelFi's welcome page.
The panel shows the nameservers the new zone lists. Ask the customer to set these nameservers at their registrar (they are set in Basic Setup).
Notes and limits
- The domain must not already be hosted on the server, and some reserved names are refused.
- On the Free edition the server holds 3 accounts; creating a fourth is refused. A suspended license blocks new accounts. See Licensing and updates.
- A reseller can create accounts only up to the limits you set for them in the Reseller Center.
- If the package has the dedicated IP option and no IPv4 address is free, creation fails; add an address first (IP functions).
Manage accounts
Where to find it: Server panel > Account Information > List Accounts ; Account Functions > Modify an Account
The account list and each account's page are where you search accounts, change a package, reset a password, suspend or unsuspend, terminate an account, change its owner or IP address, and log in to its Customer panel.
Find an account
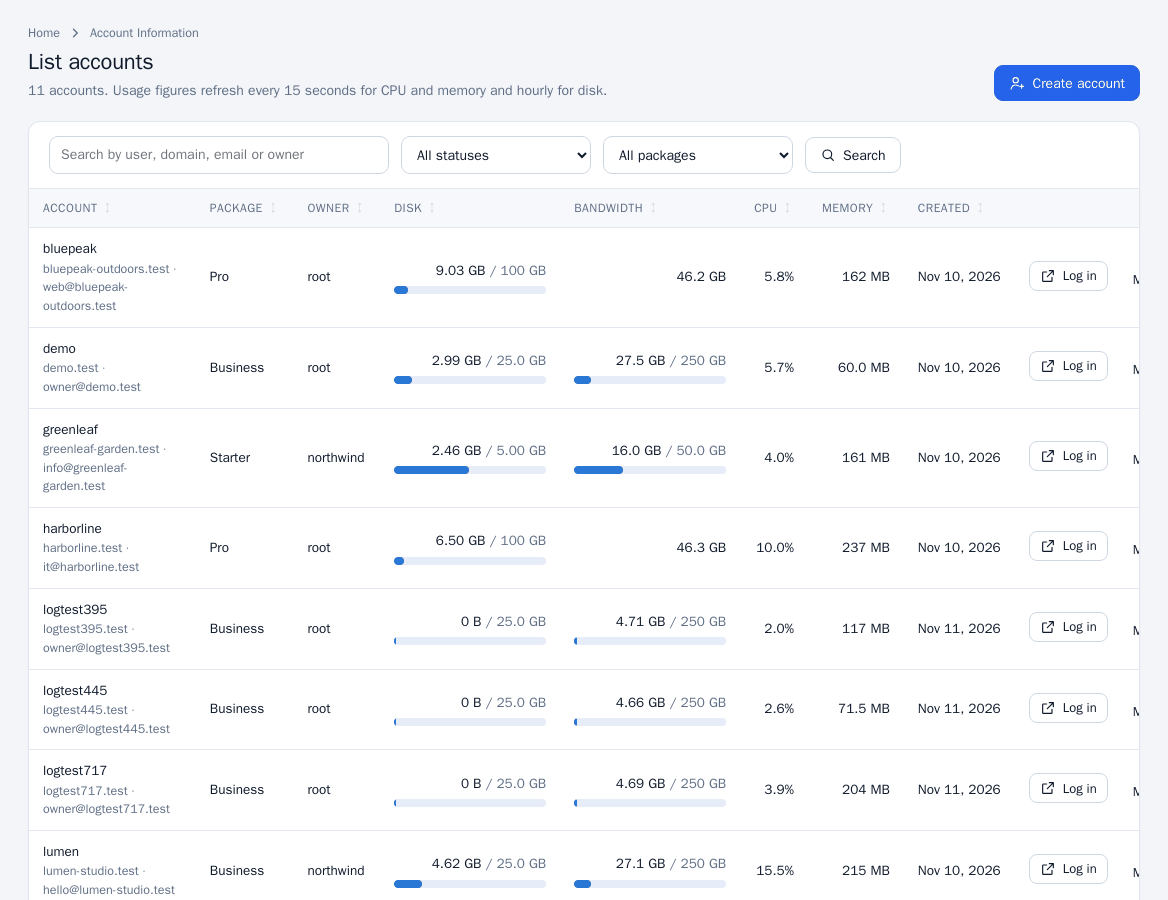
Open Account Information > List Accounts. The table shows each account's domain, package, owner, disk and bandwidth use against the package limits, CPU, memory and creation date. Usage refreshes every 15 seconds for CPU and memory and hourly for disk.
- Search by user, domain, email or owner, and filter by status (Active, Suspended, Over disk quota) and by package.
- The menu also has shortcuts: List Suspended Accounts and Show Accounts Over Quota.
- List Subdomains, List Parked Domains (aliases) and List Addon Domains list every domain of that kind across accounts.
- Click Log in to open the account's Customer panel, or Manage for the account page. Resellers see only their own accounts.
The account page
Click an account to open it. It shows suspension state, disk, bandwidth this month, CPU and memory, usage charts, the account's domains and its details (home directory, owner, databases, cron jobs).
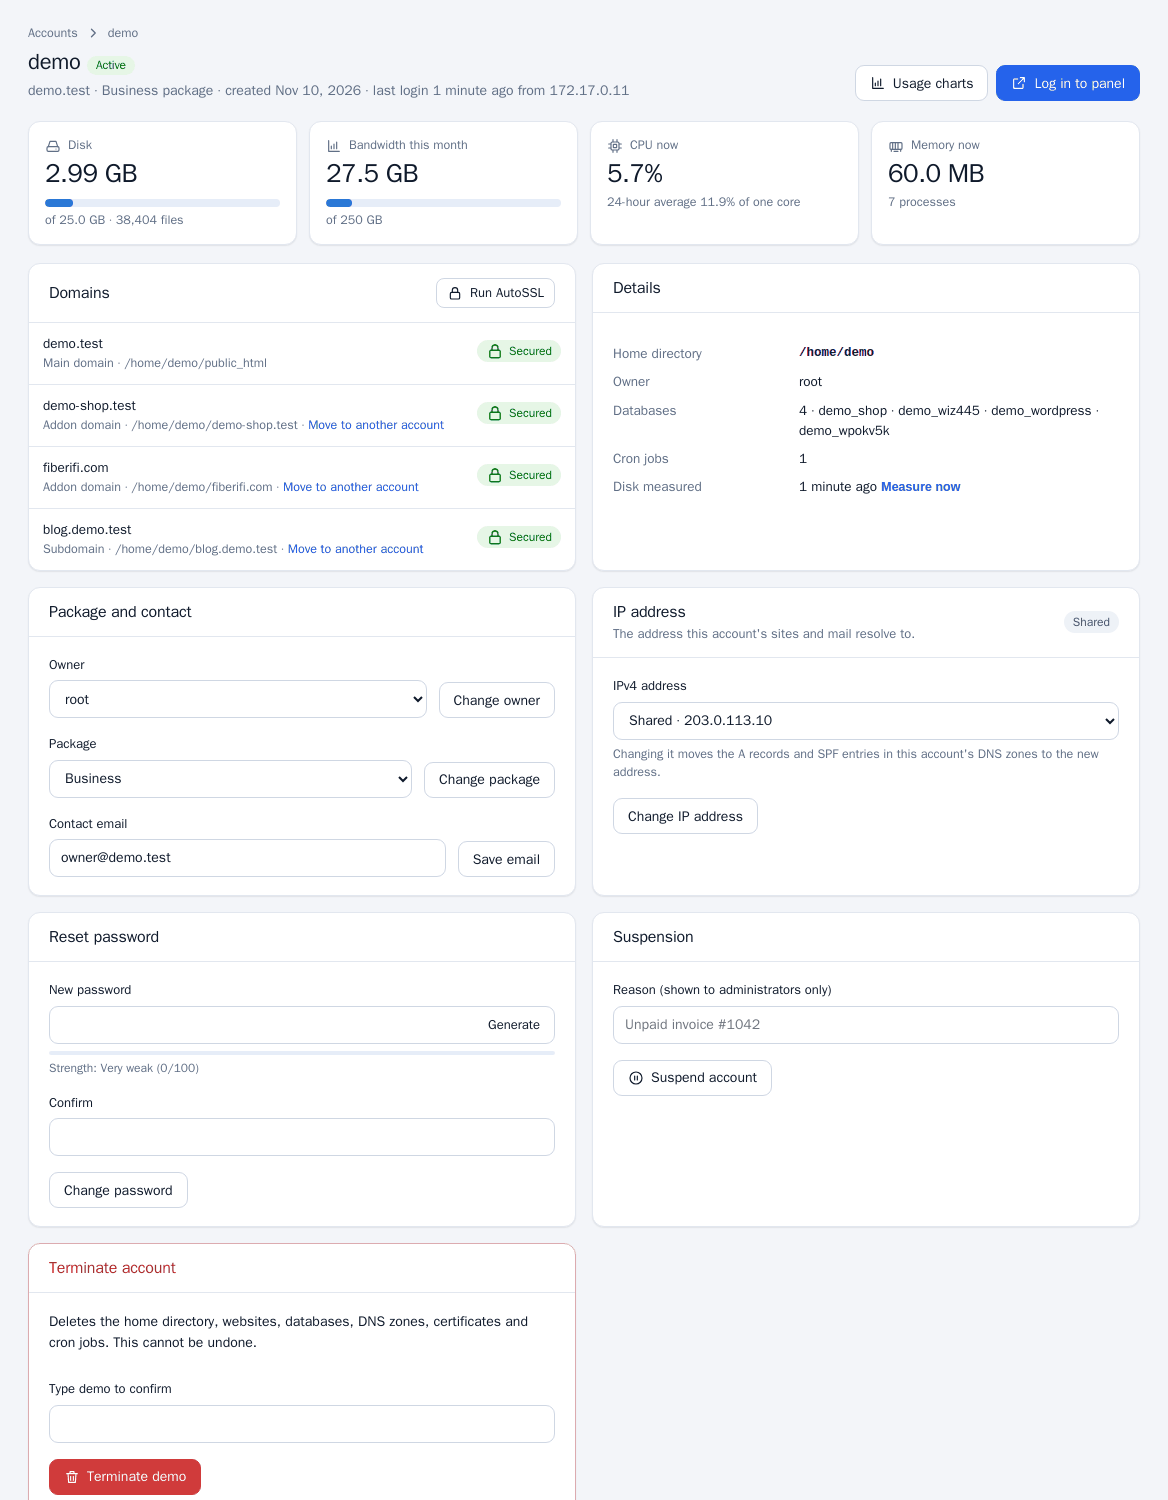
Change the package
- In Package and contact choose a package under Package.
- Click Change package. Limits and the customer's tool list change at once. Quota and package options (dedicated IP, SSH access, reseller option) are applied; an option the new package lacks is not taken away.
The change is refused if the package would push a reseller's account past that reseller's limits, or if the package needs a dedicated IP and none is free.
Update the contact email
Edit Contact email and click Save email.
Reset the customer's password
- In Reset password enter the new password twice or click Generate.
- Click Change password. The account's open Customer panel sessions are signed out.
Change the owner (administrators only)
Pick a different administrator or reseller under Owner (reseller) and click Change owner. The move is refused if it would exceed the new owner's limits.
Change the IP address (administrators only)
Under IP address choose Shared or a free dedicated address and click Change IP address. The A records and SPF entries in the account's DNS zones move to the new address. See IP functions.
Measure disk usage
Click Measure now beside the disk figure to recount the account's disk use instead of waiting for the hourly measurement.
Run AutoSSL
Click Run AutoSSL in the Domains list to start certificate issuing for every domain on the account. Refresh in a minute for results; see AutoSSL.
Suspend and unsuspend
- In Suspension optionally enter a Reason (shown to administrators only).
- Click Suspend account. The websites show a suspension page, the customer's panel sessions are signed out and the customer can no longer log in. Cron jobs and the account's SSH access stop too.
- To restore everything click Unsuspend account.
An account held by the PanelFi license (see Licensing and updates) cannot be unsuspended here.
Terminate an account
Terminating deletes the home directory, websites, databases, DNS zones, certificates and cron jobs. It cannot be undone. Take a backup first if there is any doubt.
- At the bottom of the account page find Terminate account.
- Type the account's username in Type to confirm and click Terminate.
Log in as the customer
Click Log in to panel on the account page (or Log in in the list). A one-time link valid for one minute signs you in to the Customer panel on port 2083 as that account, with no password needed.
Notes
- Each change is written to the Audit Log, and the account page lists recent activity.
- Moving a domain between accounts is covered in Move a Domain.
Packages
Where to find it: Server panel > Packages > Packages ; Add a Package
A package is a hosting plan: it sets an account's disk, bandwidth and object limits, optional account options such as a dedicated IP or SSH, resource limits, and, through the Feature Manager, which tools the customer sees.
See your packages
Open Packages > Packages. The table lists each package with its disk, monthly bandwidth, addon domain, subdomain, alias, database, email and cron limits and how many accounts use it. A package with some tools switched off is marked Default tools turned off, and a package that makes an account a reseller is marked too.
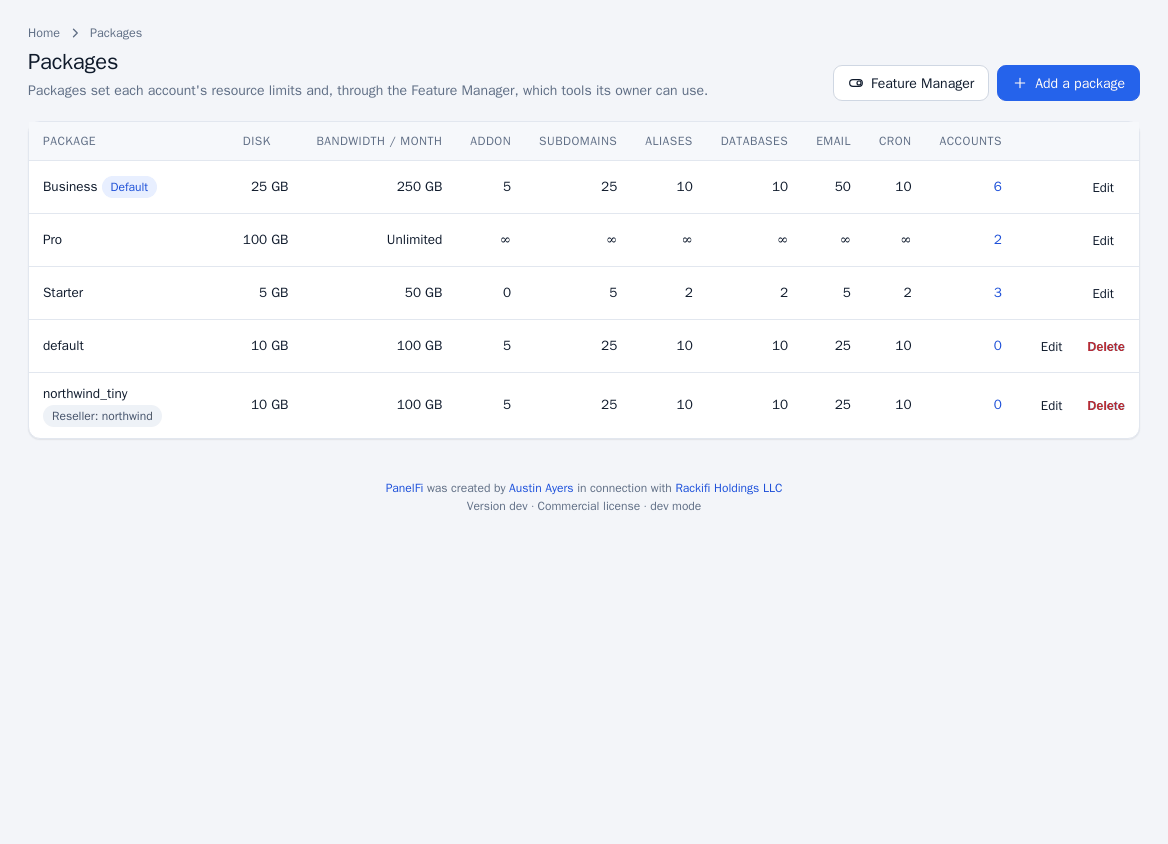
Add a package
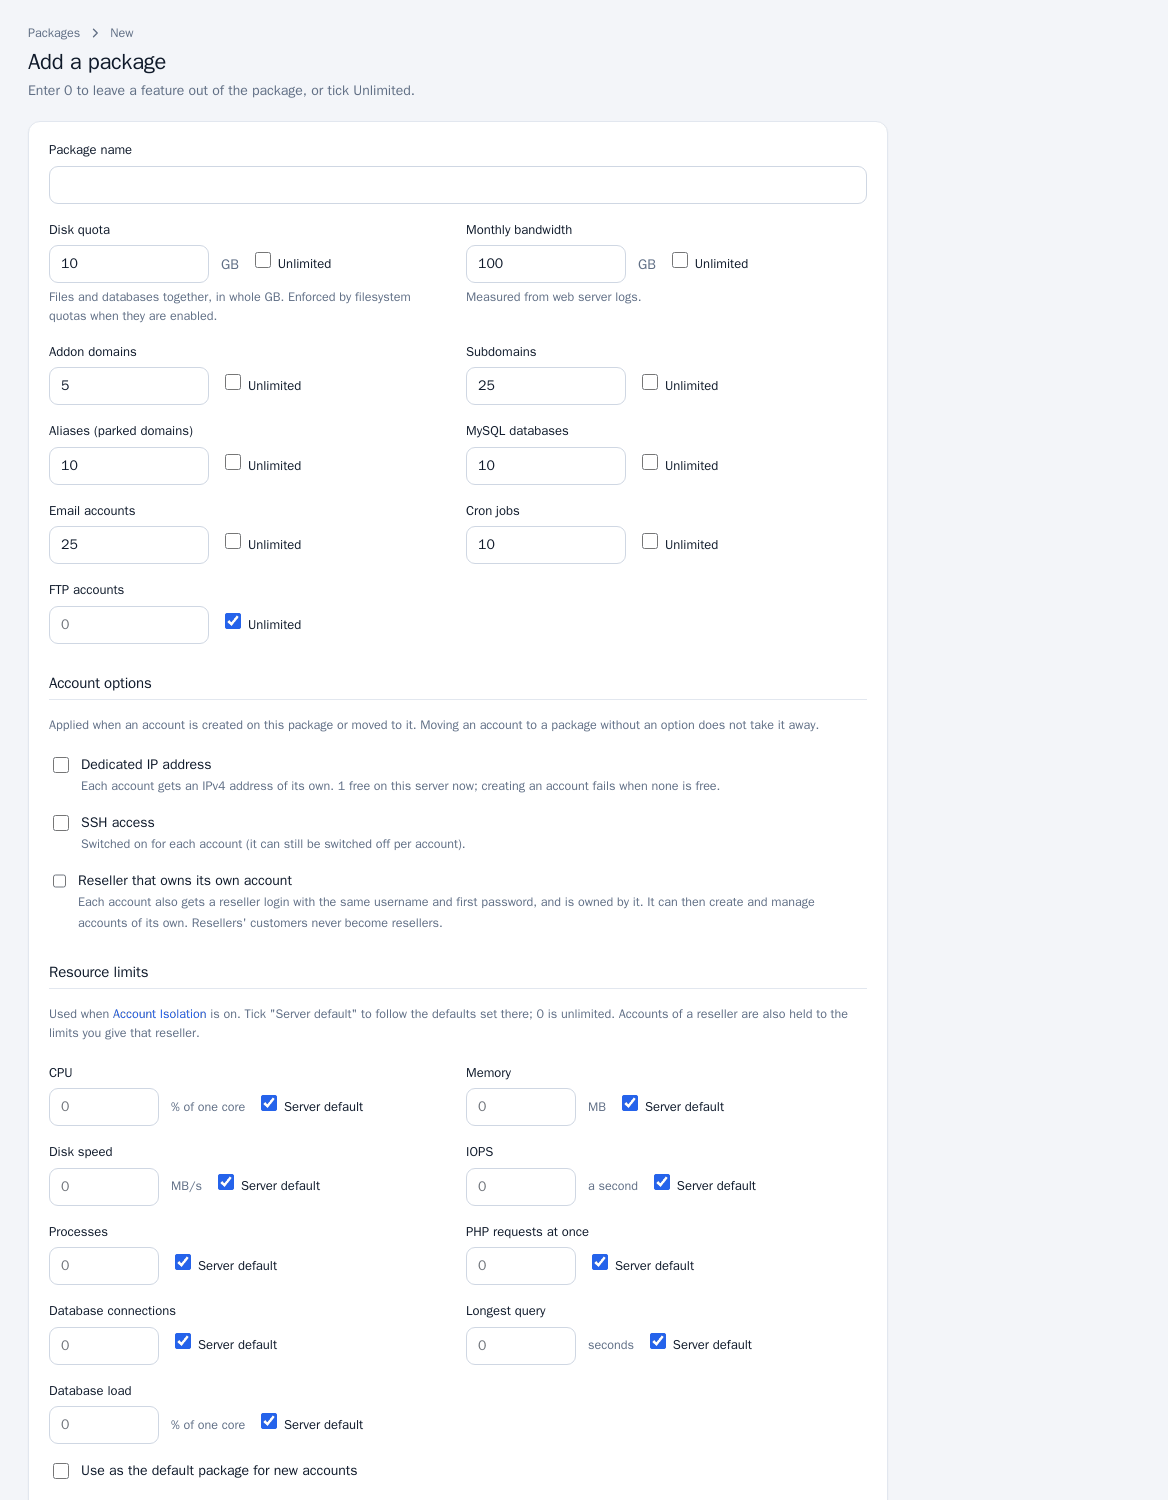
- Click Add a package (Packages > Add a Package).
- Enter the Package name.
- Set the limits. Enter a number, or tick Unlimited (0 also means unlimited):
- Disk quota in GB (files and databases together; enforced by filesystem quotas when enabled).
- Monthly bandwidth in GB, measured from the web server logs.
- Addon domains, Subdomains, Aliases (parked domains), MySQL databases, Email accounts, Cron jobs and FTP accounts.
- Choose Account options (administrators only):
- Dedicated IP address: each account gets its own IPv4 address. The form shows how many addresses are free; creating an account fails when none is.
- SSH access: switched on for each account (it can still be switched off per account).
- Reseller that owns its own account: each account also gets a reseller login with the same username and first password, and owns itself. Set Accounts the reseller may create, Disk the reseller may hand out and Bandwidth the reseller may hand out. Customers of a reseller never become resellers.
- Under Resource limits set per-account limits: CPU, Memory, Disk speed, IOPS, Processes, PHP requests at once, Database connections, Longest query and Database load. These apply when Account Isolation is on; tick Server default to follow the server's defaults.
- Optionally tick Use as the default package for new accounts.
- Click Save package.
Edit or delete a package
Click Edit on the list to change a package, or Delete to remove it. Deleting a package that accounts still use is refused. When a package is saved, disk quotas are re-applied to its accounts. Account options apply when an account is created on the package or moved to it; moving an account to a package without an option does not take the option away.
Packages and resellers
A reseller can create packages too, but only within the limits of their reseller plan; their package names are saved with their username in front (for example acme_Starter). Resellers see server packages as well as their own, and can edit only their own.
Notes
- Which customer tools a package includes is set in the Feature Manager.
- Package names are validated; a name that already exists is refused.
Feature Manager
Where to find it: Server panel > Packages > Feature Manager
The Feature Manager chooses which customer tools each package includes. A tool that is switched off disappears from that package's Customer panel and its pages refuse access.
Choose the tools in a package
- Open Packages > Feature Manager (also reachable from the Packages page).
- The table has one row per customer tool and one column per package. Tick a box to include the tool in that package; untick it to switch the tool off.
- Click Save feature lists.
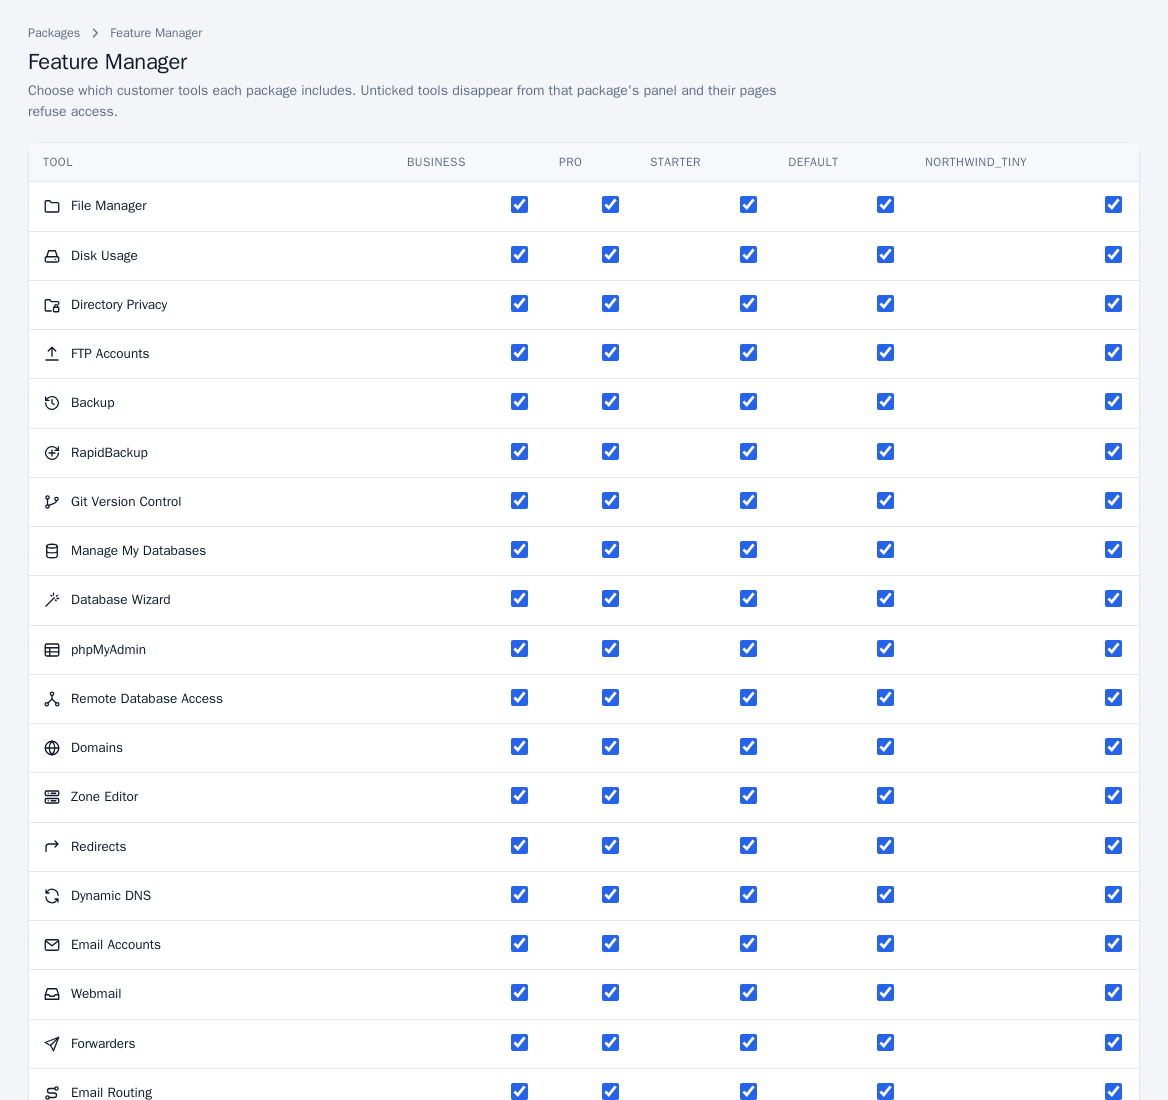
The change applies to every account on the package straight away. Customers lose the tile and the page returns an access error for a tool that is off.
What can be switched off
The list covers the Customer panel tools marked as package features, for example File Manager, Disk Usage, FTP Accounts, Backup and RapidBackup, Git, databases and phpMyAdmin, Domains, Zone Editor, Redirects, email tools, Visitors and Web Statistics, SSH Access, IP Blocker, Virus Scanner, MultiPHP Manager, WordPress Manager, the Application Installer, Node.js/Python/Ruby apps, Cron Jobs, Terminal and others. Password & Security and Contact Information are always available. Tools that are not yet built in your version do not appear.
Notes
- The Feature Manager is for server administrators; resellers cannot open it.
- A package saved after the page loaded keeps all its tools until you save again; only packages shown on the page are changed.
- Package limits (disk, domains and so on) are set on the package itself: Packages.
Move a Domain, Skeleton, Email All Users, Shell Access and IP addresses
Where to find it: Server panel > Account Functions > Move a Domain ; Skeleton Directory ; Email All Users ; Manage Shell Access ; Server panel > IP Functions
Smaller server-panel tools for working across accounts: move a domain between accounts, set the starter files for new accounts, email every customer, switch SSH access on or off per account, and manage the IP addresses accounts use.
Move a Domain
Gives an addon domain or subdomain an account of its own, or hands it to another account. Its website, subdomains, mailboxes and mail, DNS records, certificate and site settings move with it; nothing is deleted and set up again.
- Open Account Functions > Move a Domain. Under 1. Choose the domain pick the domain and click Continue.
- Under 2. What moves review the website folder, email accounts with their mail and passwords, FTP logins, and tick the databases that should go along. A database that moves is renamed to the new account's prefix, its users are copied with their passwords, and
wp-config.phpand similar files are updated. Databases you leave unticked stay with the original account and keep working for the website. - Under 3. Where it goes choose one of two options:
- An account of its own: the domain becomes the main domain of a new account. Enter a username, a package, optionally an owner (reseller) and a contact email. The new account's panel password is generated and shown once when the move is done.
- An existing account: the domain becomes an addon domain of that account, in a folder named after it.
- Click Move.
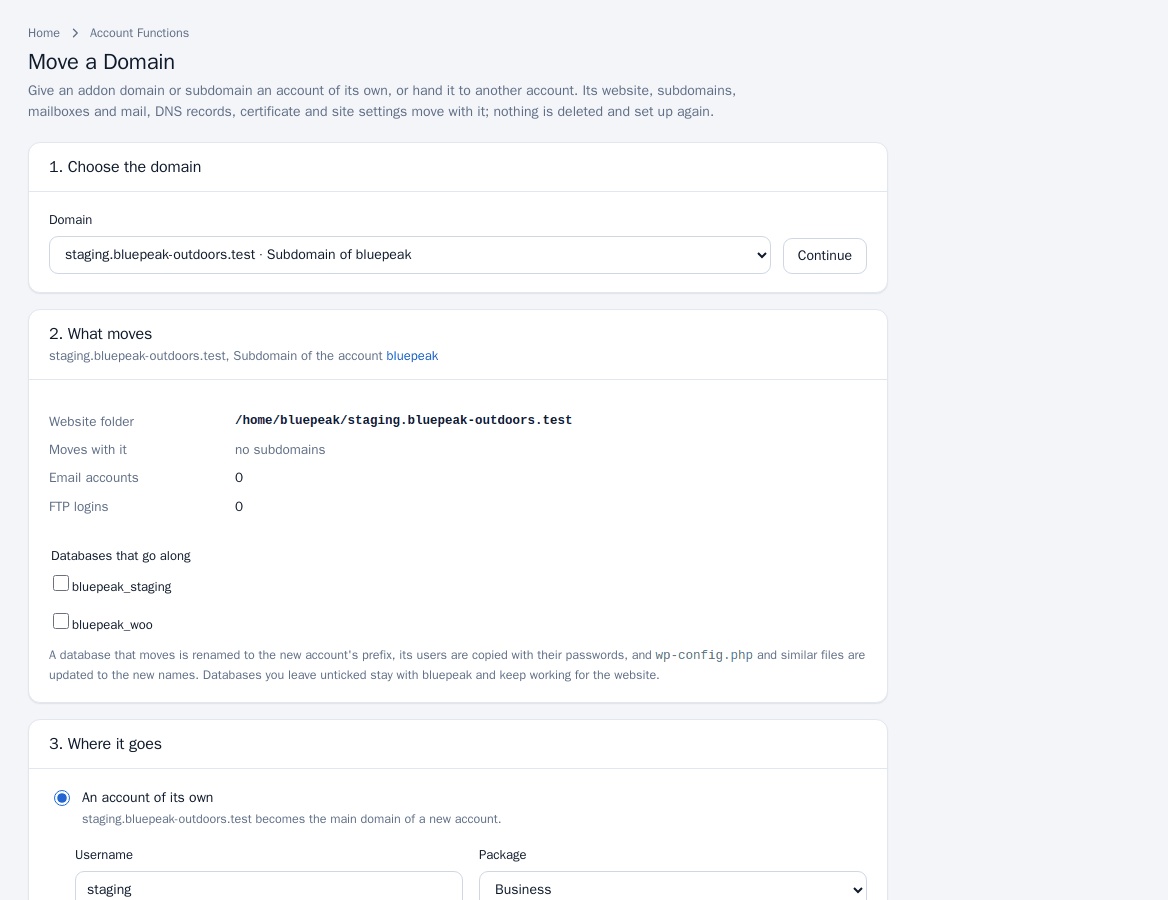
Cron jobs stay with the original account. An account's main domain cannot be moved this way; it moves with the account, by changing the account's owner on its page.
Skeleton Directory
The skeleton is a folder whose contents are copied into the home folder of every new account.
- Open Account Functions > Skeleton Directory.
- Under Add a file choose a file and a folder (relative to the account's home folder;
public_htmlis the website) and click Upload. - Remove entries with Remove.
A file named public_html/index.html or index.php replaces PanelFi's welcome page. Existing accounts are not changed, and transferred or restored accounts keep their own files. Links and special files are skipped.
Email All Users
- Open Account Functions > Email All Users. The page shows how many accounts have a contact email.
- Enter a Subject and a plain-text Message (up to 20,000 characters).
- Optionally tick Leave out suspended accounts, then click Send to all customers.
Each customer gets their own copy and does not see other addresses. The sender is the server contact email from Basic Setup, so set that first; the mail server must be installed.
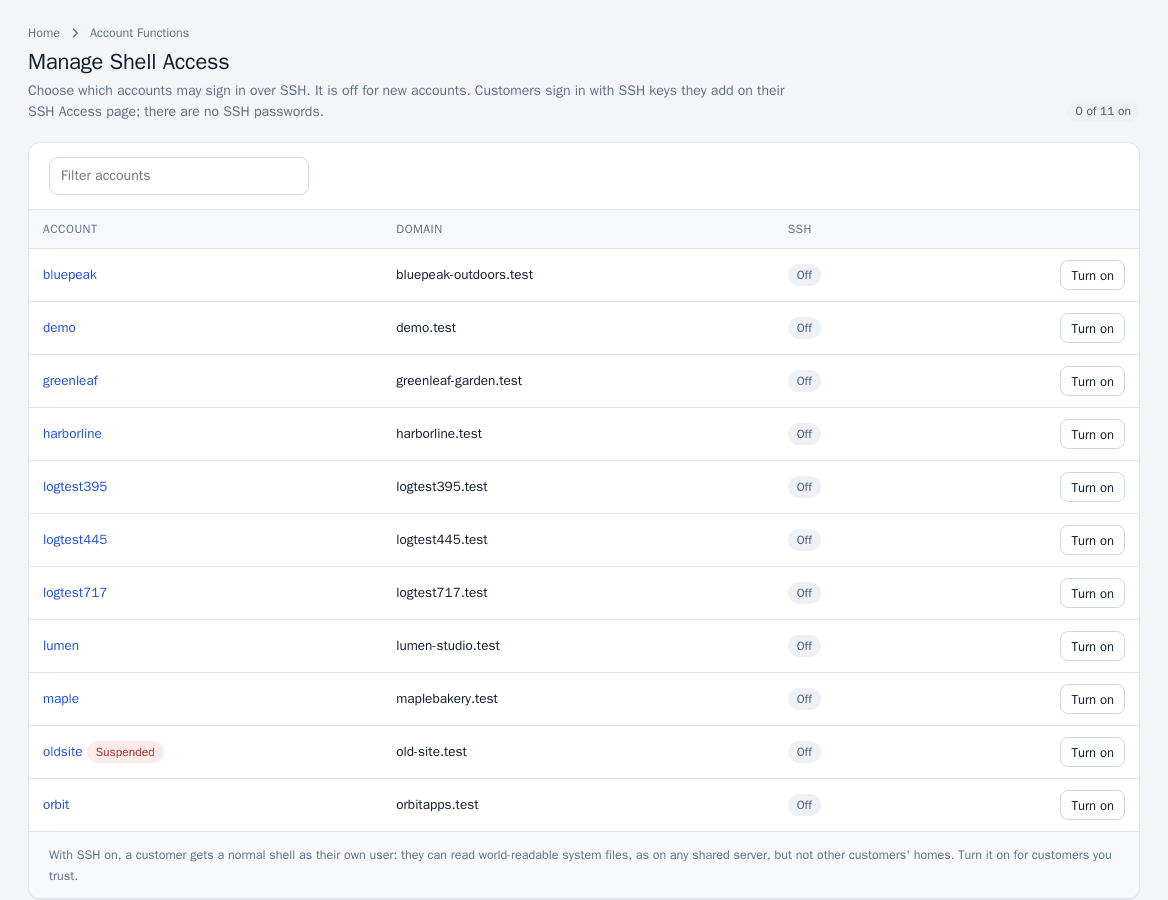
Manage Shell Access
SSH is off for new accounts unless the package turns it on. Open Account Functions > Manage Shell Access and click Turn on or Turn off beside an account. Customers sign in with SSH keys they add on their SSH Access page; there are no SSH passwords. With SSH on, the customer gets a normal shell as their own user: they can read world-readable system files, as on any shared server, but not other customers' homes. Turn it on for customers you trust. See SSH and Terminal.
IP functions
Open IP Functions > Show IP Address Usage to see the addresses on the server, which accounts use them (shared or dedicated) and which are free.
Add an IP address
- Use an address your provider has routed to this server.
- Under Add a New IP Address enter the IP address, the Prefix length (usually 32 for an extra IPv4 address, 64 for IPv6) and the Interface, then click Add address.
PanelFi brings the address up now and again at every boot. It does not edit the server's own network configuration, and only addresses added here can be removed here.
Change a site's IP address
- Under Change Site's IP Address enter the Account (username) and choose a free address, or Shared to move it back.
- Click Change IP address. The account's DNS A records and SPF entries move to the new address; websites keep working throughout.
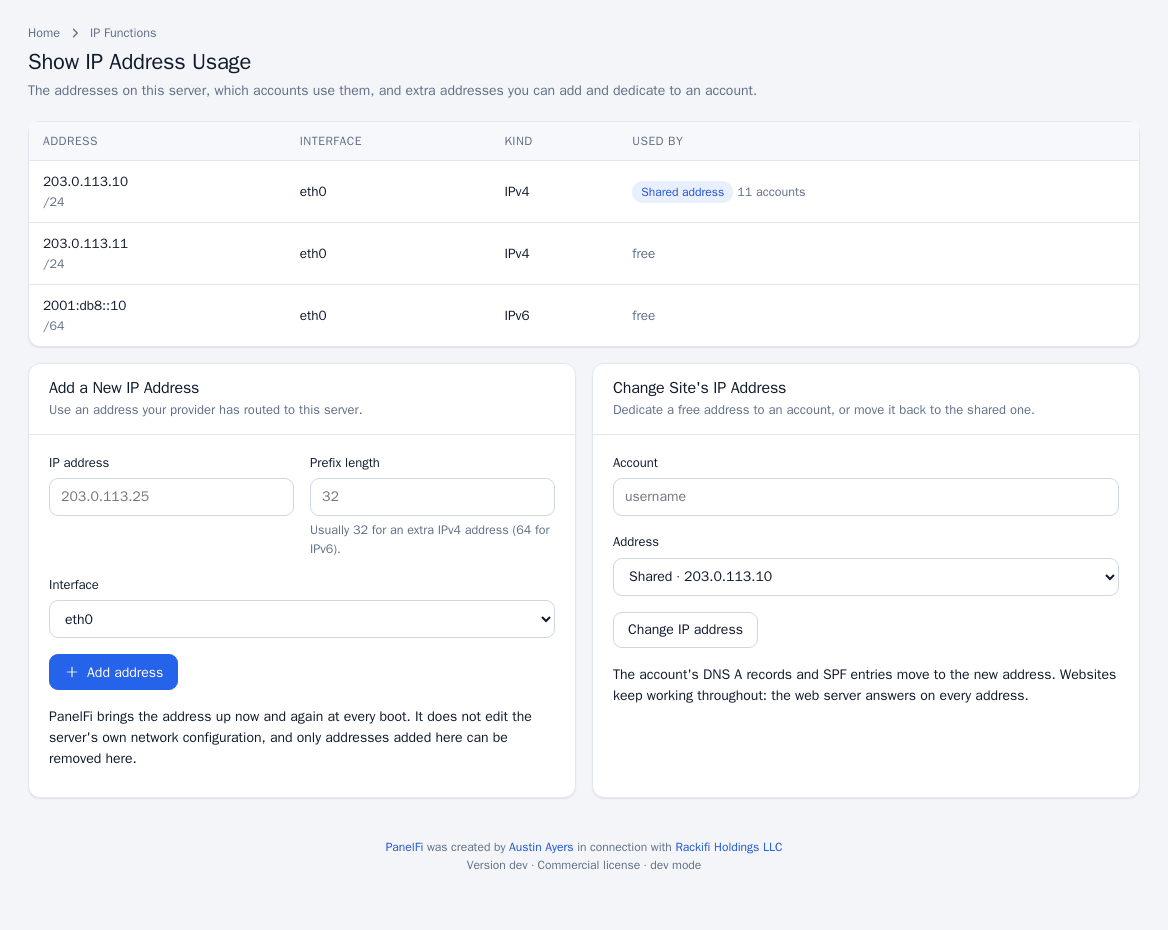
If the shared address is not on any interface of this server, the page says so. Behind NAT that is expected; otherwise correct it under Basic Setup.
Resellers
Where to find it: Server panel > Resellers > Reseller Center ; Change Account Ownership
Resellers sign in to the Server panel with their own login and manage only their own customers. The Reseller Center is where administrators add resellers, set how much disk, bandwidth and how many accounts they may hand out, suspend them and remove them. Resellers need a Professional license.
Add a reseller
- In the Server panel open Resellers > Reseller Center and click Add a reseller.
- Enter the Username, Email and a Password (or click Generate).
- Set the limits:
- Accounts: how many hosting accounts the reseller may create.
- Disk space to allocate (GB): the total of their accounts' package disk quotas cannot exceed this.
- Monthly bandwidth to allocate (GB): same for bandwidth. Each limit can be Unlimited.
- Click Add reseller. The reseller signs in on port 2087 with the username and password you gave.
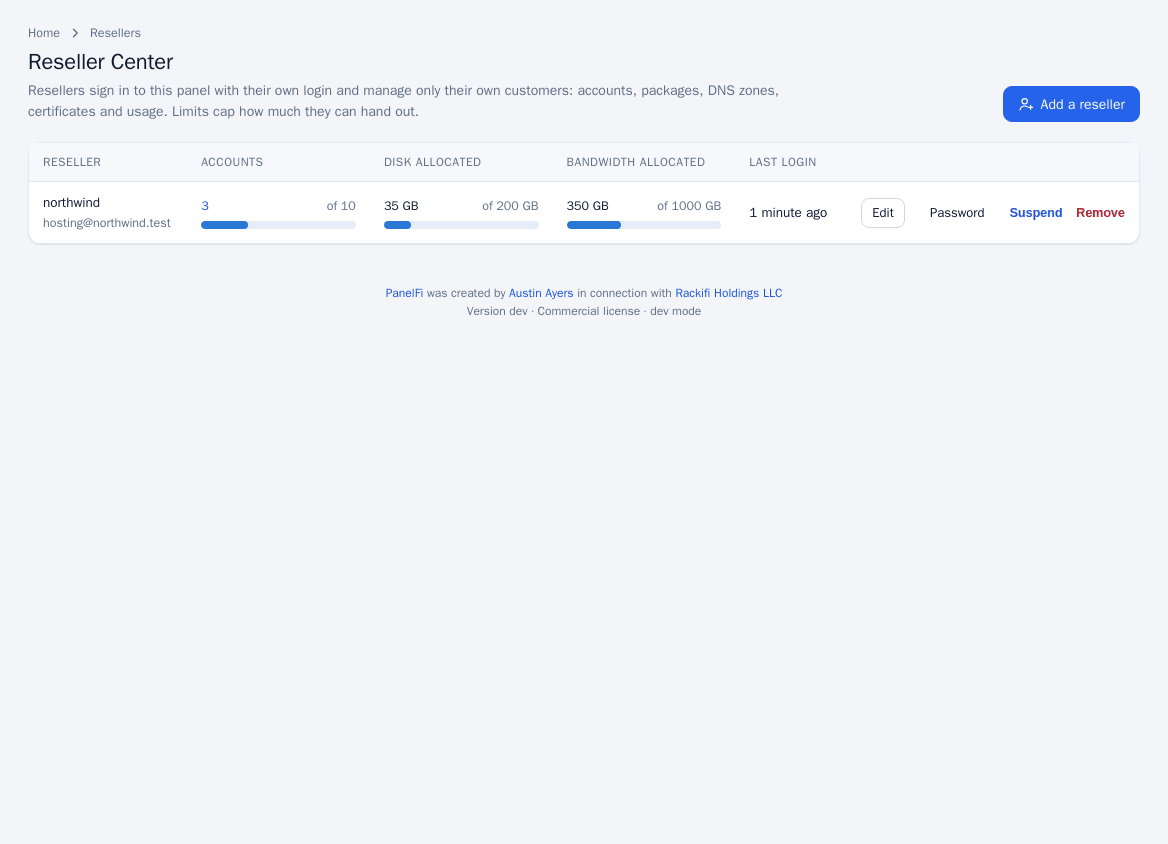
The table shows each reseller's accounts, disk allocated and bandwidth allocated against their limits, and their last login.
Creating resellers requires a Professional license; on Free the request is refused. See Licensing and updates.
Edit, reset a password, suspend or remove
- Edit: change the email and the three limits.
- Password: set a new password for the reseller.
- Suspend: the reseller can no longer sign in. Tick Also suspend every account they own to take their customers' websites offline too. Unsuspend reverses it.
- Remove: choose a New owner of their accounts (an administrator or another reseller) and type the reseller's username to confirm. Their hosting accounts are kept and handed over, and their packages become server packages.
Move an account to a reseller
An administrator changes who owns an account on the account's page (Owner (reseller) then Change owner), or picks the owner when creating the account. The move is refused if it would exceed the new owner's limits. A package can also make each new account a reseller of its own; see Packages.
What a reseller can do
A reseller sees a reduced Server panel menu and only their own accounts. The tools they can use are:
- The reseller dashboard with their plan, usage and accounts, with the nameservers and server IP to give customers.
- List Accounts, List Suspended Accounts, List Subdomains, List Parked Domains, List Addon Domains and Show Accounts Over Quota.
- Create a New Account and Modify an Account (package, password, suspension, termination, log in as the customer), within their limits.
- Packages and Add a Package: their own packages, saved with their username in front, within their plan's limits. They can also use server packages.
- DNS Zone Manager for their accounts' zones, Manage AutoSSL for their accounts, Resource Usage, Unblock an IP Address, the Audit Log and the change-password page for their own login.
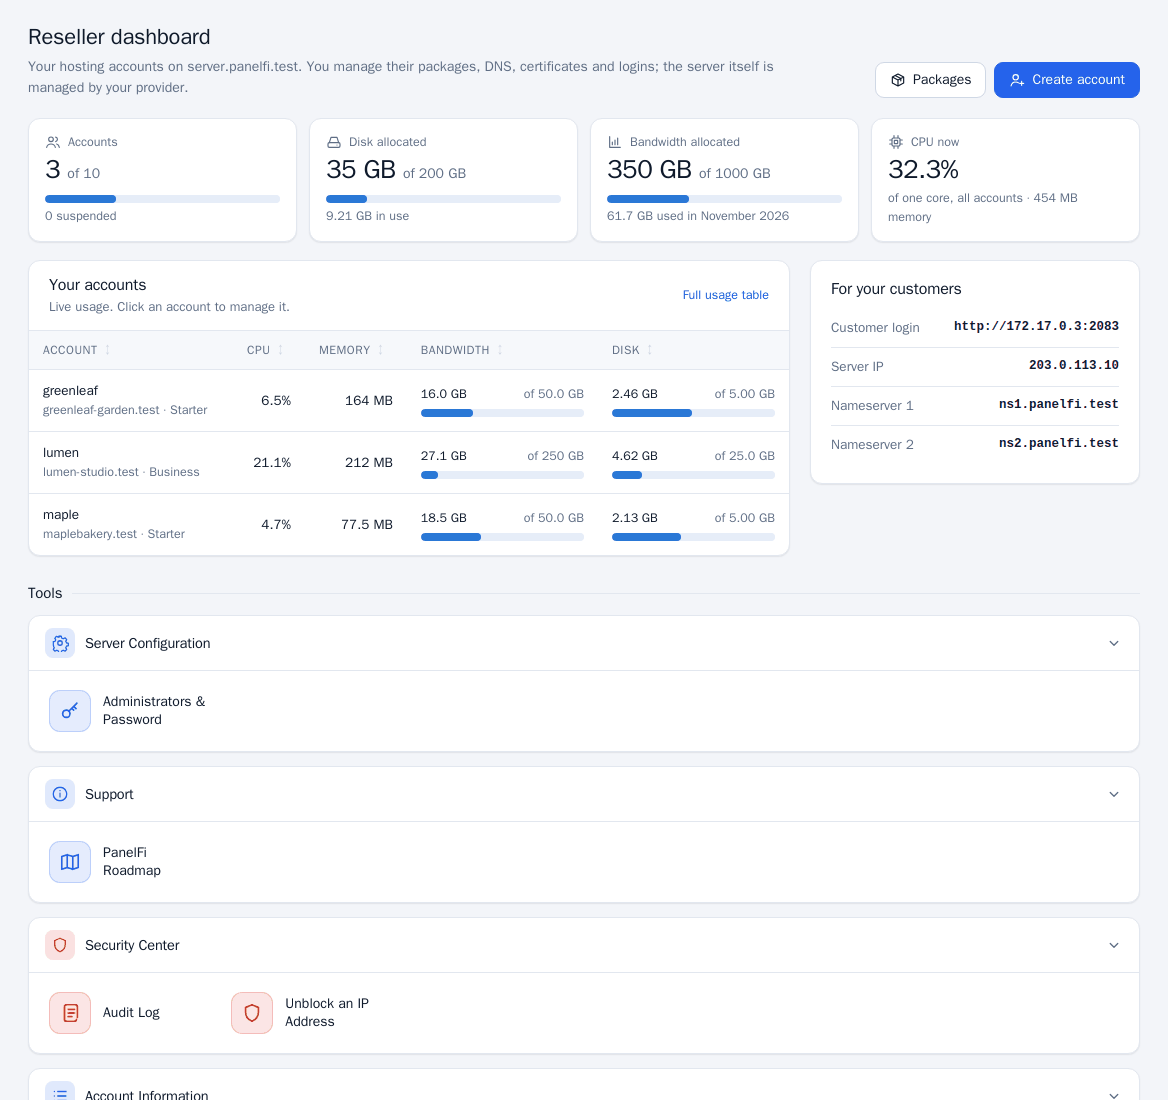
Resellers cannot change server settings, the Feature Manager, branding, the web server, PHP, backups, transfers, or move accounts between owners.
Reseller resource ceilings
Under Security Center > Account Isolation an administrator can set the highest CPU, memory and I/O limits any of a reseller's accounts may have. See Account Isolation.
Notes
- Branding and white-label are set server-wide by the administrator: Branding and white label.
- A reseller's customers sign in to the Customer panel on port 2083.
Branding and white label
Where to find it: Server panel > Customization > Branding
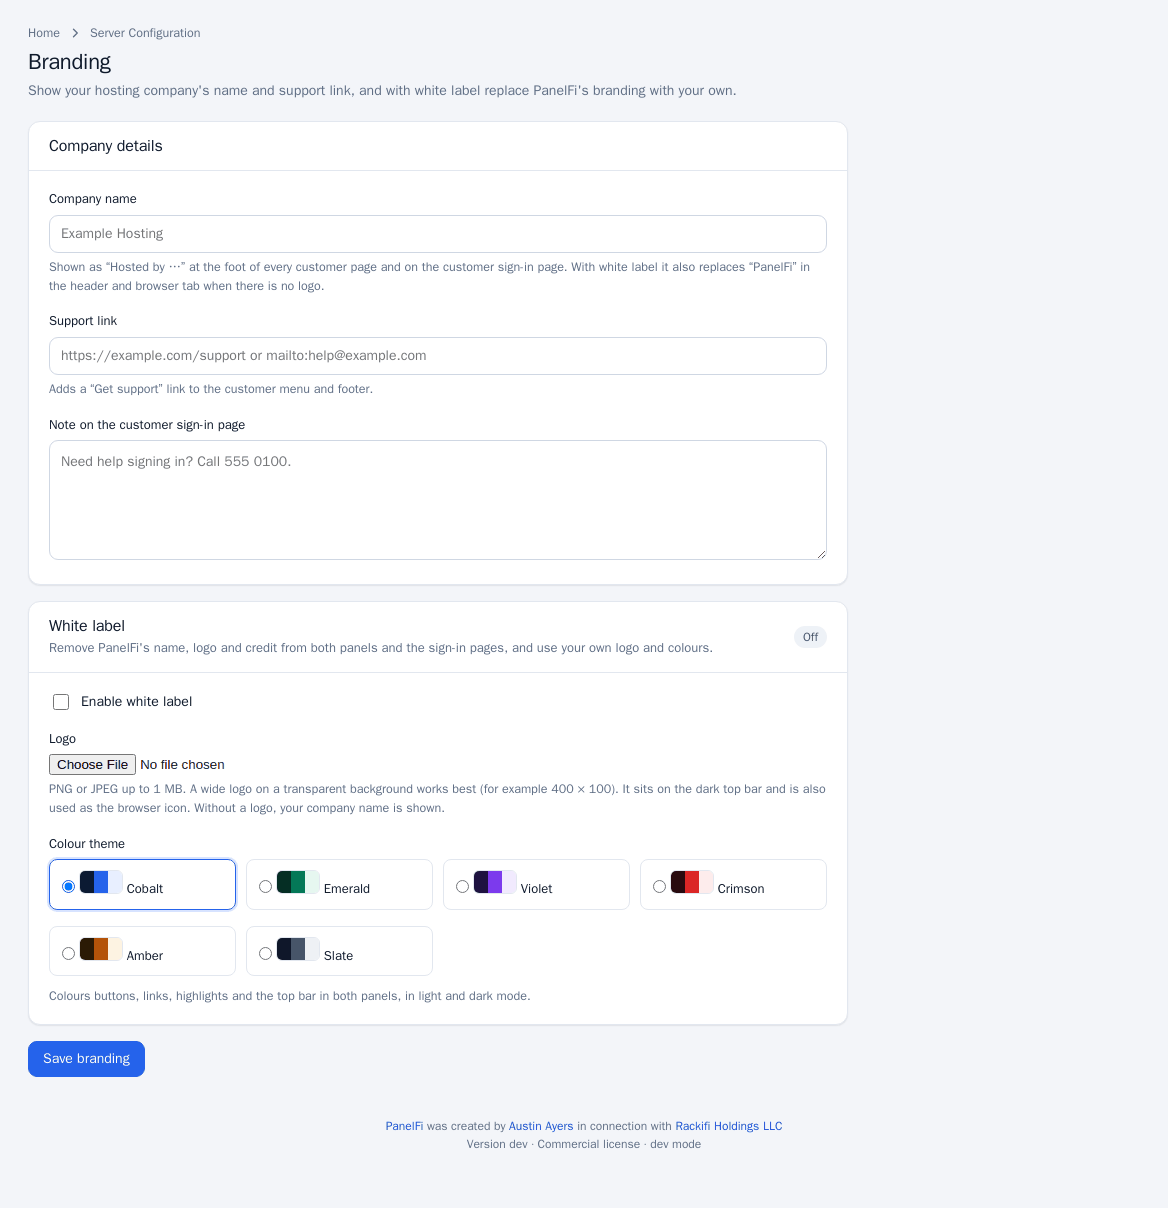
Branding shows your hosting company's name and support link in the Customer panel. With a Professional license, white label also replaces PanelFi's name, logo and credit in both panels and the sign-in pages with your own logo and colours.
Company details
These work on every edition. Open Customization > Branding and fill in:
- Company name (up to 60 characters): shown as "Hosted by ..." at the foot of every customer page and on the customer sign-in page. With white label it also replaces "PanelFi" in the header and browser tab when there is no logo.
- Support link: must start with
https://,http://ormailto:. It adds a "Get support" link to the customer menu and footer. - Note on the customer sign-in page (up to 300 characters).
Click Save branding. Customers see the change the next time they load a page.
White label (Professional)
White label removes PanelFi's name, logo and credit from both panels and the sign-in pages.
- Make sure the server has a Professional license (Licensing and updates). Without it the white-label controls are locked.
- Set Enable white label to On.
- Upload a Logo: PNG or JPEG up to 1 MB. A wide logo on a transparent background works best (for example 400 x 100). It sits on the dark top bar and is also used as the browser icon. Without a logo, your company name is shown. Use Remove this logo to delete it.
- Choose a Colour theme: Cobalt, Emerald, Violet, Crimson, Amber or Slate. It colours buttons, links, highlights and the top bar in both panels, in light and dark mode.
- Click Save branding.
Notes
- Branding is one setting for the whole server. Resellers do not have their own branding page; their customers see the server's branding.
- Your settings are kept if the license lapses; they simply stop taking effect and PanelFi's branding returns until a Professional license is active again.
Server panel: DNS
DNS Zone Manager
Where to find it: Server panel > DNS Functions > DNS Zone Manager ; Add a DNS Zone ; Synchronize DNS Zones
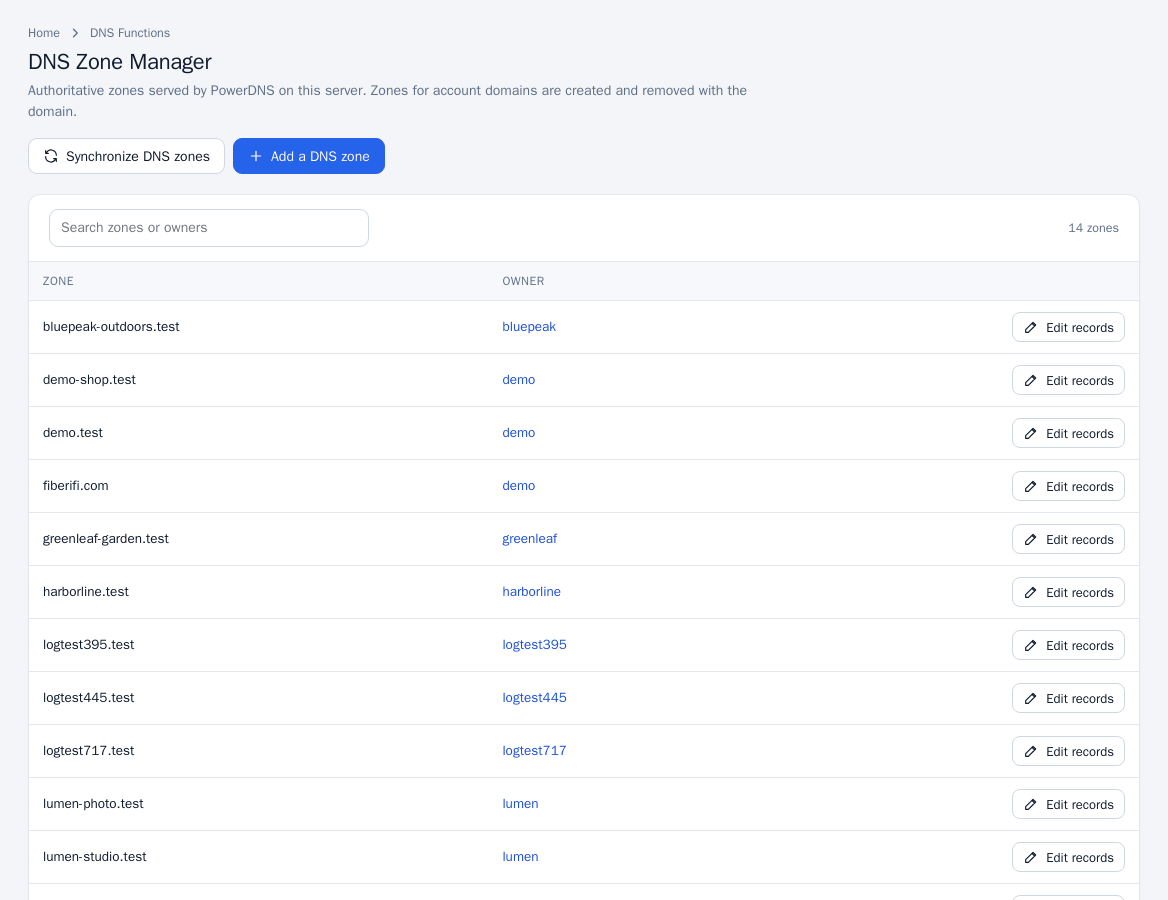
The DNS Zone Manager lists every authoritative zone PowerDNS serves on this server and lets you edit its records, add standalone zones, reset a zone to the defaults and re-create missing zones.
Browse and search zones
Open DNS Functions > DNS Zone Manager. The table lists each zone and the account that owns it (or "standalone"). Use the search box to filter by zone or account. Zones for account domains are created and removed together with the domain; resellers see only their own accounts' zones.
Edit records
- Click Edit records beside a zone.
- Use the type filter (All, A, AAAA, CNAME, MX, TXT, SRV, CAA, NS) to narrow the table, which shows Name, TTL, Type and Record.
- Click Add record, or the quick buttons + A, + CNAME, + MX, + TXT. Choose the Type, enter the Name (relative to the zone), the Record value, a Priority (for MX and SRV) and the TTL (seconds), then click Add record.
- To change a record click Edit, then Save record. To remove one click Delete and confirm.
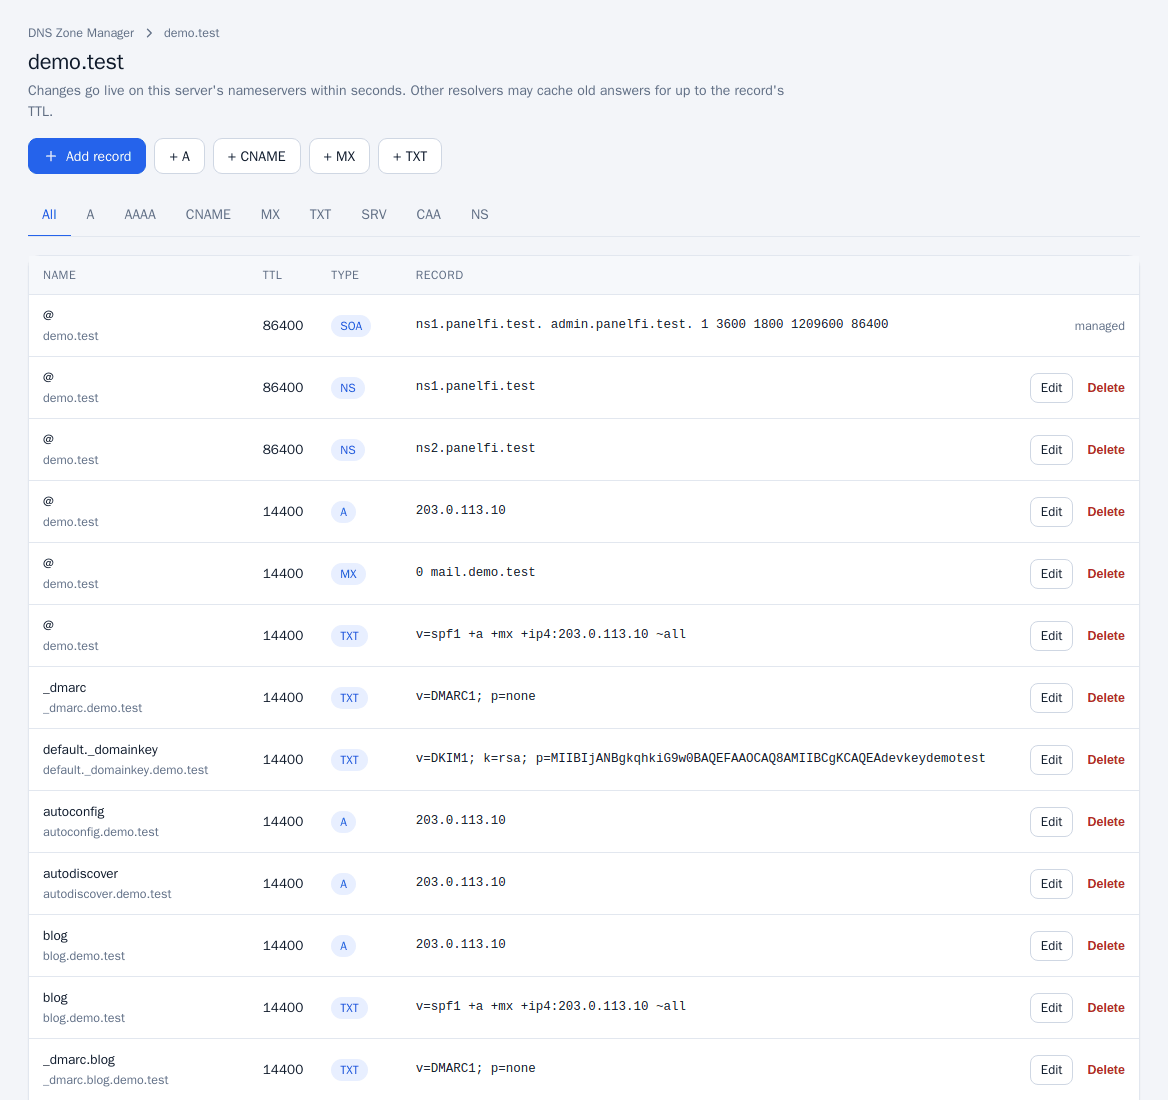
Changes go live on this server's nameservers within seconds. Other resolvers may cache old answers for up to the record's TTL. The SOA record is managed by PanelFi and cannot be edited. Deleting the last NS record at the zone apex is refused.
Add a standalone zone
- Click Add a DNS zone (or DNS Functions > Add a DNS Zone). Administrators only.
- Enter the Domain and the IPv4 address for the zone; it is used for the apex,
wwwandmailrecords. - Click Create zone.
Use a standalone zone to serve DNS for a domain that has no hosting account here. Standalone zones can be deleted with Delete zone in the zone's danger area (type the zone name to confirm); account zones are removed with the domain.
Reset a zone
On a zone's page, Reset zone replaces all records with the default set pointing at this server. Custom records are lost, so type the zone name to confirm. It also recreates a zone that is missing from the DNS server.
Synchronize DNS zones
Click Synchronize DNS zones (administrators) to re-create zones that exist for account domains but are missing from the DNS server. The result says how many missing zones were recreated.
Notes
- New zones get the standard record set plus any extra records from zone templates.
- Customers edit their own zones in the Zone Editor.
- To keep zones on more than one server see DNS clustering; to sign a zone see DNSSEC.
Zone templates
Where to find it: Server panel > DNS Functions > Edit Zone Templates
Every new domain gets a standard DNS zone. Zone templates let you add extra records, such as a verification record or your status page, that every new zone should also have.
The standard zone
A new zone always gets: the server's nameservers (set in Basic Setup); an address record for the domain, www, mail and ftp; an MX record to the domain itself; and SPF, DKIM and DMARC records for mail. The default TTL is also set under Basic Setup. These standard records are not edited here.
Add an extra record to the template
- Open DNS Functions > Edit Zone Templates.
- Under Add a record enter the Name, choose the Type (TXT, A, AAAA, CNAME, MX, SRV or CAA), enter the Value, a Priority where it applies and a TTL.
- Use
%domain%in the value for the new domain and%ip%for the server's shared address. - Click Add to template.
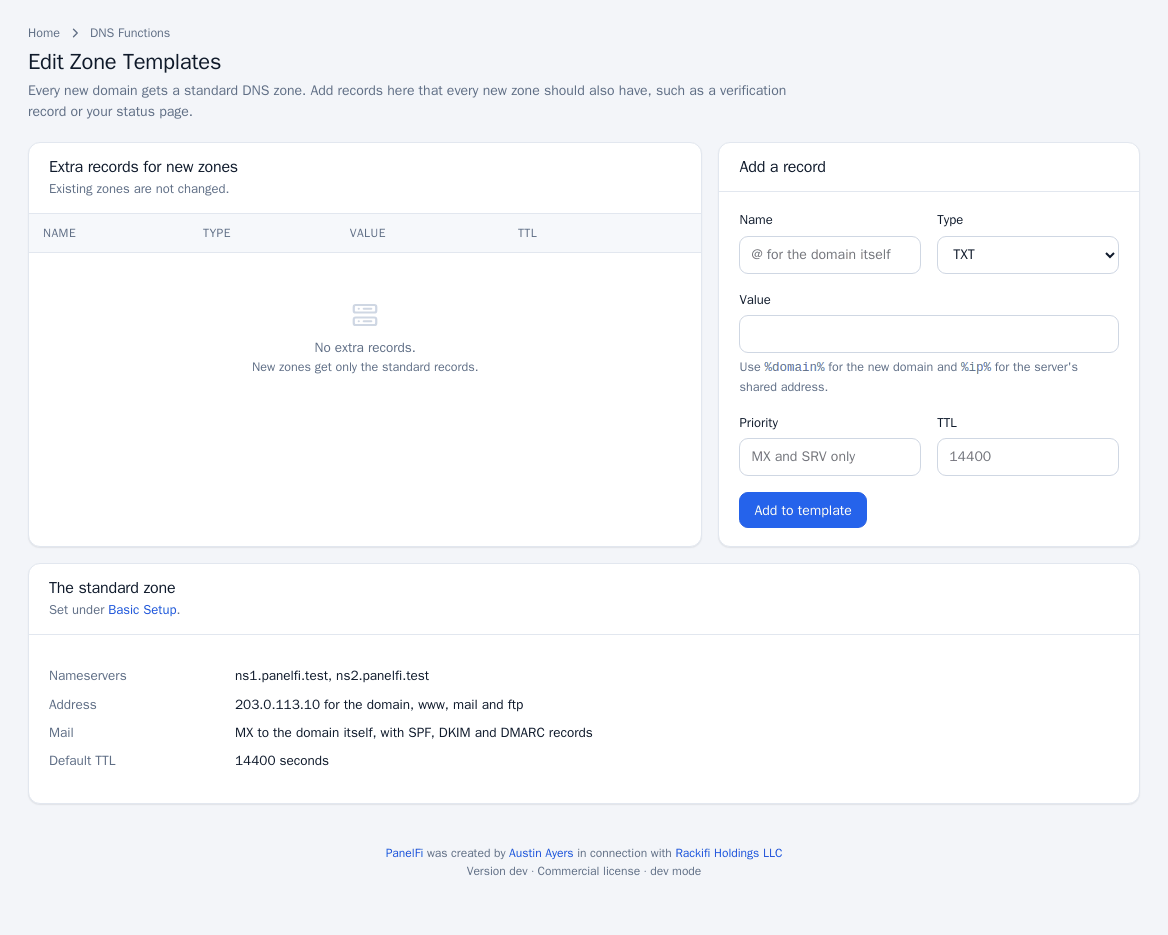
New zones get the record from then on. Use Remove to take a record out of the template.
Notes
- Existing zones are not changed. To add a record to existing zones, edit each in the DNS Zone Manager.
- The nameservers and TTL come from Basic Setup; see Nameservers.
Nameservers and resolvers
Where to find it: Server panel > Service Configuration > Nameserver Selection ; Server Configuration > Basic Setup ; Networking Setup > Resolver Configuration
PanelFi answers DNS for your hosted domains with PowerDNS. This page explains the nameserver names that new zones list, how to set them with their addresses, what to do at the registrar, and the separate resolver settings the server itself uses for lookups.
Nameserver Selection
Open Service Configuration > Nameserver Selection. PowerDNS is the only nameserver software PanelFi manages. The page shows whether it is running, how many zones it serves and the nameservers given to new zones. If the service is stopped, start it under Service Manager. DNS answers on port 53 (TCP and UDP).
Set the nameserver names
- Open Server Configuration > Basic Setup (or the Initial Setup Wizard).
- Under Nameservers enter Nameserver 1 to Nameserver 4 and, beside each, the IPv4 address it should resolve to (it defaults to the shared IP). At least two are required; nameserver 3 and 4 are optional.
- Save. PanelFi creates the A record for each nameserver when the zone that contains it is hosted on this server (for example
ns1.example.cominexample.com). For names in zones hosted elsewhere, the confirmation message tells you which glue and A records to create at your registrar or DNS host.
New zones list these names. Customers point their domains at them at their registrar. PanelFi does not rewrite the NS records of existing zones when you change the names; edit them in the DNS Zone Manager if needed.
Use other nameservers for a domain
To use your registrar's or another provider's DNS for a domain, leave its nameservers there and copy the records from its zone in the DNS Zone Manager. For a second nameserver that keeps your domains resolving when this server is down, see DNS clustering.
Resolver Configuration
Resolvers are the DNS servers this server asks when it looks up other domains, for example to deliver mail or issue certificates. They are not the nameservers of your hosted domains.
- Open Networking Setup > Resolver Configuration.
- Enter the Primary resolver, Secondary resolver and Third resolver, such as your provider's resolvers or public ones like 1.1.1.1, 9.9.9.9 or 8.8.8.8.
- Click Save resolvers.
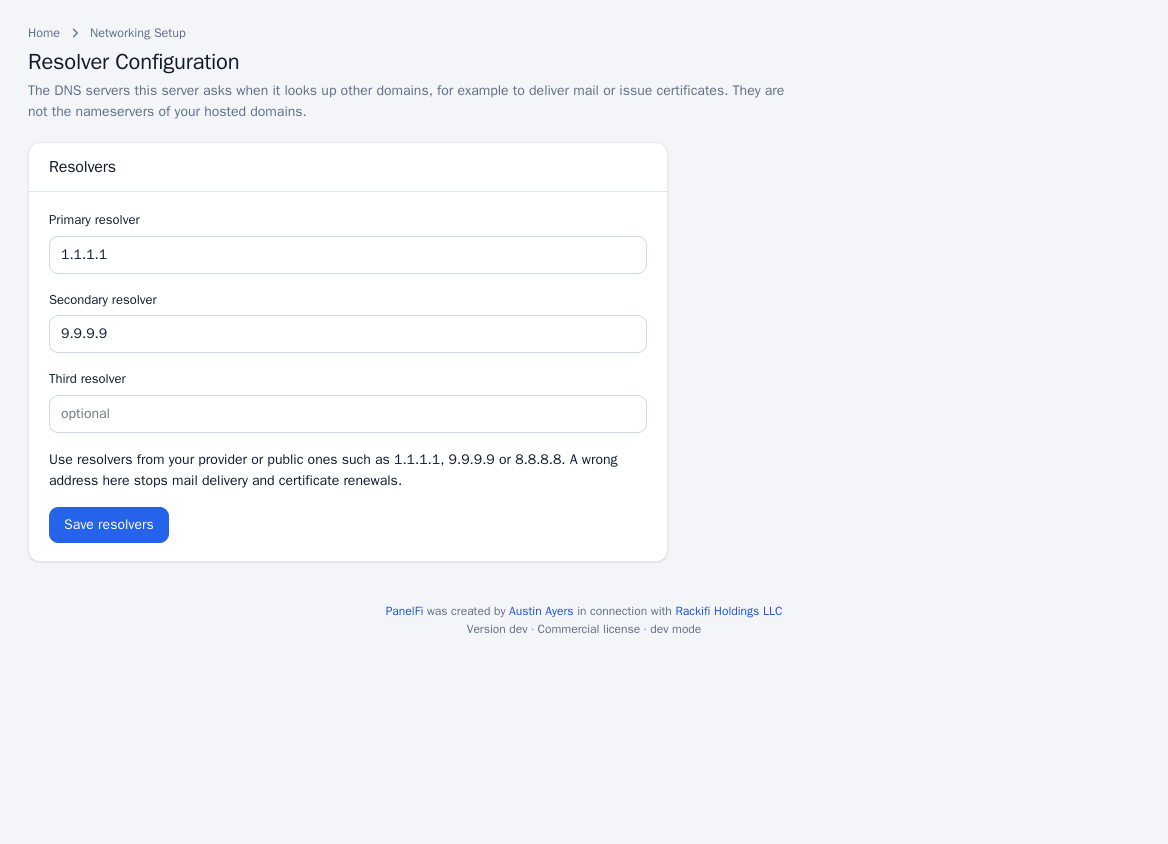
A wrong resolver address stops mail delivery and certificate renewals. On servers where the operating system manages resolvers, the page says so and shows them read-only; change them in the system's network settings.
DNSSEC
Where to find it: Server panel > DNS Functions > DNSSEC
DNSSEC signs a zone so resolvers can prove its answers were not forged. Signing has two halves: turn it on in PanelFi, then give the DS record to the domain's registrar.
Sign a zone
- Open DNS Functions > DNSSEC. The table lists each zone, its account and whether it is Signed or Not signed.
- Click Sign zone beside the zone.
- Click DS records for the zone. The dialog shows the key tag, algorithm (ECDSA P-256 with SHA-256), digest type and digest. Most registrars ask for the SHA-256 one. For registrars that want the key instead of a digest, the dialog also shows the public key (DNSKEY).
- Enter the DS record at the domain's registrar.
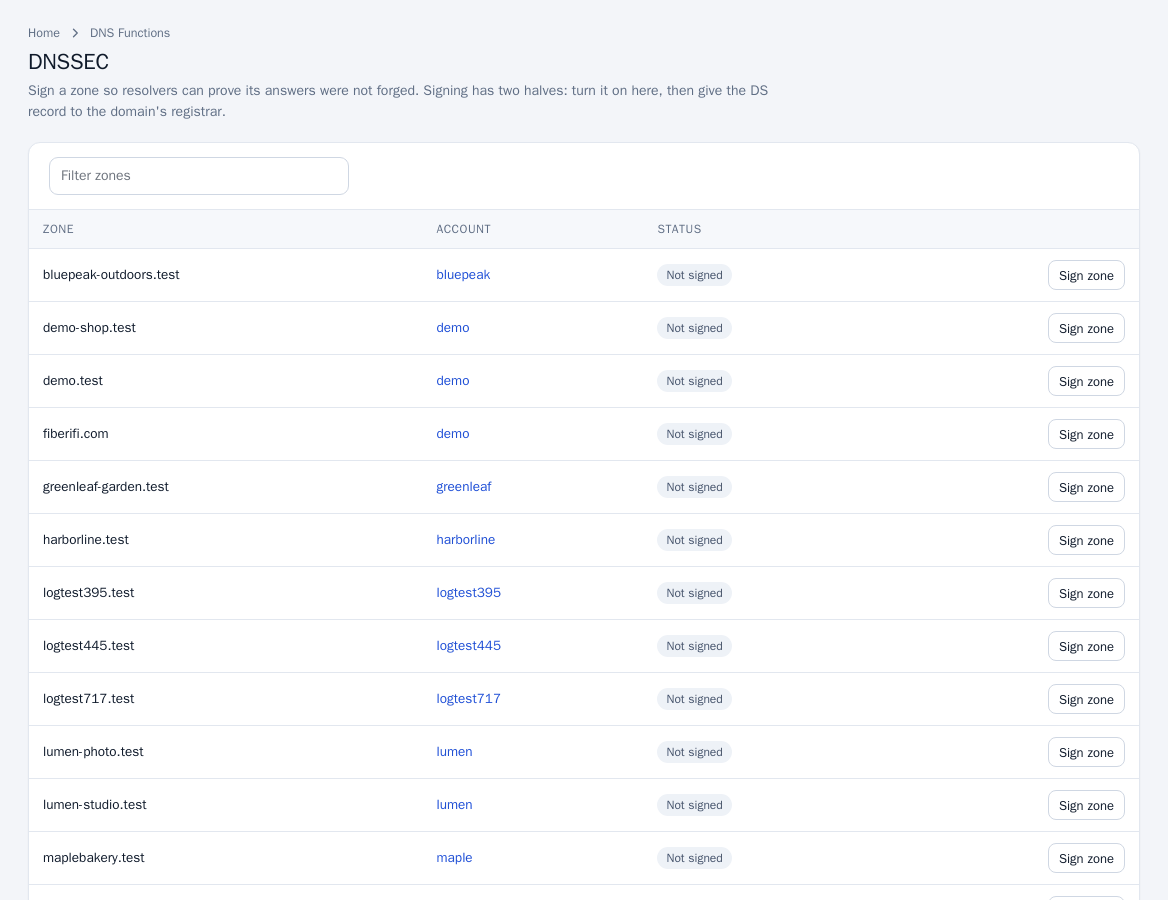
Until the registrar publishes the DS record, the zone works exactly as before.
Remove signing
Click Remove keys on a signed zone.
Remove the DS record at the registrar first. After the registrar has published the DS record, removing the keys here without removing the DS record there makes the domain unreachable for validating resolvers.
Notes
- If the page says the DNS software cannot sign zones, DNSSEC is not available on that server.
- With DNS clustering, signed zones are copied to secondaries with their signatures.
DNS clustering
Where to find it: Server panel > Clusters > DNS Cluster
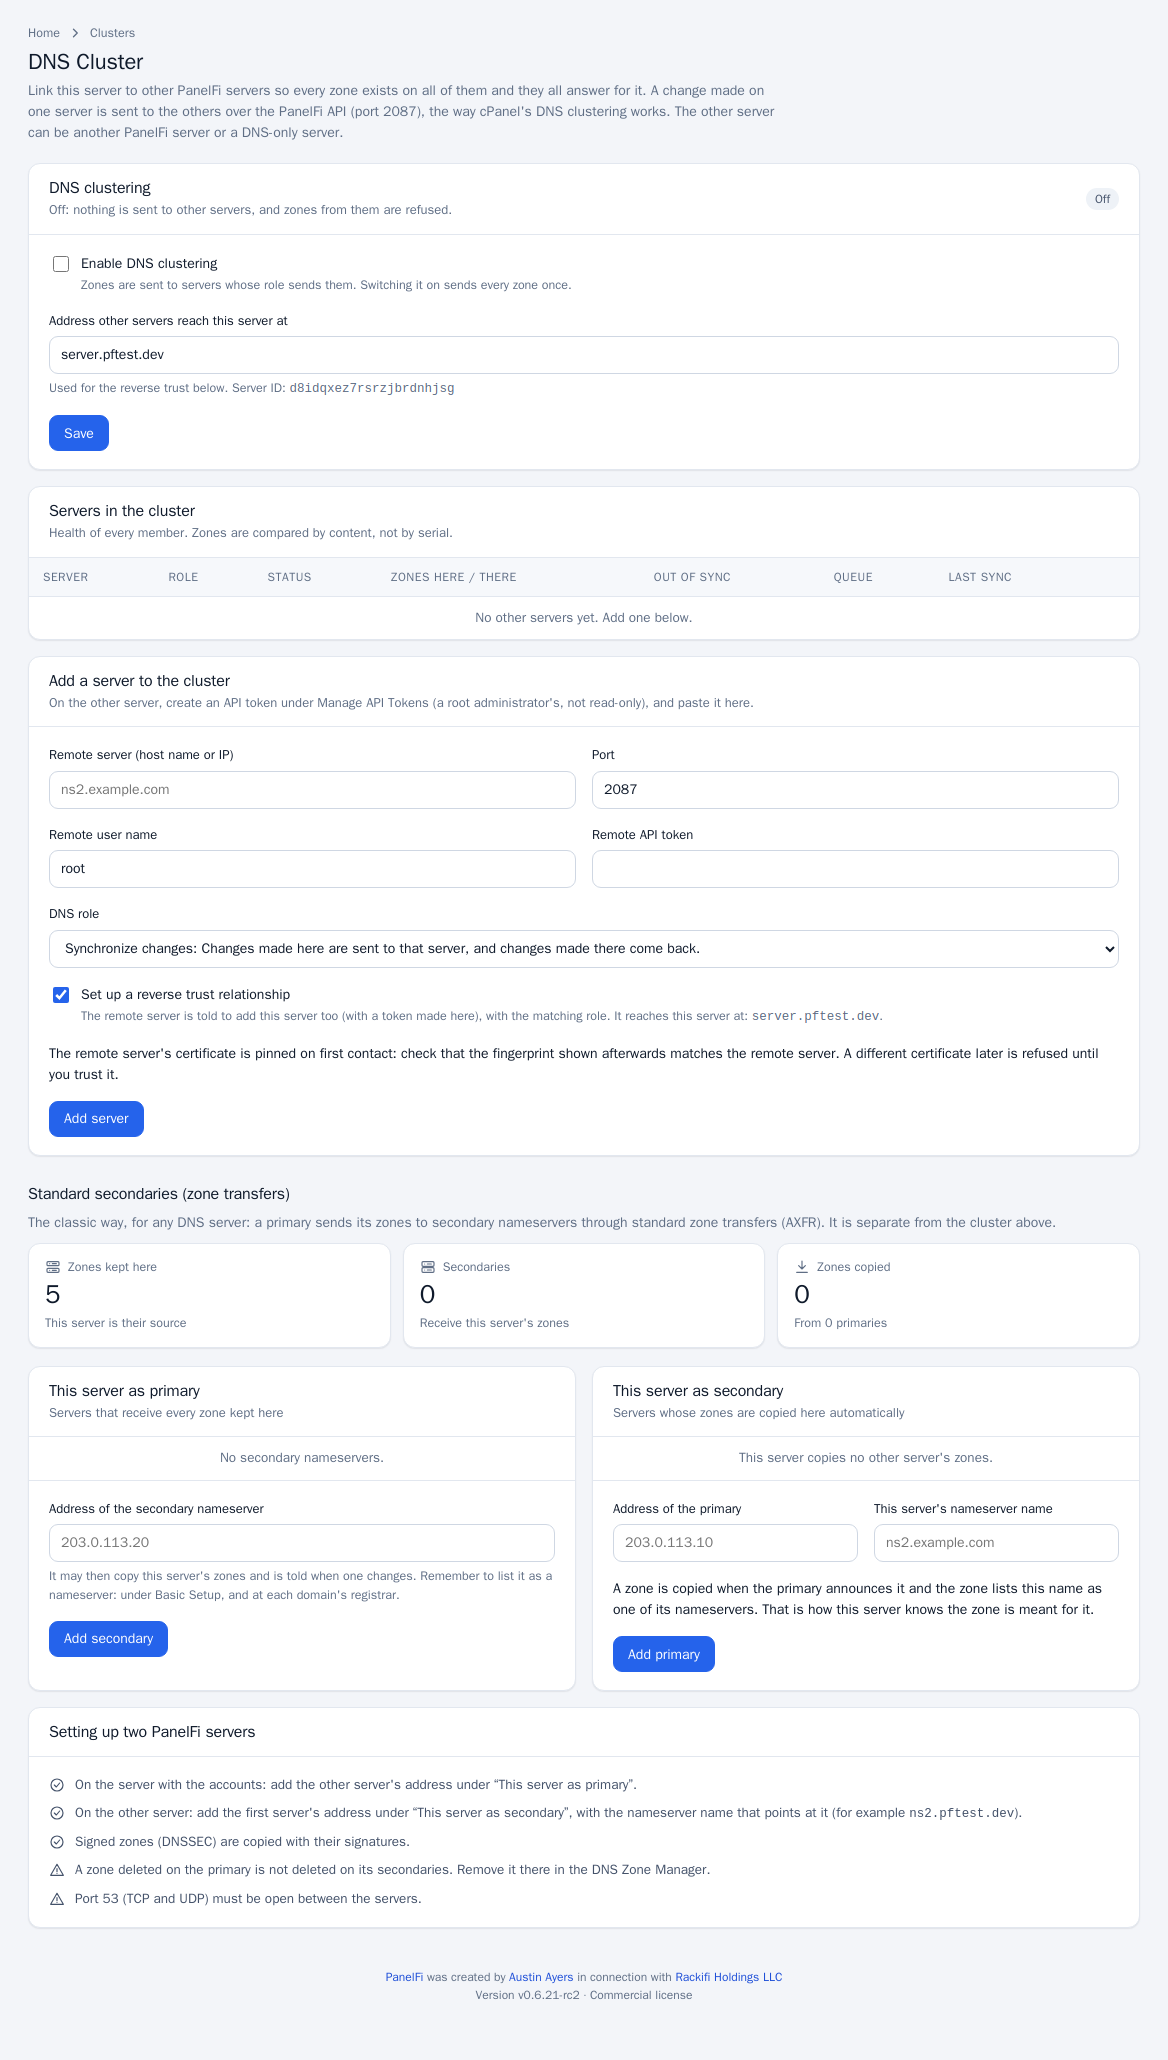
PanelFi links servers into a DNS cluster the way cPanel does: every zone is kept on every member, a change made on one server (including a deleted zone) is sent to the others, and each of them answers for it. Add a server with its address and an API token, choose a role (Synchronize changes, Write-only or Standalone), and optionally set up the reverse trust in the same step. Dedicated nameservers can run the free DNS-only edition, like cPanel DNSONLY. Standard AXFR secondaries are still available too.
PanelFi can link servers into a DNS cluster the way cPanel does. Every zone is kept on every member, a change made on one server is sent to the others, and each of them answers for it. Customers keep their DNS when a server is down, and you can run dedicated nameservers next to your hosting server.
Open it under Server panel, Clusters, DNS Cluster.
There are two separate features on that page:
- DNS clustering (this document): servers talk over the PanelFi API on port 2087 and send whole zones.
- Standard secondaries (zone transfers): the older AXFR primary and secondary setup, for any DNS server. It is unchanged and independent of the cluster.
How it works
- Each server has a list of cluster members. For each member you choose a DNS role.
- Every change to a zone on a server (a new zone, a record added, edited or deleted, a zone reset, a domain or account removed, a restore, a domain moved) is put in a queue for each member that receives changes. The queue is stored in the panel database, so it survives restarts.
- Several changes to one zone become one push of the whole zone. A push takes about two seconds to start, so a burst of changes is sent once.
- If a member is down or refuses, the push is retried with growing delays (30 seconds, doubling, up to 15 minutes) and a new change to the zone brings the retry forward. The member catches up when it is back.
- Deleting a zone on a server deletes it on the members that receive its changes, as cPanel does.
- The members talk to each other's API:
GET/PUT/DELETE /api/v1/dns/zones/{zone},GET /api/v1/dns/zones,GET /api/v1/dns/cluster/hello, andPOST/DELETE /api/v1/dns/cluster/peersfor the reverse trust. They are for root administrators; a read-only token can read but not write.
Roles
The role is what this server does with that member.
| Role | This server sends its changes | This server takes the member's zones |
|---|---|---|
| Synchronize changes | yes | yes |
| Write-only | yes | no |
| Standalone | no (paused) | no |
| Download-only | no | yes |
Download-only is the other end of Write-only, so you rarely choose it yourself: when you add a member as Write-only with the reverse trust option, the member lists you as Download-only. Likewise Synchronize on one side is Synchronize on the other, and Standalone is Standalone.
A server that receives a push checks its own role for the sender. If the role does not take zones from the sender (Write-only or Standalone), the push is refused. A server that does not have the sender in its list refuses too: add each server to the other (the reverse trust does it in one step).
Topology
Link every server to every other (a full mesh), which is what cPanel recommends. A zone received from a member is written to the local DNS server and is not forwarded to other members, so there are no loops and nothing is sent in circles. With three servers A, B and C, link A-B, A-C and B-C. If B is not linked to C, a zone created on A reaches B and C, but a change made on B does not reach C.
Conflicts
A zone sent by a member never silently replaces a zone that already exists on the receiving server for a different purpose. The rule:
- The zone does not exist here: it is accepted and shown in the DNS Zone Manager as from cluster member <name>. It is not tied to an account.
- The zone exists here for a hosting account, or was created by hand on this server: the push is refused (HTTP 409) unless the two servers already share the zone, that is, one of them has already pushed it to the other, or the zone only exists here because a member sent it.
- The same goes for deletes: a zone that an account here owns is never deleted by a member.
A refused zone is listed under Conflicts on the receiving server and on the sending server, and the entry leaves the queue (it would fail again). Fix it by hosting the domain in one place, or by removing the zone on one side, then use Synchronize now. This is the same "zone already exists" conflict you know from cPanel.
If an account on one server owns a domain and the same domain was already pushed to the other server (for example you created the account first and the cluster copied the zone), both servers share the zone from then on, and changes made on either side go to the other.
Set up two PanelFi servers
You need port 2087/TCP open between the servers (in both directions when you use the reverse trust), and 53/TCP and 53/UDP open to the world on both.
- On server B, open Manage API Tokens and create a token. Do not tick read-only. Copy it. It must belong to a root administrator, not a reseller.
- On server A, open DNS Cluster. Under DNS clustering, set "Address other servers reach this server at" (A's host name, which B must be able to resolve and reach), tick Enable DNS clustering, and Save.
- Under Add a server to the cluster, enter B's host name or IP, port 2087, user
root, the token from step 1, and a role. Leave Set up a reverse trust relationship ticked and click Add server. - A connects to B over HTTPS, checks that the token is a root administrator's token that can write, and pins B's certificate (its SHA-256 fingerprint is shown in the table). Compare it with the fingerprint of B's panel certificate. With the reverse trust, A makes a token of its own for B, calls B's API to add A to B's list with the matching role, and B connects back to A to check it. B also switches clustering on.
- Every zone on A is queued for B. Open DNS Cluster on both servers to watch the Servers in the cluster table: role, reachable, zones here and there, zones out of sync (compared by content, not by serial), queue length, last sync and last error.
- Add the nameservers to your registrar and to Basic Setup (
ns1,ns2) as usual. The cluster keeps the zones equal; it does not change which nameservers a zone lists.
Without the reverse trust you do step 1 and 3 on both servers by hand, each side with a token from the other.
A PanelFi server and a DNS-only server
A DNS-only server is a dedicated nameserver, like cPanel's DNSONLY. It runs PowerDNS and the panel, and nothing else: no web server, mail, FTP, PHP, MariaDB, phpMyAdmin or Roundcube. It has no customer panel and no accounts, and it needs no license and never counts against one.
Install it on a fresh server (Ubuntu, Debian or AlmaLinux and its relatives):
cd /home && curl -o latest -L https://panelfi.net/latest && sh latest --dns-onlyor from an extracted release: ./install.sh --dns-only. The installer asks no questions, opens only 53/TCP, 53/UDP and 2087/TCP, writes "dns_only": true to /etc/panelfi/panelfi.json and the setting dns_only=1, and keeps the server DNS-only when you update it later. Its server panel offers only DNS tools, DNS Cluster, server settings, security, updates and the API; the accounts, packages, resellers, mail, web and backup tools are hidden and refused.
Then follow the steps for two PanelFi servers, with the hosting server as A and the DNS-only server as B. A DNS-only server's hostname must be a fully qualified name with at least two dots, like any PanelFi server. Use role Synchronize if the DNS-only server should also take zones created on it; use Write-only for a pure replica of the hosting server.
Changing the cluster
- Change role: pick another role in the table. With the reverse trust, the member is told and gets the matching role. Standalone pauses everything; going back to Synchronize or Write-only sends all zones again.
- Synchronize now: sends every zone of this server to that member and waits for the result.
- Pull zones: copies the zones the member has and this server lacks (for roles that take zones).
- Synchronize all DNS records (top of the page): Synchronize now for every member that receives zones.
- Remove from cluster: drops the member. Tick "also remove this server there" to have the member drop this server too (and revoke the token made for it). Zones already copied stay until you delete them in the DNS Zone Manager.
- Enable DNS clustering off: nothing is sent, changes from members are refused, and the queue waits.
If a member does not answer for more than 30 minutes, the administrator is told through the Contact Manager (event "A DNS cluster member stops answering"; switch it on under Notifications).
Certificates
The certificate of a member is pinned on first contact. If the panel certificate of a member changes, requests are refused with "the certificate of the remote server changed", the table shows the new fingerprint, and nothing is sent until you check it against the real server and click Trust the new certificate. The exception is a certificate from a public CA (for example Let's Encrypt) for the member's host name: when that renews, the pin follows it automatically. A self-signed certificate has to be trusted by hand when it is replaced.
Troubleshooting
- "could not connect" when adding: check the address and that 2087/TCP is open from this server to the other. From this server:
curl -k https://remote:2087/api/v1/version. - "does not accept the API token": the token is wrong, expired, or belongs to a reseller; create a root token without the read-only box.
- "the remote server could not set up the reverse trust": the remote server could not connect back. The address in "Address other servers reach this server at" must resolve on the remote server and 2087/TCP must be open towards this server.
- "this server does not know you" (403): the receiving server has no entry for the sender. Add it there, or use the reverse trust.
- "this server does not take zones from you" (403): the receiving server has the sender as Write-only or Standalone. Change the role there.
- Queue length does not go down: the table shows the last error. Unreachable servers are retried with growing delays; Synchronize now retries at once.
- Zones out of sync: use Synchronize now on the server that has the right version. A zone is "out of sync" when its records differ; the SOA serial is not compared.
- Conflicts: see the section above.
- Zone changes made directly in PowerDNS (not through the panel) are not seen by the cluster until Synchronize now.
Everything the cluster does is in the Audit Log (dns.cluster.*).
Standard secondaries (zone transfers)
Below the cluster, the same page still offers the standard primary and secondary arrangement over NOTIFY and AXFR, for secondaries that are not PanelFi servers (BIND, Knot, PowerDNS, a managed DNS provider). It is independent of the cluster.
How it works
DNS clustering uses the standard primary and secondary arrangement of the DNS protocol:
- The primary is the server where the zones are created and edited: the PanelFi server with your hosting accounts. It is the source of truth for those zones.
- A secondary holds read-only copies. It gets them from the primary and answers queries for them like any other nameserver. Changes are made on the primary only.
The two steps of keeping a zone in sync:
- NOTIFY. When a zone on the primary changes, the primary sends a NOTIFY message (UDP port 53) to every secondary you listed. This tells the secondary to refresh straight away instead of waiting for a timer.
- AXFR. The secondary then asks the primary for the full zone with a zone transfer (TCP port 53). The primary only answers zone transfer requests from the addresses you listed as secondaries (and from itself).
PanelFi runs PowerDNS. Making a server a primary switches its own zones from "Native" to "Master" so they announce changes and can be transferred. A secondary uses PowerDNS automatic secondary zones: when a NOTIFY arrives from a listed primary for a zone that names this server as one of its nameservers, the secondary creates the zone and transfers it. The secondary also re-checks every 15 seconds. DNSSEC-signed zones are copied with their signatures.
A server can be a primary for some servers and a secondary for others at the same time. Each side accepts up to 20 servers.
Before you start
- Open port 53 for both TCP and UDP between the servers (UDP for NOTIFY and queries, TCP for zone transfers), in both directions. The PanelFi installer opens 53/tcp and 53/udp on the server when
ufworfirewalldis active; if you use another firewall or a provider firewall, check it. See Firewall. - Each secondary needs a nameserver name (for example
ns2.example.com) with an A record pointing at its IP address. - Both servers need PowerDNS managed by PanelFi. If the page reports that this server's DNS software cannot be clustered, or that its PowerDNS configuration does not read the
pdns.dfolder yet, run the PanelFi installer once to upgrade (see Requirements and installation). - The secondary's address must not be the loopback or an empty address, and the same address cannot be both a secondary of this server and a primary for it.
Set up a cluster of two PanelFi servers
In this example server A (203.0.113.10, ns1.example.com) holds the hosting accounts, and server B (198.51.100.20, ns2.example.com) is the secondary.
1. List the second nameserver on server A
- On server A open Server Configuration > Basic Setup.
- Set Nameserver 2 to
ns2.example.comwith its IPv4 address198.51.100.20, and save. Every new zone now lists ns2 as a nameserver, and a zone only reaches the secondary if it lists the secondary's name. - For zones that already exist, add an NS record for
ns2.example.comat the zone apex in the DNS Zone Manager. PanelFi does not rewrite the NS records of existing zones.
2. Make server A the primary
- On server A open Clusters > DNS Cluster.
- Under This server as primary, enter server B's IP address in Address of the secondary nameserver and click Add secondary.
- PanelFi writes the cluster settings for PowerDNS, restarts it, switches your zones to Master and announces every zone to the secondary. If PowerDNS fails to start with the new settings, the previous settings are put back and the error is shown.
3. Make server B the secondary
- On server B open Clusters > DNS Cluster.
- Under This server as secondary, enter server A's IP address in Address of the primary and
ns2.example.comin This server's nameserver name, then click Add primary.
The name matters: a zone is copied when the primary announces it and the zone lists this name as one of its nameservers. That is how server B knows the zone is meant for it.
4. Send the zones and check
- On server A click Send every zone again if server B was set up after server A, so all existing zones are announced again.
- On server B reload the DNS Cluster page. Zones copied should show the zones, and the list Zones copied from primaries names them.
5. Delegate at the registrar
For each domain, set both nameservers at the registrar (ns1.example.com and ns2.example.com), with glue records if the nameservers are inside the domain itself. The secondary only helps once resolvers know about it.
Use a non-PanelFi secondary
Any DNS server that supports standard zone transfers can be a secondary: BIND, Knot, NSD, PowerDNS, a managed DNS provider that offers secondary zones, and so on.
- On your PanelFi primary, add the secondary's IP address under This server as primary as above. This permits zone transfers from that address and sends NOTIFY to it.
- On the other server, configure each zone as a secondary (slave) zone of the primary's IP address, and allow NOTIFY from it. For example in BIND:
zone "example.com" { type secondary; primaries { 203.0.113.10; }; file "example.com.zone"; }; - Make sure the zone lists the secondary's nameserver name as an NS record, and that port 53 TCP and UDP are open between the servers.
PanelFi does not create zones on a non-PanelFi secondary; the zone has to exist there, or be created by that software's own automatic-secondary feature. Transfer access is by IP address: the secondary must request transfers from the address you listed. The panel does not configure TSIG keys.
Check status
- Zones kept here: the zones this server is the source of. Secondaries: how many addresses receive them. Zones copied: zones this server holds as a secondary.
- Compare a zone's serial on both servers (replace the addresses and zone):
The third number of the SOA answer is the serial; it should match on both servers shortly after a change.dig +short SOA example.com @203.0.113.10 dig +short SOA example.com @198.51.100.20 - Each cluster change is written to the Audit Log.
Remove a server from the cluster
- Click Remove beside a secondary. It stops receiving this server's zones; zones it already copied stay there until removed on that server.
- On a secondary, remove the primary entry. It takes no new zones, and the zones already copied stay until you delete them in the DNS Zone Manager.
- With no secondaries left, the server returns its zones to Native.
Troubleshooting
| Symptom | What to check |
|---|---|
| A zone does not appear on the secondary | Does the zone list the secondary's nameserver name as an NS record, spelled exactly like This server's nameserver name? Is the primary's address on the secondary the one the NOTIFY arrives from (a server with several IPs may send from another one)? Then click Send every zone again on the primary. |
| Nothing arrives at all | Port 53 UDP and TCP must be open in both directions, including any provider-level firewall. Test with dig against each server from the other. |
| Zone transfer refused | The primary only permits transfers to the addresses listed under This server as primary. A secondary behind NAT or with a different outgoing address must be listed by the address it transfers from. |
| Serial differs after a change | The secondary refreshes on NOTIFY and every 15 seconds. Wait a minute, then re-send every zone. |
| A deleted zone is still on the secondary | Deleting a zone on the primary does not delete it on secondaries. Remove it there in the DNS Zone Manager (or on the non-PanelFi server). |
| Cluster change fails with "PowerDNS did not start" | PanelFi restored the previous settings. Check the address is a real server address, then see journalctl -u pdns on the server. |
Message that the configuration does not read pdns.d | Run the PanelFi installer once to upgrade the server's PowerDNS configuration. |
| Edits to a copied zone are lost | Copies are kept up to date by the primary. Make changes on the primary. |
Notes
- A cluster does not move websites, email or accounts; it only copies DNS zones.
- Set up the nameserver names and glue first: Nameservers and resolvers.
Server panel: web, SSL and PHP
Web server
Where to find it: Server panel > Service Configuration > Web Server
PanelFi runs your sites on OpenLiteSpeed by default and can switch the whole server to NGINX or LiteSpeed Enterprise from one page. Every domain, document root, PHP version and certificate is kept when you switch.
What it does
PanelFi generates each site's web configuration for whichever engine is active. Switching engines re-renders the same sites for the new engine, so you do not edit configuration by hand and nothing needs to be re-created.
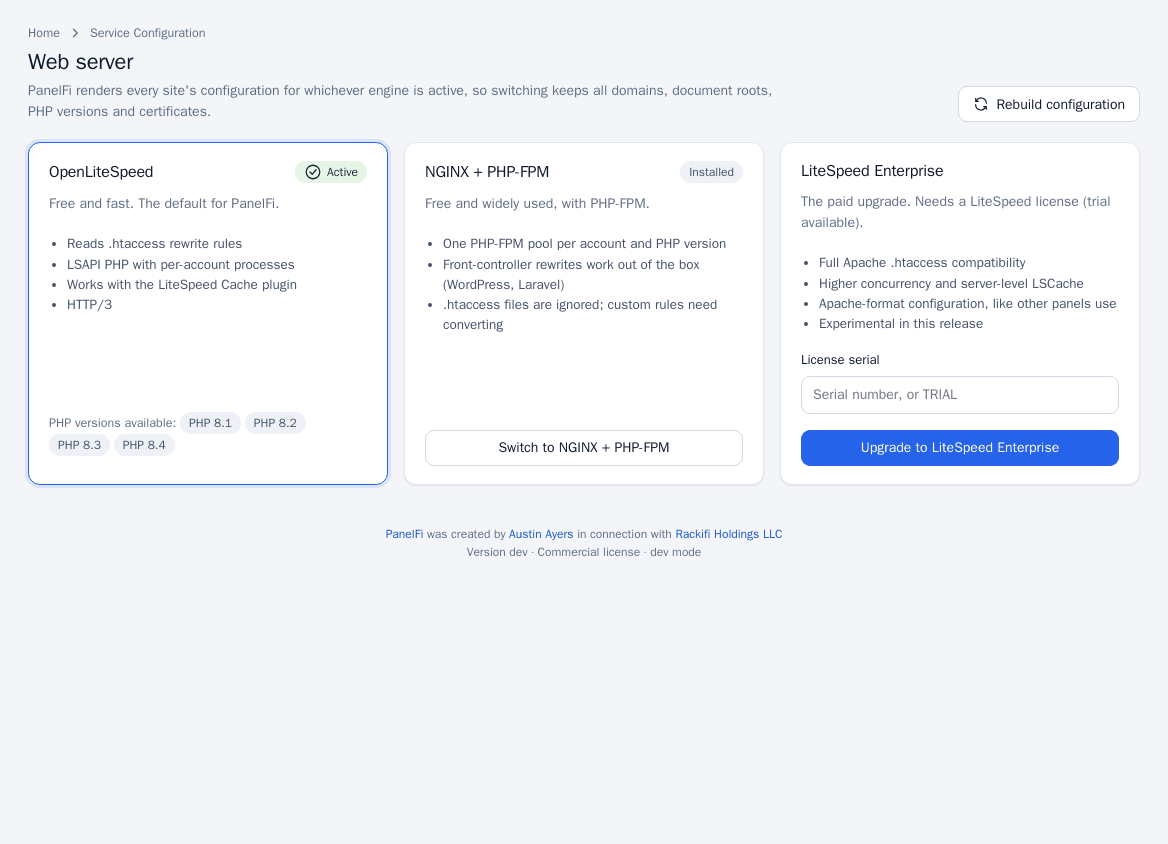
The three engines
| Engine | Notes |
|---|---|
| OpenLiteSpeed | Free, the default. Reads .htaccess rewrite rules, runs PHP over LSAPI with per-account processes, works with the LiteSpeed Cache plugin, supports HTTP/3. |
| NGINX | Free, with PHP-FPM: one pool per account and PHP version. WordPress and Laravel front-controller rewrites work out of the box. .htaccess files are ignored, so custom rules must be converted to NGINX rules. |
| LiteSpeed Enterprise | Paid upgrade that needs a LiteSpeed license (a trial is available). Full Apache .htaccess compatibility and server-level LSCache. Marked experimental in this release. |
Switch the web server
- Open Service Configuration > Web Server. The active engine shows Active; engines already on the server show Installed.
- On the engine you want, click Switch to NGINX (or OpenLiteSpeed). For LiteSpeed Enterprise, enter your License serial (a serial number, or
TRIAL) and click Upgrade to LiteSpeed Enterprise. - Follow the progress in the job panel near the top (Switching web server…, then Done or Failed with the log). Every site stays online on the current server until the new one is ready.
The job status and its log stay on this page after it finishes. The Task Queue Monitor tile under Server Status links to the same place.
Rebuild configuration
If you changed something outside the panel or a site seems out of sync, click Rebuild configuration. PanelFi re-renders the configuration for every site and reloads the web server.
Changes made in the panel (a new domain, a PHP version change, a certificate) are applied to the web server automatically. You only need Rebuild after manual intervention.
Notes and limits
- Only the root administrator can switch engines.
- Check customers' custom rules before moving to NGINX:
.htaccessis ignored there. - If a switch fails, the error and log are shown under Last switch failed.
- The PHP versions available depend on the active engine; see PHP administration.
SSL/TLS and AutoSSL
Where to find it: Server panel > SSL/TLS > Manage AutoSSL
AutoSSL issues and renews free Let's Encrypt certificates for every website and for the panel itself. This page shows the state of every domain and lets you issue, reissue or run AutoSSL on demand.
What it does
When AutoSSL is on, PanelFi requests a Let's Encrypt certificate for each domain on the server, runs again every 6 hours and whenever domains are added. The page header tells you if AutoSSL is turned off in Basic Setup, or if the staging CA is in use (staging certificates are not trusted by browsers).
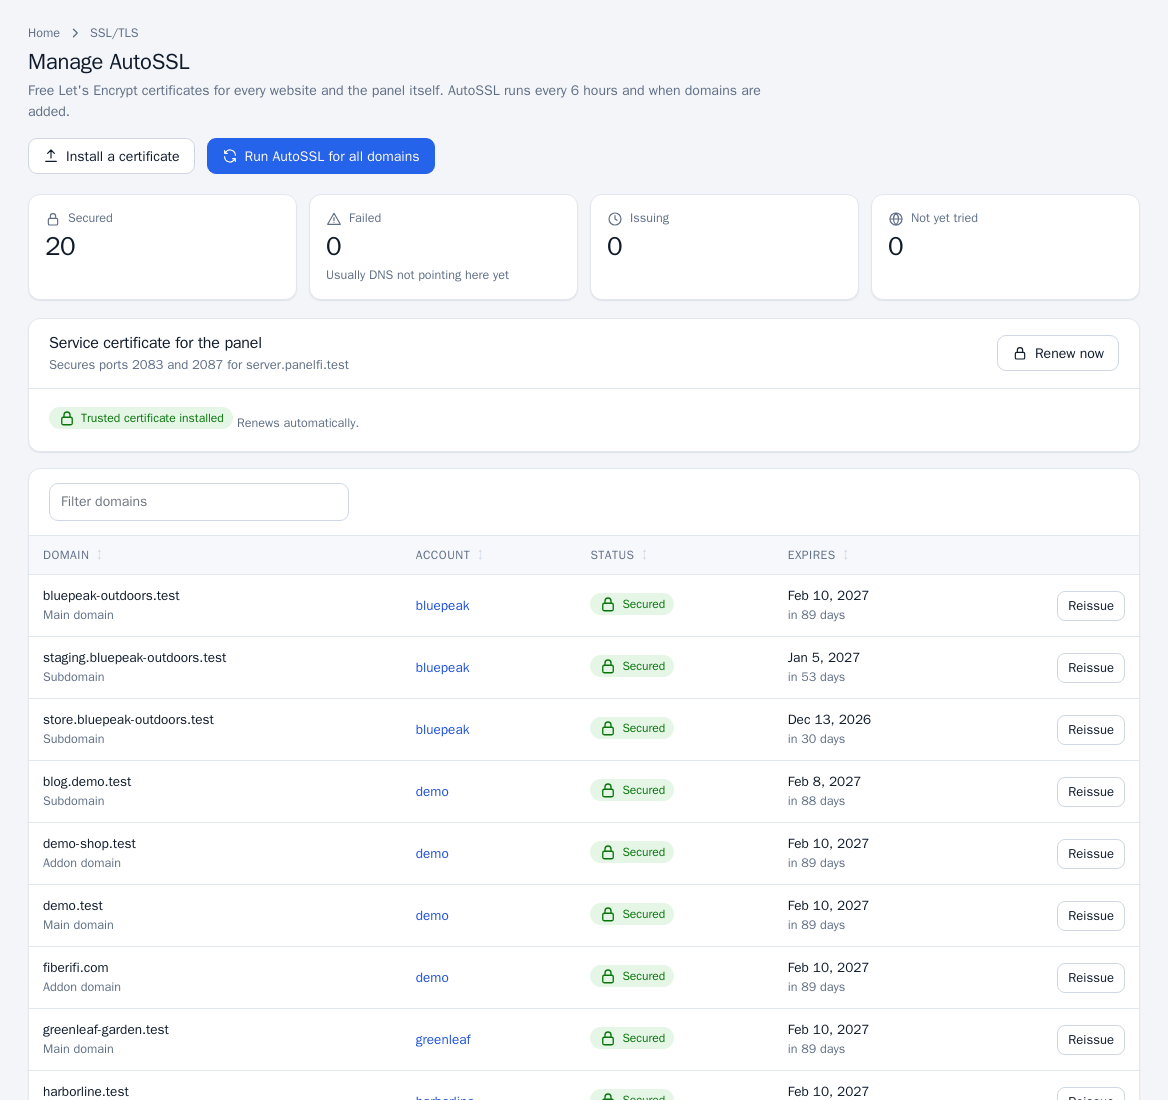
Read the status summary
- Secured: domains with an active certificate.
- Failed: usually DNS does not point at this server yet. The error is shown under the domain.
- Issuing: a request is in progress.
- Not yet tried: domains AutoSSL has not attempted.
Issue or renew certificates
- Open SSL/TLS > Manage AutoSSL.
- To process everything, click Run AutoSSL for all domains (root administrator only).
- To act on one domain, use the button in its row: Issue for a domain without a certificate, Reissue for one that already has one.
The table lists each domain, its type, the owning account, the status and the expiry date.
Turn AutoSSL on or off
The AutoSSL checkbox lives in Basic Setup and Tweak Settings (Server settings). When it is off the page still lists domains, but nothing is issued automatically.
Resellers
Resellers can open Manage AutoSSL for their own accounts' domains. Installing a certificate and the panel service certificate are root-only.
Notes and limits
- A certificate can only be issued once the domain's DNS points at this server.
- Domains with a custom (installed) certificate show a Remove button instead of Reissue; see Custom and hostname certificates.
- Customers see the result for their own domains in the Customer panel: SSL/TLS Status.
Custom and hostname certificates
Where to find it: Server panel > SSL/TLS > Install an SSL Certificate ; Server panel > SSL/TLS > Manage Service SSL Certificates
Install a certificate you bought (EV, wildcard or any CA) on a website, and secure the panel and hostname on ports 2083 and 2087 with a trusted certificate.
Install a purchased certificate
Use this when you were given a certificate instead of using the free automatic one.
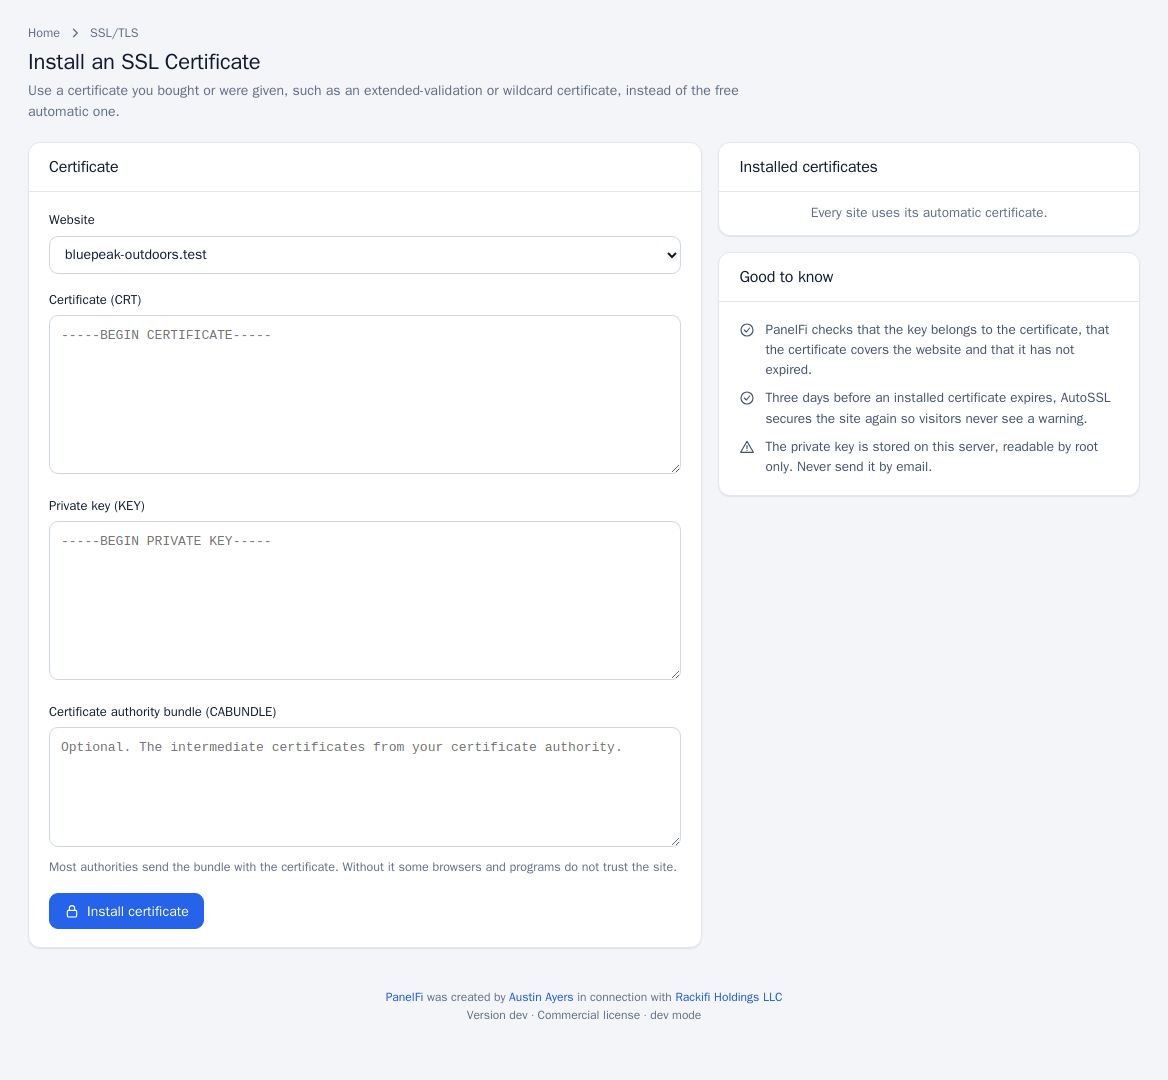
- Open SSL/TLS > Install an SSL Certificate.
- Choose the Website.
- Paste the Certificate (CRT), the Private key (KEY) and, if your authority sent one, the Certificate authority bundle (CABUNDLE). Without the bundle some browsers do not trust the site.
- Click Install certificate.
PanelFi checks that the key matches the certificate, that the certificate covers the website and that it has not expired. Installed certificates are listed on the same page, each with a Remove button.
Three days before an installed certificate expires, AutoSSL secures the site again so visitors never see a warning. The private key is stored on the server, readable by root only. Never send it by email.
Panel and hostname certificate
The panels (ports 2083 and 2087) use a self-signed certificate until a trusted one is issued for the server hostname, so browsers warn.
- Make sure the hostname (shown on the page) resolves to this server.
- Open SSL/TLS > Manage Service SSL Certificates. It opens the Service certificate for the panel card on Manage AutoSSL.
- Click Get a certificate for <hostname>. When one is installed the card reads Trusted certificate installed. Renews automatically. and the button becomes Renew now.

Notes and limits
- Installing certificates and the service certificate are root-only actions.
- To go back to the free certificate, remove the custom certificate; AutoSSL then issues one.
- Changing the hostname is covered in Server settings.
PHP versions, settings and extensions
Where to find it: Server panel > Software > MultiPHP Manager ; Server panel > Software > MultiPHP INI Editor ; Server panel > Software > PHP Extensions
Choose the server-wide default PHP version, set server-wide php.ini values per version, and install or share PHP extensions. Customers can still pick their own version per domain.
MultiPHP Manager: default version
Domains that have no PHP version of their own use the server default. The table lists each installed version and how many domains use it; Server default (inherit) shows the domains following the default.
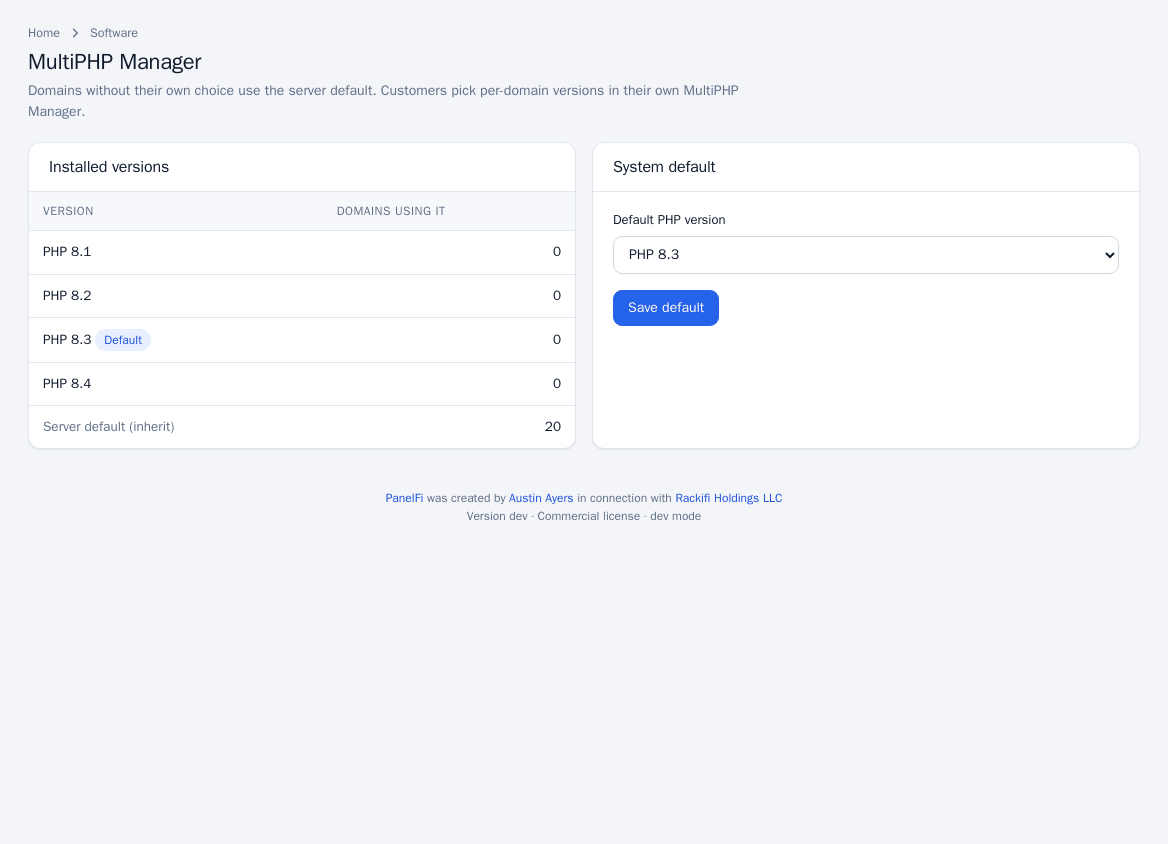
- Open Software > MultiPHP Manager.
- Under System default, pick the Default PHP version.
- Click Save default. The web configuration is rebuilt for every site.
Only versions installed for the active web server are offered. Customers choose per-domain versions in their own PHP selector.
MultiPHP INI Editor: server-wide settings
Values set here apply to every website that does not set its own value. Leave a field empty to keep PHP's own default.
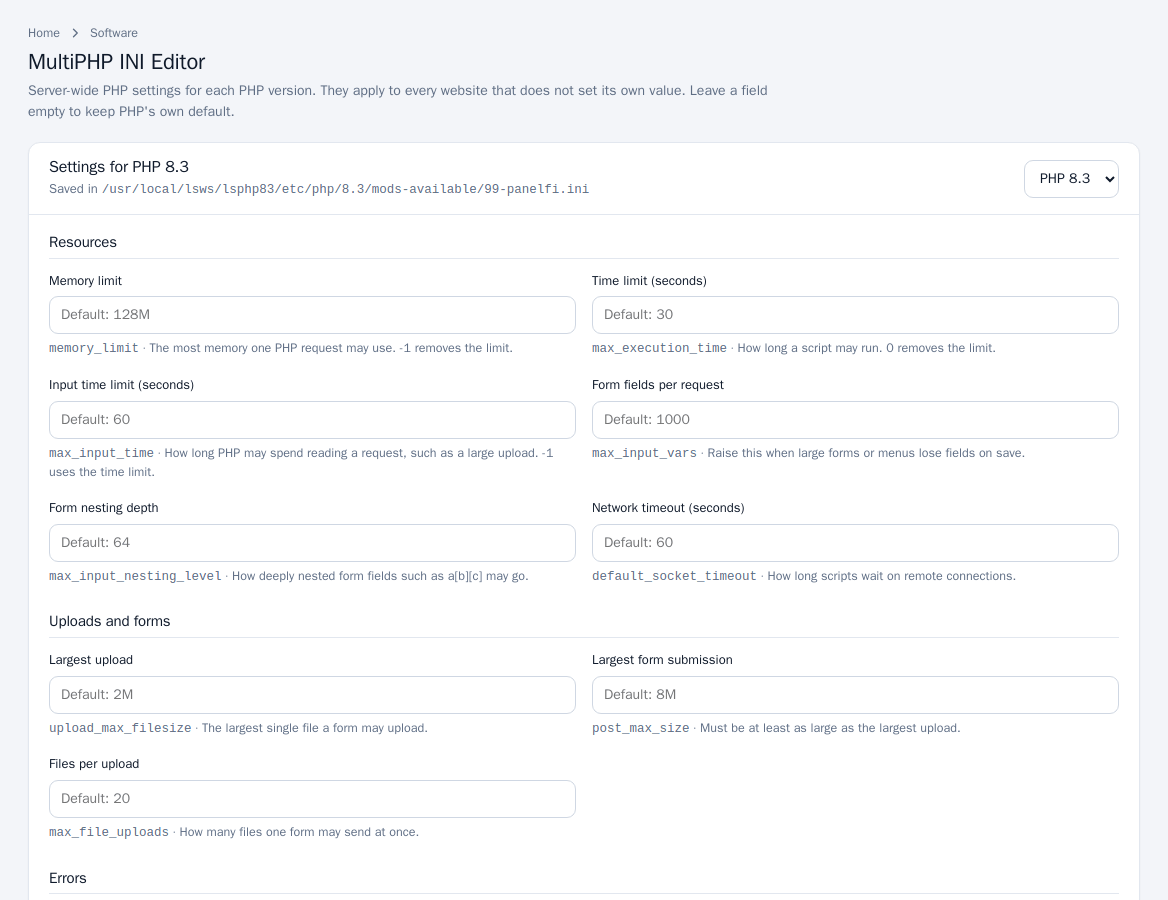
- Open Software > MultiPHP INI Editor.
- Choose the PHP version and click Show. The page names the file the settings are saved in.
- Edit the fields, grouped as Resources (memory limit, time limit, form fields per request), Uploads and forms (largest upload, largest form submission, files per upload), Errors, Output (including time zone), Sessions, OPcache and Mail.
- Click Save settings. PHP restarts for every site; visitors do not notice.
The server editor also exposes a few system-level settings customers cannot change, such as Disabled functions, Open remote files (allow_url_fopen) and Announce the PHP version.
PHP Extensions
Shows what each PHP version has loaded and lets you add extensions from the operating system's packages, for example ImageMagick, Redis or the internationalisation functions.
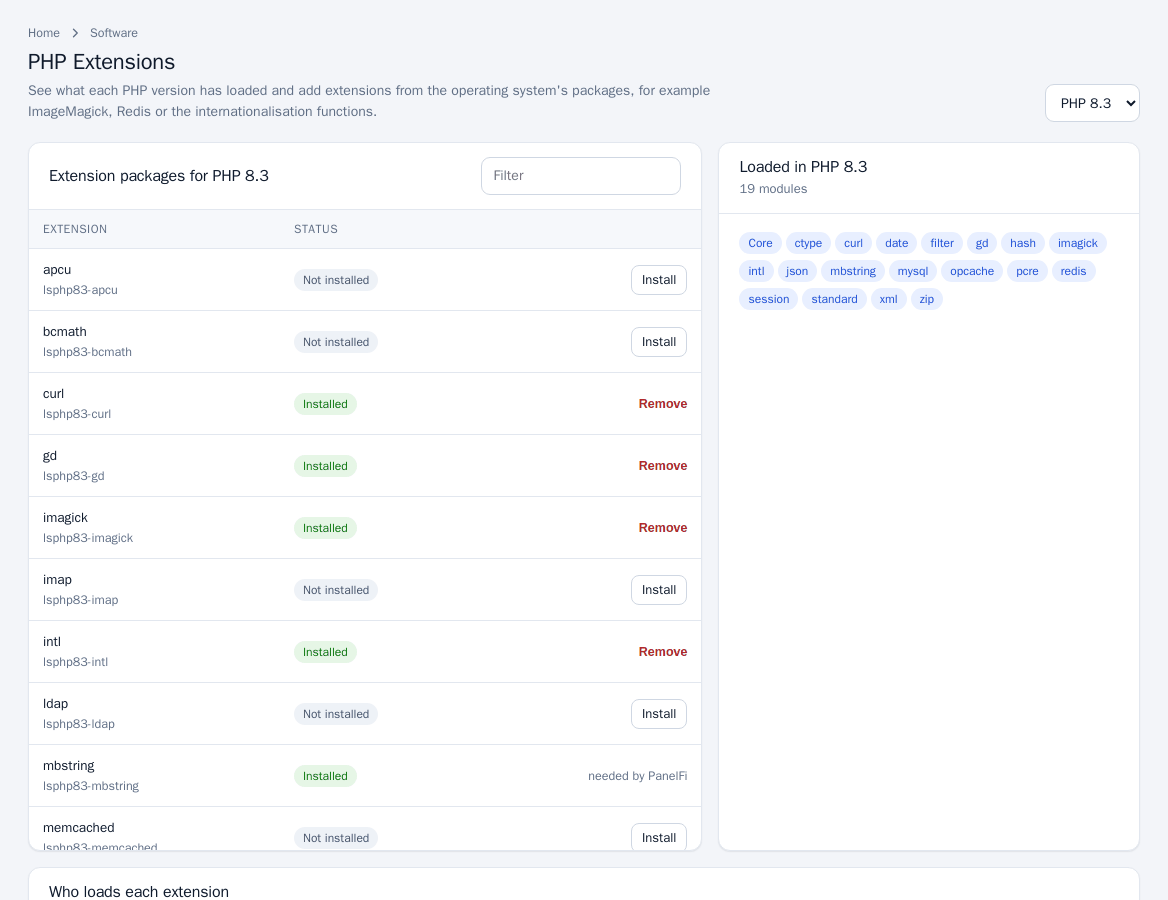
- Open Software > PHP Extensions and choose the PHP version.
- In Extension packages, click Install next to a missing extension, or Remove for one you added. Extensions marked needed by PanelFi cannot be removed.
- The Loaded in list shows the modules PHP actually loads.
Who loads each extension
An installed extension is either loaded for every site (Make optional switches it back) or optional: each customer ticks it under their MultiPHP Manager Extensions tab, like CloudLinux's PHP Selector. Use Load for everyone to enable an optional extension for all sites.
Notes and limits
- If no PHP version is installed for the active web server, the pages say so instead of showing settings. Switching web server changes which versions are available; see Web server.
- Account-level resource limits (memory, PHP requests at once) are set in Account isolation.
- On CloudLinux OS in CloudLinux mode, accounts can also use CloudLinux's PHP Selector (alt-php). Domains on the server's default PHP then run the version each account picks there; see CloudLinux OS.
Server panel: security
Account isolation
Where to find it: Server panel > Security Center > Account Isolation
Keeps hosting accounts from affecting each other. Each account gets its own CPU, memory and disk speed share, a private view of the server (the cage), and database limits. Limits come from each account's package.
What it does
Account Isolation has three parts, shown as cards on the page:
- Resource limits. Every account runs in its own share of the server with the CPU, memory, disk speed and process limits of its package. A busy or broken site slows down or stops only its own account. PHP, cron jobs, SSH sessions, the terminal and applications all count.
- Private file system (cage). Each account sees only its own home folder, its own processes and its own
/tmp. Other accounts' names, files and processes are hidden from its PHP, cron jobs, SSH and SFTP sessions and terminal. The server's programs stay available, read-only. The cage needs resource limits to be on. - Database limits. Caps each database user's connections and how long one query may run. An account that keeps the database busier than its package allows is held to one connection per user for five minutes, and its long-running queries are ended.
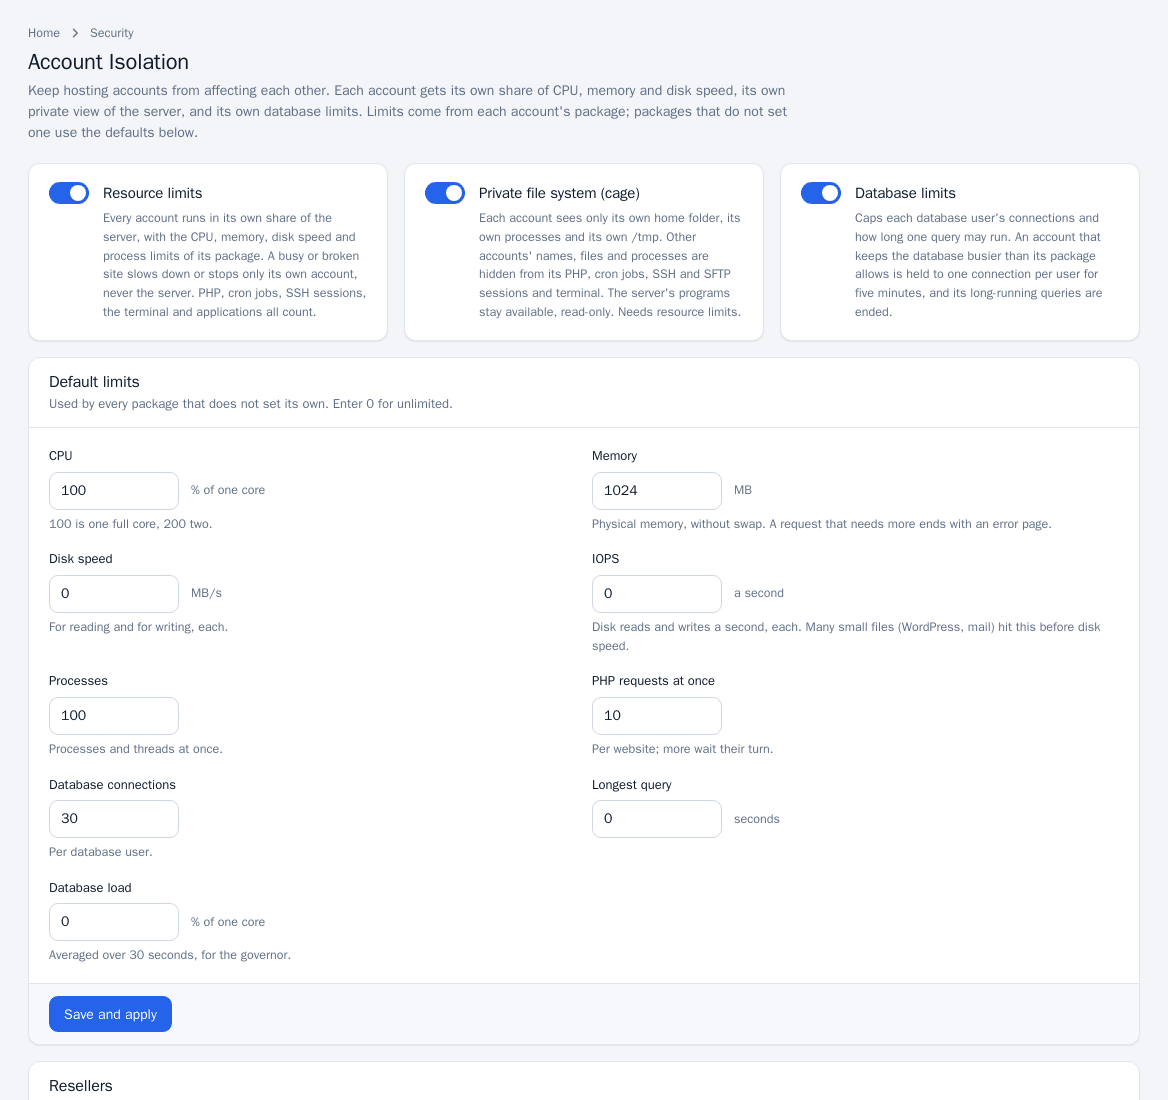
Turn isolation on and set the defaults
- Open Security Center > Account Isolation.
- Use the switches on the three cards to turn on resource limits, the private file system and database limits.
- Under Default limits (used by every package that does not set its own) fill in: CPU (% of one core, 100 is a full core), Memory (MB of physical memory, without swap), Disk speed (MB/s), IOPS, Processes, PHP requests at once (per website), Database connections (per database user), Longest query (seconds) and Database load (% of one core, averaged over 30 seconds). Enter 0 for unlimited.
- Click Save and apply. The change is applied as a job; the activity box shows progress. If it fails, it is undone and the output shows why.
Per-package limits
Packages carry their own values (see Packages); where a package does not set a limit, the defaults above apply.
Reseller ceilings
If you have resellers, the Resellers table shows the highest limits each reseller's accounts may have. Click Edit limits to open Limits for <reseller>, set a ceiling per limit (0 for no ceiling) and click Save limits. An account whose package allows more, or unlimited, is held to the reseller's ceiling. Resellers set limits on their own packages within these.
Watch usage
The Accounts table lists use now and how often each account reached its limits in the last 24 hours (CPU limit, memory, processes, CPU held back, memory and process limit hits, database restraints), most-limited first. Recent database restraints lists events since the panel last started.
Notes and limits
- With LiteSpeed Enterprise, PHP is started by the web server, so PanelFi moves its processes into the account's limits within two seconds of them starting. OpenLiteSpeed and NGINX start PHP inside the limits.
- A request that needs more memory than the limit ends with an error page.
- On CloudLinux OS you can use CloudLinux's LVE and CageFS instead: turn on CloudLinux mode as described in CloudLinux OS. The two are never on at the same time.
CloudLinux OS
Where to find it: Server panel > Security Center > CloudLinux & Imunify360
PanelFi works natively with CloudLinux OS. In CloudLinux mode, every account is an LVE with its own CPU, memory, I/O and process limits. CageFS cages each account, including its websites. PHP Selector chooses the PHP version for sites and the shell, and MySQL Governor limits each account's database use. PanelFi tells CloudLinux about every account, domain, package and database user change. Tested on CloudLinux OS 9.8.
What works with CloudLinux
PanelFi connects to CloudLinux through CloudLinux's own control panel integration (the /opt/cpvendor scripts and hooks), the same way other supported panels do. CloudLinux's own diagnostics recognise the server as PanelFi.
| CloudLinux feature | With PanelFi | Notes |
|---|---|---|
| LVE resource limits (CPU, memory, I/O, IOPS, processes, entry processes) | Yes | Every account is an LVE. Website PHP, cron, SSH and the terminal all count against it. |
| CloudLinux packages | Yes | PanelFi packages appear in CloudLinux under the same names; renaming a package keeps its limits. |
| CageFS | Yes | New and existing accounts are caged, including their websites’ PHP. |
| PHP Selector (alt-php) | Yes | For websites on the server’s default PHP, and for the command line, cron and SSH. |
| MySQL Governor | Yes | PanelFi writes the database user map, so every database user is counted to its account. |
| Hooks (account, domain, package and owner changes) | Yes | CloudLinux hears about every change as it happens. |
| Imunify360 and ImunifyAV | Yes | See Imunify360 and ImunifyAV. |
| LVE Manager web interface | Not embedded | Use lvectl, cloudlinux-packages and lveinfo in a terminal. |
| Reseller limits, X-Ray, AccelerateWP, Python/Node.js/Ruby selectors, mod_lsapi | Not yet | PanelFi reports them to CloudLinux as unsupported. |
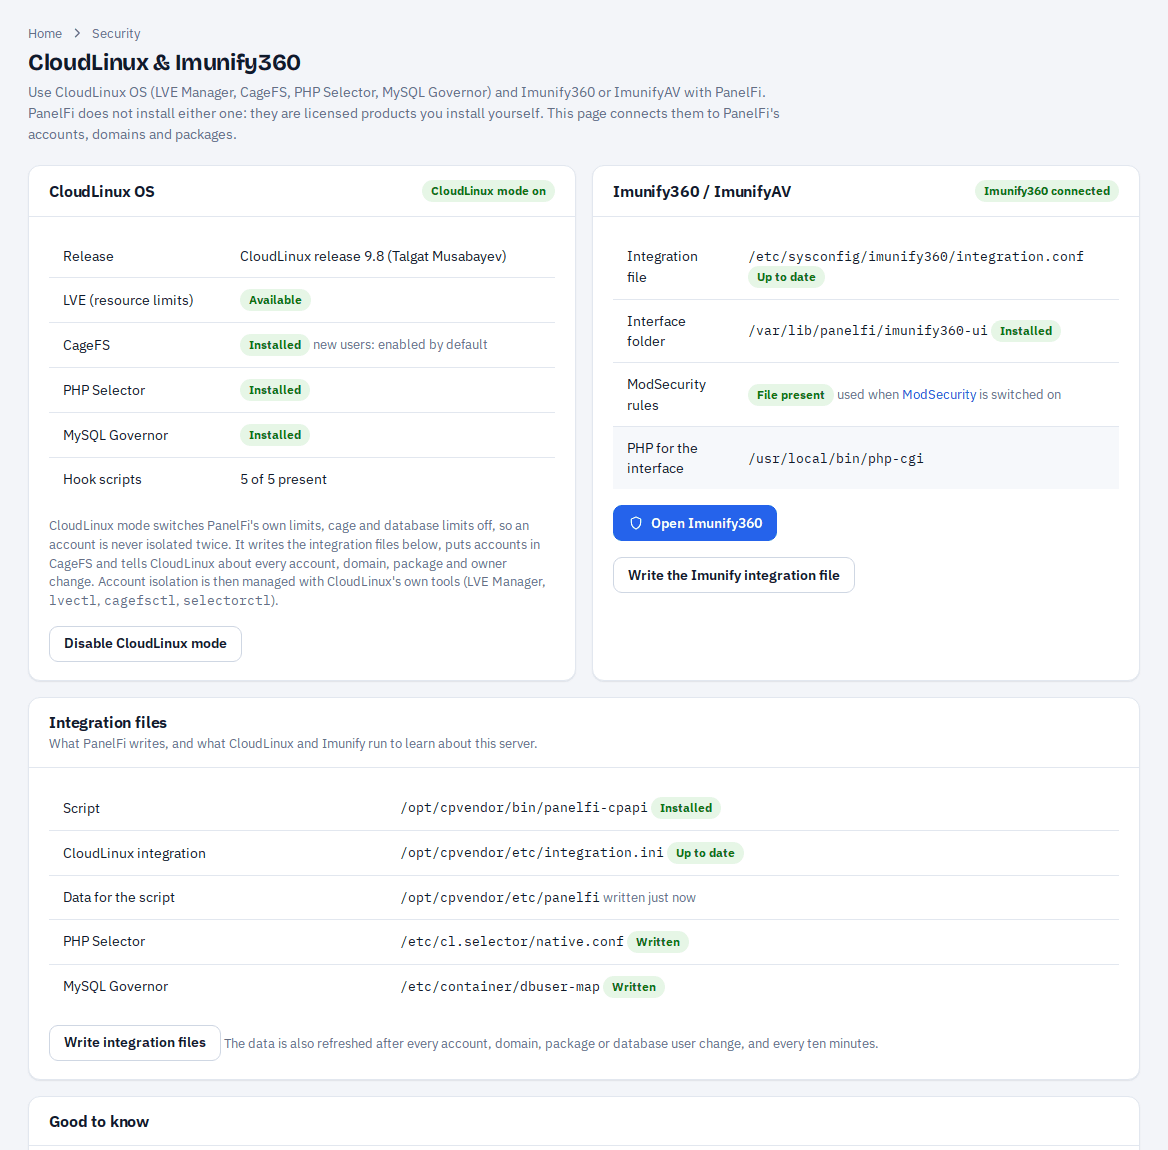
Install CloudLinux and PanelFi
CloudLinux OS is a licensed product; PanelFi does not install it. You need a CloudLinux OS Shared or Shared Pro license (or a trial key) and an AlmaLinux 8, 9 or 10 server.
- Start from a fresh AlmaLinux server and convert it to CloudLinux with CloudLinux's installer. Minimal images lack
wget, which the installer needs:dnf install -y wget curl -O https://repo.cloudlinux.com/cloudlinux/sources/cln/cldeploy sh cldeploy -k YOUR_CLOUDLINUX_KEY
- Reboot into the CloudLinux kernel:
reboot. - Install PanelFi with the one-line installer from the Downloads page. It recognises CloudLinux as a supported system (see AlmaLinux, Rocky Linux and RHEL for what it changes).
- Install CageFS and the alt-php versions you want to offer in PHP Selector:
dnf install -y cagefs
cagefsctl --init
dnf groupinstall -y alt-php
You can install single versions instead, for examplednf install -y alt-php82 alt-php83. - Open Security Center > CloudLinux & Imunify360 in the Server panel and click Enable CloudLinux mode (next section).
PanelFi can also be installed first and the server converted to CloudLinux afterwards. Reboot after cldeploy, then reload the CloudLinux & Imunify360 page.
Enable CloudLinux mode
The CloudLinux OS card shows what PanelFi found: the release, LVE, CageFS, PHP Selector, MySQL Governor and CloudLinux's hook scripts.
- Open Security Center > CloudLinux & Imunify360.
- Click Enable CloudLinux mode. The activity box shows each step.
Enabling CloudLinux mode:
- Installs PanelFi's integration script at
/opt/cpvendor/bin/panelfi-cpapiand writes/opt/cpvendor/etc/integration.ini, so CloudLinux reads PanelFi's accounts, domains, packages, resellers and PHP versions. - Tells CloudLinux about every existing account.
- Sets CageFS to cage every account by default and puts every existing account in CageFS. New accounts are caged as they are created.
- Switches PanelFi's own Account Isolation off, so no account is isolated twice. The Account Isolation page then says that CloudLinux is in charge.
- Has OpenLiteSpeed run every website's PHP inside its account's LVE and CageFS.
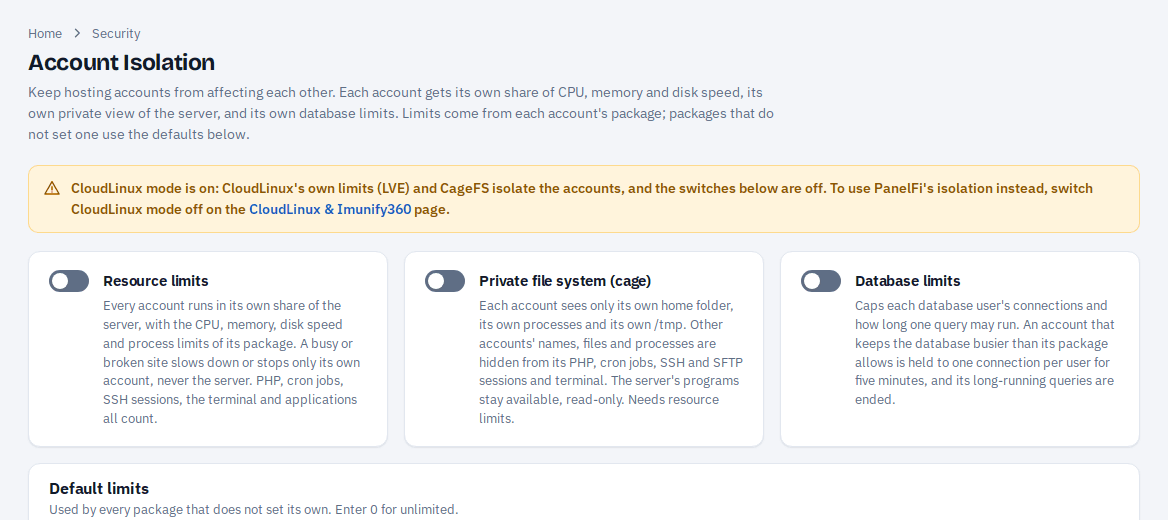
Limits and packages
In CloudLinux mode, limits come from CloudLinux, not from PanelFi's package form. Every PanelFi package exists in CloudLinux with the same name and owner, and each account is assigned to its package. Set limits per package with CloudLinux's tools, for example:
cloudlinux-packages set --json --provider root --package standard --speed 80% --pmem 1024M
lvectl list-user           # limits each account has now
lveinfo --period=1h        # who reached their limits
A limit set for a single user with lvectl set-user overrides that user's package. Renaming a package in PanelFi renames it in CloudLinux and keeps its limits.
CageFS
CageFS gives each account a private view of the server: its own home folder, a cut-down /etc/passwd and only the system files it needs. In CloudLinux mode it covers SSH and the terminal, cron jobs, and, with OpenLiteSpeed, every website's PHP. Manage it with cagefsctl, for example cagefsctl --list-enabled or cagefsctl --disable USER. After you install new system software, run cagefsctl --force-update. PanelFi does this itself after installing PHP versions or extensions.
PHP Selector
PHP Selector lets each account choose an alt-php version and its extensions, with selectorctl or CloudLinux's PHP Selector interface:
selectorctl --set-user-current=8.2 --user=USER
selectorctl --enable-user-extensions=sockets --user=USER --version=8.2
- Websites: with OpenLiteSpeed and CageFS, every domain that uses the server's default PHP runs the version chosen in PHP Selector. A version picked for a domain in PanelFi's PHP manager still takes priority. The selector's native version is PanelFi's default PHP.
- Command line, cron and SSH:
phpruns the chosen version. - NGINX: websites keep the PHP-FPM versions set in PanelFi; the selector applies to the command line only.
To do this, PanelFi provides the native PHP entry points CloudLinux expects: /usr/local/bin/php, php-cgi and lsphp-panelfi, all named in /etc/cl.selector/native.conf. Inside each cage, CageFS swaps them for the chosen version. PanelFi never replaces a /usr/local/bin file it did not write.
MySQL Governor
MySQL Governor limits each account's database CPU and I/O. It replaces MariaDB with CloudLinux's build of the same version, so back up your databases first:
mkdir -p /root/dbbackup
mysqldump --all-databases --single-transaction --routines --events > /root/dbbackup/all.sql
dnf install -y governor-mysql
mysql -V     # e.g. "Distrib 10.5.29-MariaDB" means mariadb105
/usr/share/lve/dbgovernor/mysqlgovernor.py --mysql-version=mariadb105
/usr/share/lve/dbgovernor/mysqlgovernor.py --install --yes
PanelFi notices Governor within ten minutes (or straight away when you open the CloudLinux & Imunify360 page). It then writes /etc/container/dbuser-map, which maps every database user to its account. Database users created or removed later update the map automatically. Check it with dbctl list and dbtop.
Integration files
The Integration files card lists what PanelFi writes for CloudLinux and whether each file is current. PanelFi refreshes the data after every account, domain, package or database user change, and every ten minutes. Click Write integration files to rewrite them at once, for example after you change something by hand.
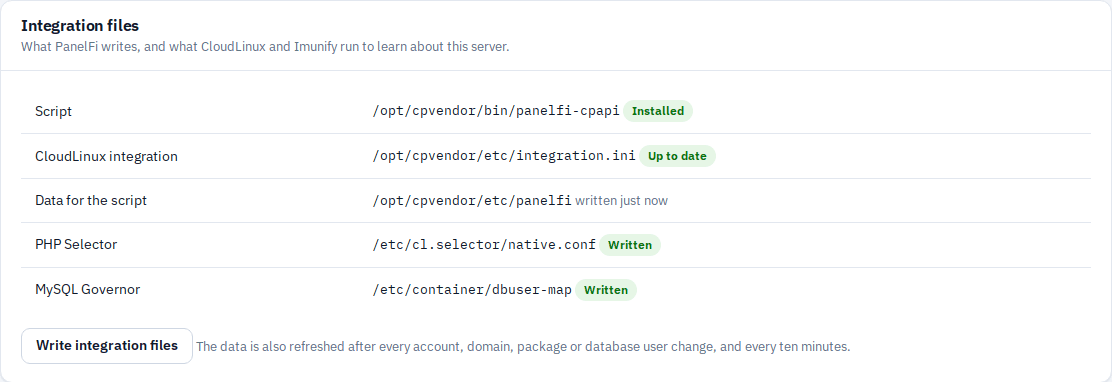
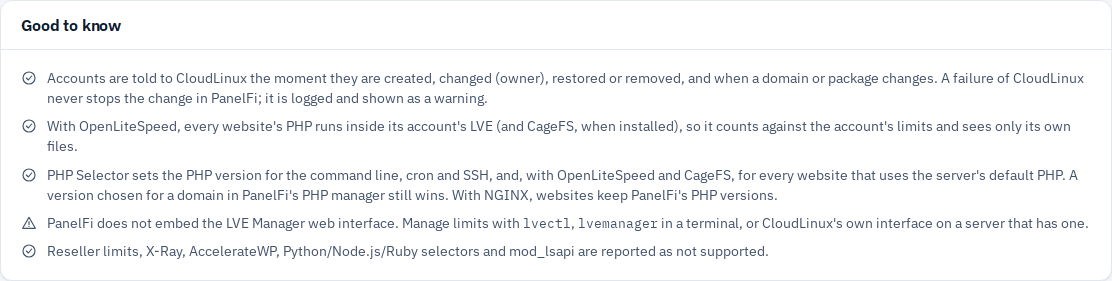
Switch back to PanelFi's isolation
Click Disable CloudLinux mode on the CloudLinux & Imunify360 page. CloudLinux stops reading PanelFi's data, and websites' PHP no longer runs in LVE. Then turn on the parts you want on the Account Isolation page. PanelFi's own limits and cage work on every supported system, CloudLinux or not.
Check that it works
/opt/cpvendor/bin/panelfi-cpapi panel_info    # CloudLinux sees "PanelFi"
lveps -p                                       # websites' lsphp processes under each account
cagefsctl --list-enabled
selectorctl --user-current --user=USER
cldiag --all
cldiag reports a quota error when disk quotas are not enabled on /home. That does not affect LVE, CageFS or PHP Selector.
Notes
- If CloudLinux fails to run a hook, the change still goes through in PanelFi. The failure is logged and shown as a warning.
- Tested end to end on CloudLinux OS 9.8 with OpenLiteSpeed, CageFS, alt-php 8.2 and 8.3, MySQL Governor with MariaDB 10.5, and ImunifyAV.
Imunify360 and ImunifyAV
Where to find it: Server panel > Security Center > CloudLinux & Imunify360
Imunify360 and the free ImunifyAV connect to PanelFi through Imunify's integration for servers without cPanel. Imunify reads PanelFi's accounts and domains, and its interface opens inside the Server panel. Imunify360's per-domain firewall rules go through PanelFi's ModSecurity.
What you get
- Malware scanning by account. Imunify lists PanelFi's accounts with their home folders and scans them on demand or on a schedule. ImunifyAV detects malware; ImunifyAV+ and Imunify360 can also clean infected files.
- Imunify's interface in the Server panel at
https://your-hostname:2087/imunify360/, for administrators only. - Imunify360's web application firewall (paid). Its rules, including per-domain rule changes, are loaded through PanelFi's ModSecurity, and the web server is reloaded safely when they change.
Imunify is a separate product with its own license (ImunifyAV is free). PanelFi's built-in Malware Scanner (ClamAV) keeps working alongside it.
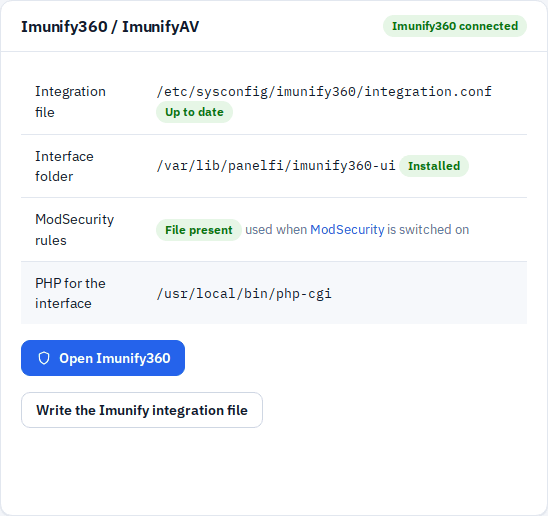
Install
- Open Security Center > CloudLinux & Imunify360 in the Server panel.
- On the Imunify360 / ImunifyAV card, click Write the Imunify integration file. This writes
/etc/sysconfig/imunify360/integration.conf, which tells Imunify where PanelFi's account and domain data and the interface folder are. Do this before running Imunify's installer. - Run Imunify's installer for servers without a control panel, as root:
# ImunifyAV (free)
wget https://repo.imunify360.cloudlinux.com/defence360/imav-deploy.sh -O imav-deploy.sh
bash imav-deploy.sh

# or Imunify360 (licensed)
wget https://repo.imunify360.cloudlinux.com/defence360/i360deploy.sh -O i360deploy.sh
bash i360deploy.sh --key YOUR_KEY
- Reload the page. The card shows connected, the interface folder shows Installed, and Open Imunify360 appears.
Open the interface
Click Open Imunify360. Imunify's interface opens inside the Server panel and asks you to sign in with a system account (Imunify uses the server's own logins, not PanelFi's). Use root and its system password, or a system user listed in /etc/sysconfig/imunify360/auth.admin.
- Only Server panel administrators can reach the interface. Customers and resellers get an error page.
- The interface needs a PHP CGI binary to run. The card's PHP for the interface row shows which one PanelFi uses.
Scan an account
- In Imunify, open Malware Scanner > Users. Every PanelFi account is listed with its home folder.
- Click the scan button on an account's row, or Scan all.
- Results appear under Malicious. With ImunifyAV+ or Imunify360, Clean up cleans the infected files; the free ImunifyAV only reports them.
From the command line: imunify-antivirus malware on-demand start --path /home/USER (ImunifyAV) or imunify360-agent malware on-demand start --path /home/USER (Imunify360).
Firewall rules (Imunify360)
Turn on ModSecurity in PanelFi first (ModSecurity). Imunify360 then installs its rule set, and when it changes the rules for one domain, PanelFi writes them to /etc/panelfi-web/imunify-modsec/ and reloads the web server. If the web server refuses the new rules, the previous ones are put back.
Notes
- Imunify reads PanelFi's account and domain data, refreshed after every change and every ten minutes. Click Write integration files on the same page to refresh it at once.
- If the card shows the integration file as Differs, click Write the Imunify integration file again. This can happen after a PanelFi update.
- Tested with ImunifyAV 8.11 on CloudLinux OS 9.8: accounts listed, test malware found in an account, interface signed in from the Server panel.
Firewall and brute-force protection
Where to find it: Server panel > Security Center > Firewall ; Server panel > Security Center > Brute Force Protection ; Server panel > Security Center > Unblock an IP Address
Control which ports are reachable, keep a list of addresses that are always let in or kept out, block addresses that keep failing to log in (SSH, mail, FTP, WordPress, the panels), and lift blocks for customers who locked themselves out.
What it does
Three tools work together:
- Firewall manages open ports, a permanent allow list and block list, and the automatic "guard" that blocks addresses after repeated failed logins to SSH, mail, FTP, WordPress or the panels. The guard uses its own nftables table, beside any other firewall.
- Brute Force Protection is the panel's own sign-in lockout: after too many failed sign-ins to either panel or the API, an address or a login name is locked out.
- Unblock an IP Address lets you (and resellers, for their customers) look up an address and lift its block.
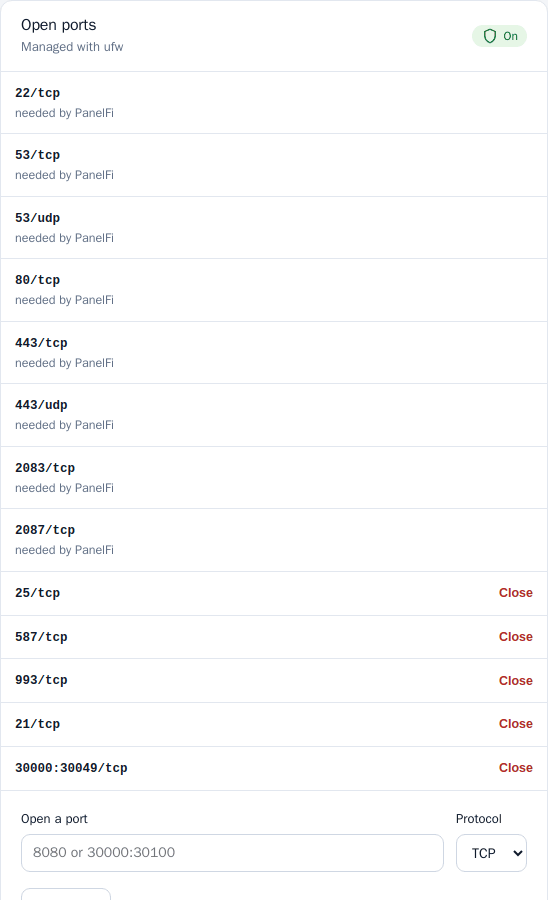
Block or allow an address by hand
- Open Security Center > Firewall.
- In the form under Blocked addresses, enter the Address or range, an optional Note and, for a temporary block, For (minutes).
- Click Block for a while, Block for good or Always let in.
Temporary blocks expire by themselves; permanent ones stay until you click Remove. Always-let-in addresses are never blocked, whatever they do. Add your office, monitoring and your other servers. The summary tiles show Blocked for now, Blocked for good and Always let in.
Automatic blocks (brute force detection)
Like CSF's login failure daemon, an address that fails too often is blocked from the whole server. Under Brute force detection:
- Choose which services to watch and, for each, the number of Failures and the Within (min) window. The shipped defaults are SSH 10 in 10 minutes, mail 15 in 10, FTP 10 in 10, WordPress 30 in 5 and the panels 10 in 15.
- Set Block for (minutes) (default 60) and Block for good after blocks in one day (default 5; 0 never).
- Click Save.
WordPress counts requests to wp-login.php and xmlrpc.php in each site's access log, since WordPress answers a wrong password with a normal page. Blocked addresses show the reason, the service, the login names tried and when the block ends; Unblock lifts one.
Open and close ports
- Under Ports, if the port firewall is off, click Turn port firewall on. It closes every port except those PanelFi and its services use: SSH (22), websites (80, 443), DNS (53), both panels (2083, 2087), and mail and FTP where installed.
- To open another port, use Open a port: choose the port and protocol (TCP or UDP) and click Open port. Ports PanelFi needs are marked needed by PanelFi and cannot be closed; others have a Close button.
- Turn port firewall off reverts it. Blocked addresses stay blocked either way.
If SSH listens on a port other than 22, open that port immediately after turning the firewall on. If no firewall is installed, install ufw (Ubuntu, Debian) or firewalld (AlmaLinux, Rocky Linux, CentOS Stream) from a root shell first; PanelFi uses what is already installed. A firewall at your hosting provider works independently.
Brute Force Protection (panel sign-in)
- Open Security Center > Brute Force Protection.
- Under Limits set Failures per address, Failures per login name and Within (minutes), then Save limits. Past either limit, sign-in is refused until old failures leave the window; a correct password does not get through while locked.
- Under Always allow or always block add an Address or range with the rule Always allow or Always block and an optional note, then Add rule. Allowed addresses are never locked out; blocked addresses cannot sign in at all.
- The Locked out right now table has an Unlock button per entry. Failed sign-ins, last 24 hours has a Block button per address, and Sign-in history lists the latest 100 attempts on both panels and the API.
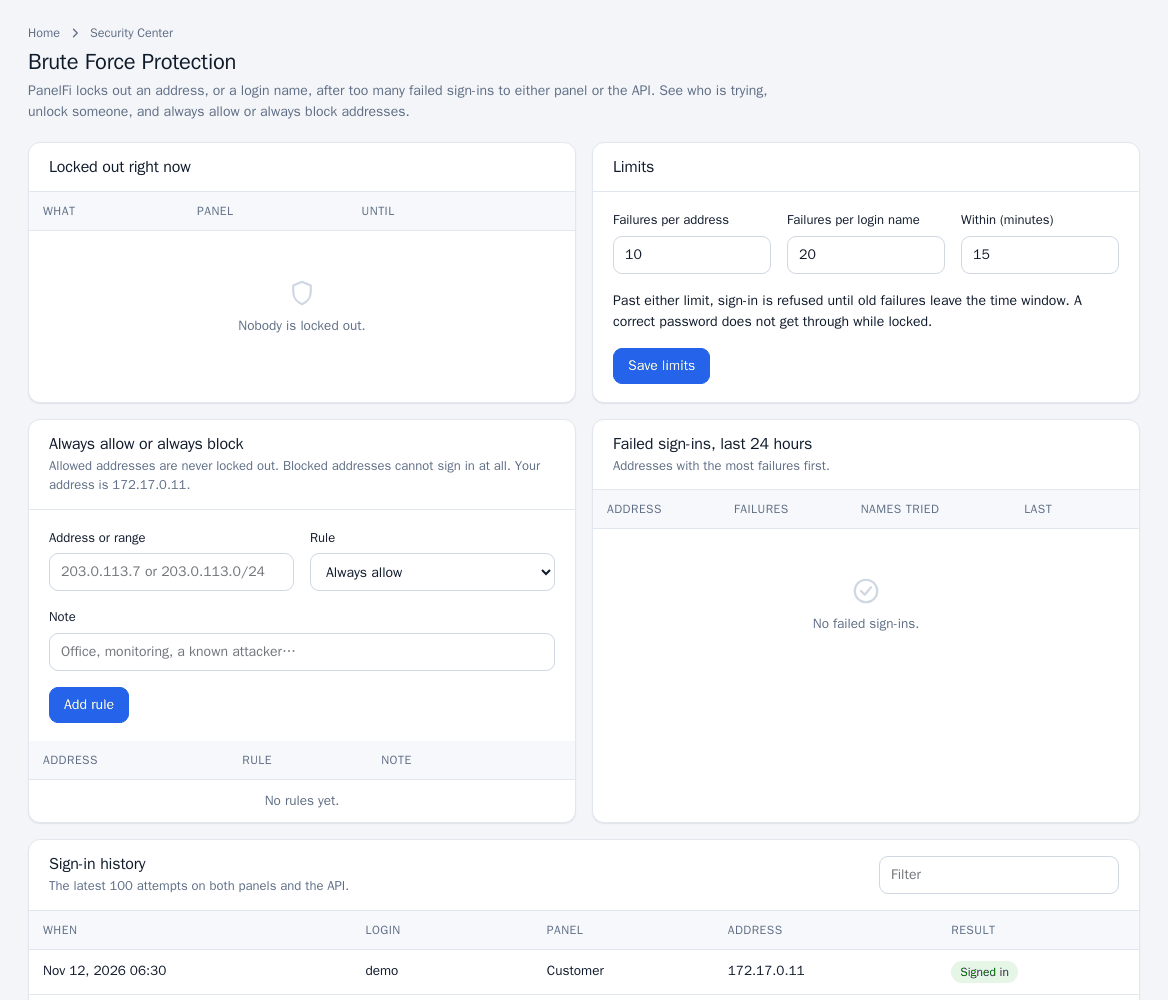
Addresses on the Brute Force Protection allow list are also never blocked by the firewall guard.
Unblock an IP address
- Open Security Center > Unblock an IP Address (resellers see it too).
- Enter the customer's Address and click Look up. Customers can find theirs at a site such as whatismyip.com.
- If it is blocked you see why, for which service, and when the block ends. Click Unblock. If panel sign-in is locked for that address, that is lifted as well.
If the address is not blocked, the page says so and the problem is elsewhere (password, DNS or the customer's connection). Permanent blocks made by the administrator are removed on the Firewall page by root, not by resellers.
Notes and limits
- Your own address is shown on each page so you do not lock yourself out.
- Firewall and guard are server-wide; Brute Force Protection applies to the panels and API only.
ModSecurity
Where to find it: Server panel > Security Center > ModSecurity
A web application firewall in front of every hosted site. It checks each request against the OWASP Core Rule Set and refuses common attacks such as SQL injection and cross-site scripting before they reach the site.
What it does
ModSecurity inspects every web request. Matching requests get a "403 Forbidden" answer (in On mode) or are only recorded (in Detection only mode). PanelFi manages it on OpenLiteSpeed and NGINX. LiteSpeed Enterprise has its own ModSecurity engine, set up in its WebAdmin console, and the page says so.
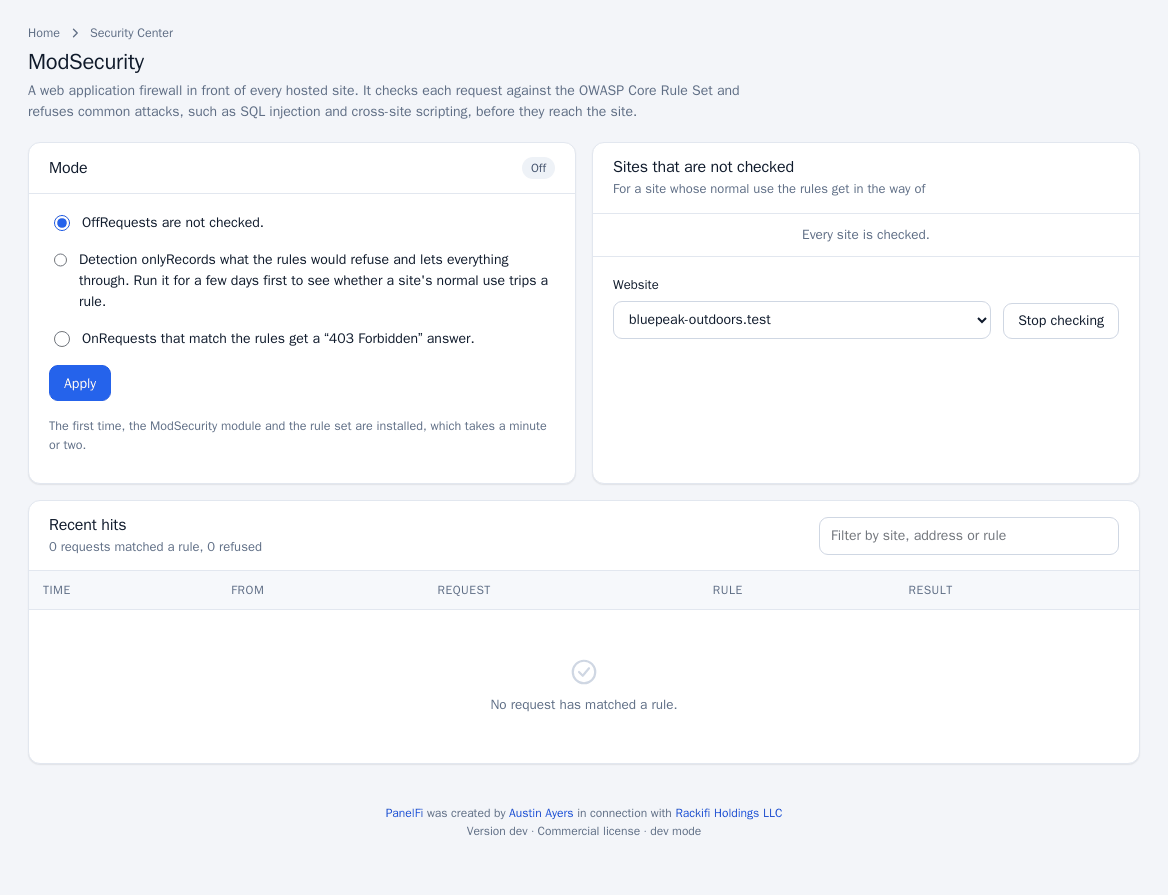
Turn it on
- Open Security Center > ModSecurity.
- Choose a Mode: Off (requests are not checked), Detection only (records what the rules would refuse and lets everything through) or On.
- Click Apply. The first time, the ModSecurity module and the rule set are installed, which takes a minute or two.
Start with Detection only for a few days to see whether a site's normal use trips a rule, then switch to On. If the module for the current web server is not installed, the page tells you requests are not being checked; press Apply to install it.
Exempt a site
For a site whose normal use the rules get in the way of, choose it under Sites that are not checked and click Stop checking. Exempt sites are listed with a Check again button to bring them back.
Review recent hits
The Recent hits table shows requests that matched a rule: time, source address, the host, method and URI, the rule message and id, and whether the request was Refused or Let through. Use it to decide on exemptions.
Notes and limits
- Rules are the OWASP Core Rule Set; the page does not edit individual rules.
- Pair it with brute-force protection, which blocks repeat offenders by address.
Malware Scanner
Where to find it: Server panel > Security Center > Malware Scanner
Scans the files of every hosting account with ClamAV, on a schedule or on demand, and either reports infected files or moves them to a quarantine folder inside the account. Customers have a matching Virus Scanner in their own panel.
What it does
A scan reads one account at a time at low priority and never follows a link out of an account's home folder. Findings are listed per account with details, and the account owner can be told.
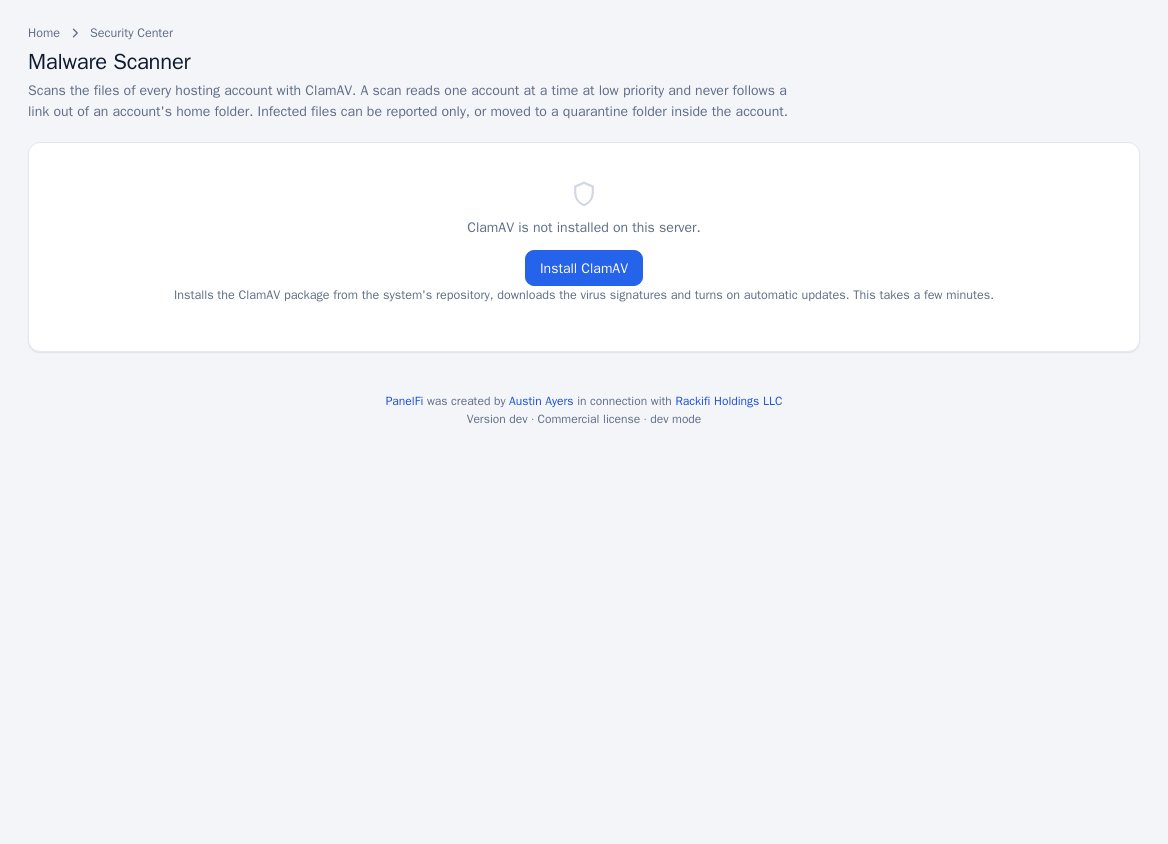
Install ClamAV and the signatures
- Open Security Center > Malware Scanner. If ClamAV is not installed, click Install ClamAV. It installs the system package, downloads the virus signatures and turns on automatic updates; this takes a few minutes.
- The status block shows Status, Scanner version, Signatures from, Automatic updates, Last scan and Infected files. If there are no signatures, click Download signatures.
Configure scanning
- Under Settings, pick the Scheduled scan: Off, Every night or Every Sunday night. It starts at 03:30 server time and scans every account's home folder.
- Choose When a file is infected: report it and leave it in place, or move it to the account's quarantine folder. Quarantine can break a site that uses the file; the account owner or you can restore it.
- Set the Largest file to scan (MB), and tick Tell the account owner if the owner should get a message for new findings. They can switch this off in Contact Information.
- Click Save settings.
You are told about new findings by the "Malware is found" notice in the Contact Manager (see Contact Manager).
Scan now
- Scan all accounts now starts a scan of every account; the page shows progress (account name, accounts done, infected files so far) and refreshes by itself.
- Under Results by account, choose an account and click Scan one account.
Read results
The Results by account table lists each account's latest scan: time and trigger, files scanned, and Clean, Scan failed or N infected (with the quarantined count). Details opens the account page with the findings and quarantine, where you can run Scan this account again.
Notes and limits
- The scanner relies on ClamAV signatures; it detects known malware only.
- Customers scan their own files from Virus Scanner in the Customer panel.
Administrator security: 2FA, SSH keys, audit log and support access
Where to find it: Server panel > Security Center > Two-Factor Authentication ; Security Advisor ; Manage Root's SSH Keys ; Audit Log ; Server panel > Server Configuration > Administrators & Password ; Server panel > Support > Grant Support Access
Protect and review administrator access: two-factor sign-in for the server panel, a Security Advisor check, root SSH keys, the audit log, administrator accounts and a time-limited support login.
Two-factor authentication
Adds a 6-digit code from an authenticator app (Google Authenticator, Microsoft Authenticator, 1Password, Aegis) to your server-panel login. It works with any app, needs no text messages and works offline.
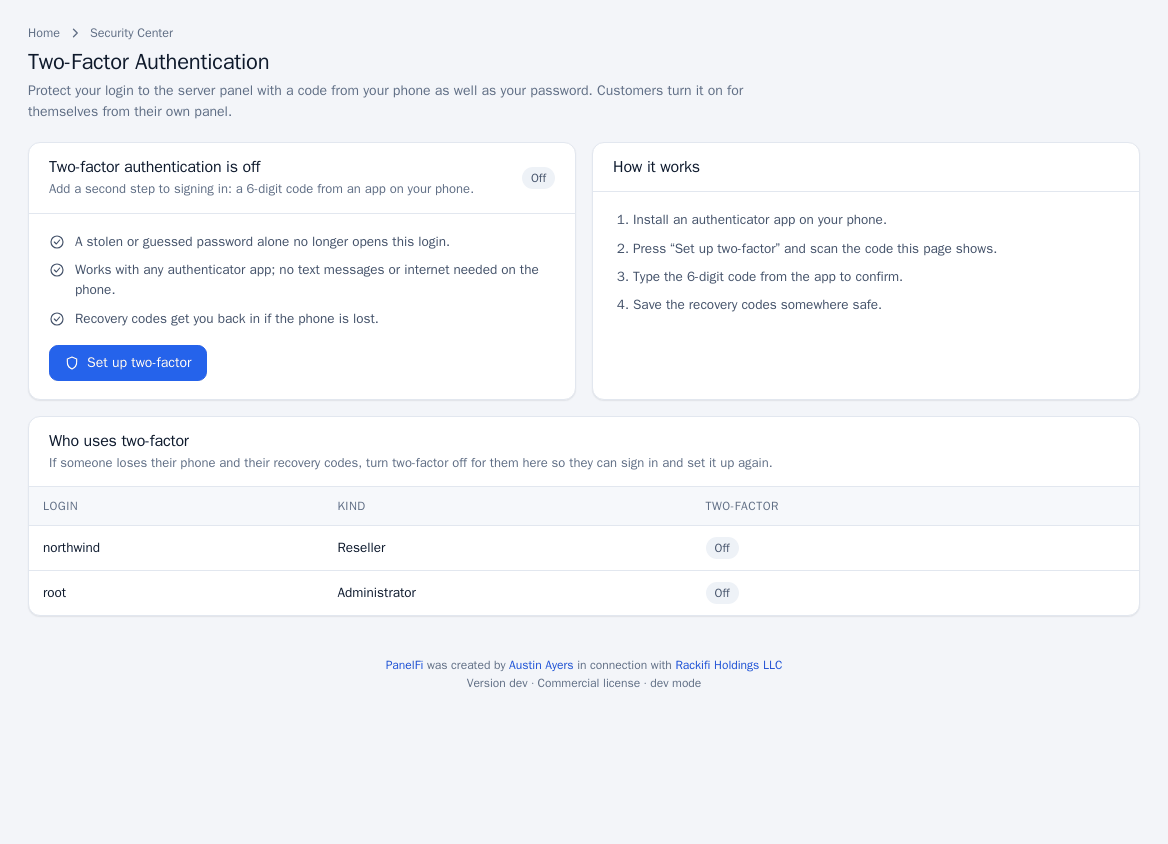
- Open Security Center > Two-Factor Authentication and press Set up two-factor.
- Scan the QR code, or add an account by hand using the key shown (time-based, 6 digits).
- Type the Code shown in the app and click Turn on two-factor.
- Save the recovery codes that appear. Each signs you in once if you lose your phone and they are shown only that time.
Once on, the page shows when it was turned on and how many recovery codes are left. Enter your Current password to Make new recovery codes (this cancels the old ones) or to turn it off. Administrators with full access also get a Who uses two-factor table where Turn off resets the second step for an administrator or customer who lost their phone and recovery codes, so they can set it up again. Customers set up their own in the Customer panel (see Account security).
Security Advisor
A check of the server and panel against common weak spots, most serious first. The header counts serious, to fix and good results; each finding has a title, an explanation and, where it helps, a link to the page that fixes it. Click Check again after changing something.
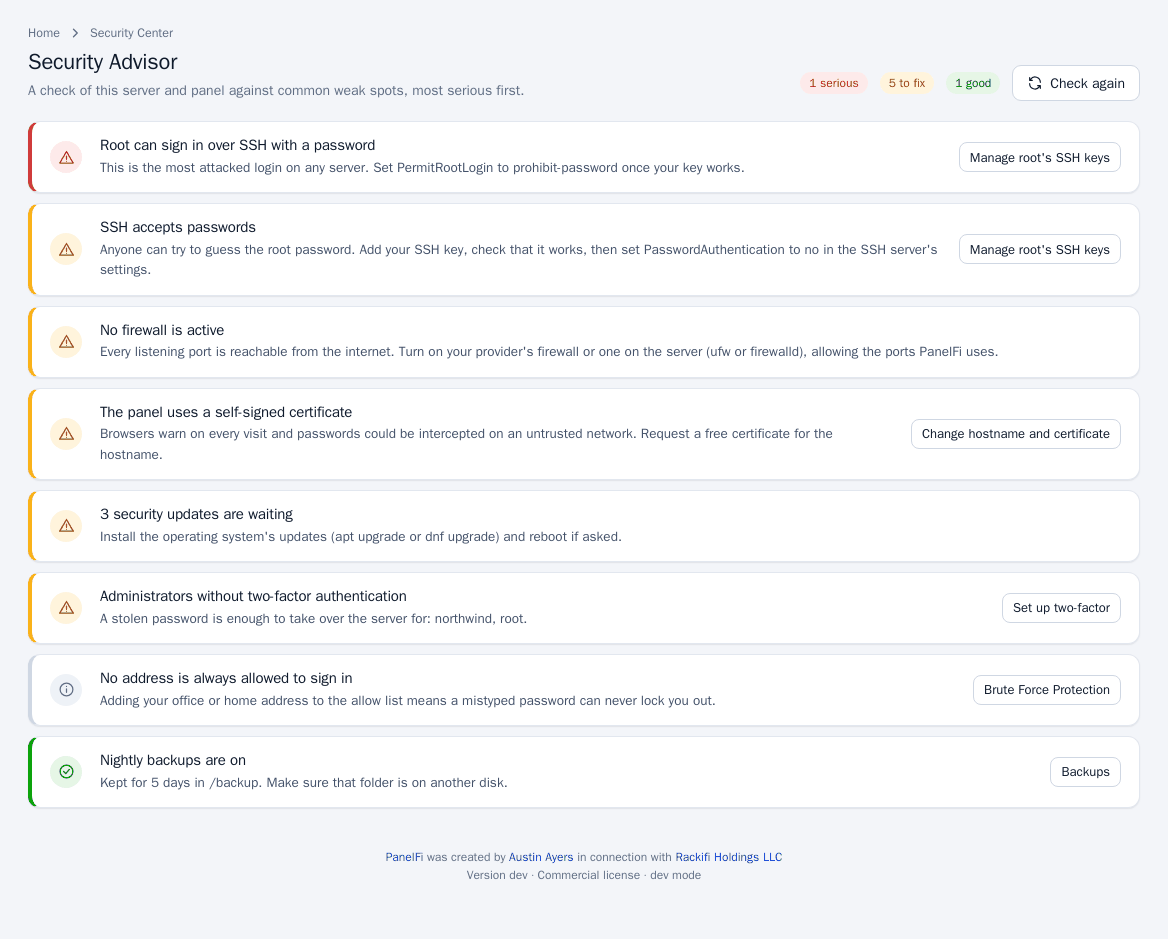
Root's SSH keys
Lists the keys allowed to sign in over SSH as root (/root/.ssh/authorized_keys), with name, type and fingerprint.
- Open Security Center > Manage Root's SSH Keys.
- Under Add a key, paste the Public key (the contents of your
.pubfile; make one withssh-keygen -t ed25519) and click Add key. Never paste a private key. - Use Remove to delete a key.
Keys are safer than a root password; once yours works, turn password sign-in off in the SSH server's settings.
Audit log
Security Center > Audit Log lists every change made in either panel, newest first, including failed logins: when, who, IP, action, target and detail. The latest entries are shown.
Administrators and password
Under Server Configuration > Administrators & Password the root administrator sees everyone with full access to the server panel (username, email, last login and address).
- Add administrator: enter Username, Email and Password (Generate makes one), then Add.
- Change password next to a login: enter the new password and confirm. Changing your own also asks for your current password.
- Remove deletes another administrator (you cannot remove yourself).
Resellers see only a form to change their own password. Resellers themselves are managed in the Reseller Center (Resellers).
Grant support access
Gives someone helping you a temporary administrator login to the panel. It ends on its own, and everything they do is in the audit log under the support user.
- Open Support > Grant Support Access.
- Choose How long: 4 hours, 1 day, 3 days or 7 days.
- Optionally tick Send the login to PanelFi support (needs your license key under Licensing & Billing) and add a ticket number and note.
- Click Grant support access. The address, username and password are shown once; pass them on privately. Renew with a new password makes a new password and signs the old session out; End access now ends it immediately.
The support login is a full administrator of the panel (not an SSH login). Only grant it to people you trust and end it when the work is done.
Notes and limits
- Security Advisor, audit log, SSH keys and two-factor administration are root-only; resellers only see tools listed for them in The two panels.
- Failed sign-ins and lockouts are covered in Firewall and brute-force protection.
Server panel: backups and migration
Backups (server panel)
Where to find it: Server panel > Backup > Backup Configuration ; Server panel > Backup > Backup Restoration
Nightly full or incremental backups of every account, with daily, weekly and monthly retention. Copies go automatically to SFTP servers and S3-compatible storage (AWS S3, Cloudflare R2, Backblaze B2, Wasabi, MinIO). Restore one account or part of it, restore every account onto a new server after a disaster, and let customers restore themselves with RapidBackup.
What it does
Every night PanelFi can save each account: files, mail, databases, email accounts, DNS zones and settings. Each backup is one file per account, <backup folder>/<date>/<account>.tar.gz (<account>.incr.tar.gz for an incremental one), readable by root only.
- Full or incremental backups, with daily, weekly and monthly retention.
- Remote destinations: every backup is copied to SFTP servers and S3-compatible storage, so losing a server or a disk does not lose the backups.
- Restores: a whole account (even a terminated one), just its files and databases, or every account at once on a fresh server.
- RapidBackup: customers restore for themselves, without a ticket.
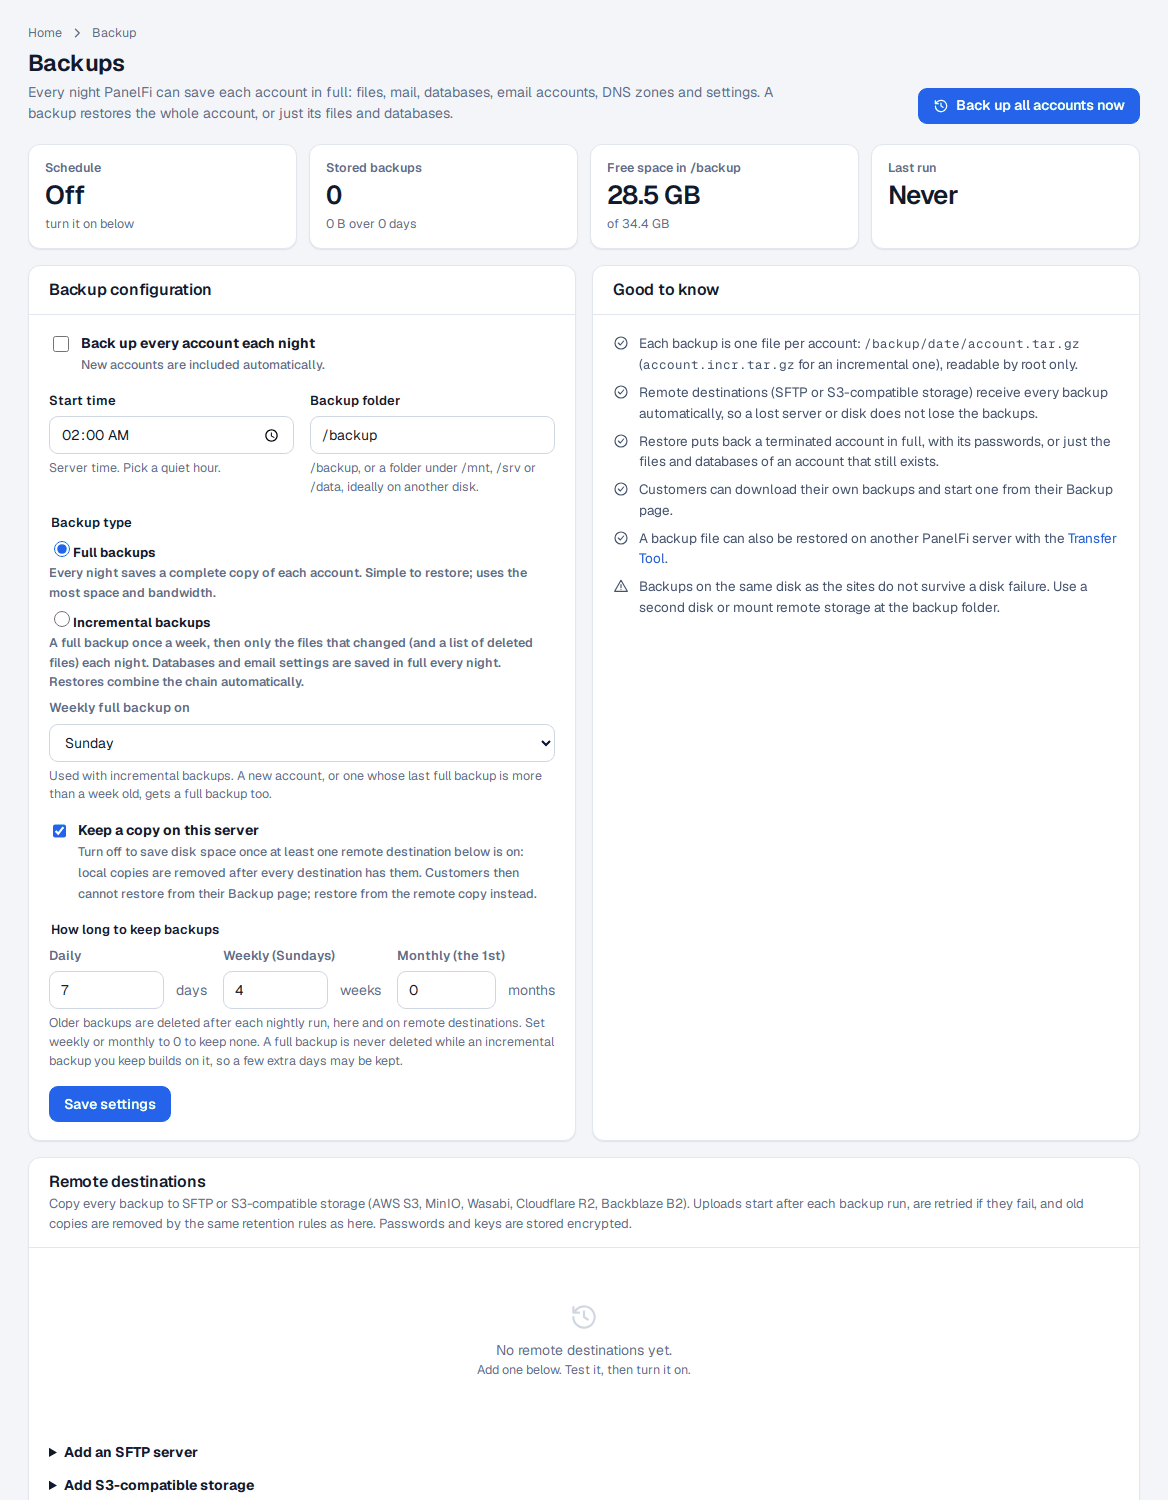
Turn on nightly backups
- Open Backup > Backup Configuration.
- Under Backup configuration, enable Back up every account each night. New accounts are included automatically.
- Set the Start time (server time; pick a quiet hour) and the Backup folder:
/backup, or a folder under/mnt,/srvor/data, ideally on another disk. - Choose the Backup type (next section).
- Under How long to keep backups set Daily (days), Weekly (Sundays) (weeks) and Monthly (the 1st) (months). Older backups are deleted after each nightly run, here and on remote destinations. Set weekly or monthly to 0 to keep none.
- Click Save settings.
The summary shows the schedule and next run, how many backups are stored and their size, free space in the backup folder, and the last run. Back up all accounts now starts a run immediately; its progress and log appear on the page.
Full or incremental backups
| Backup type | How it works | Best for |
|---|---|---|
| Full backups | Every night saves a complete copy of each account. | Small servers; the simplest restores. |
| Incremental backups | A full backup once a week (on the day set in Weekly full backup on), then each night only the files that changed and a list of deleted files. Databases and email settings are saved in full every night. | Large accounts and remote storage: much less space and upload bandwidth. |
Restores combine the chain automatically: you pick a day, and PanelFi applies the full backup and the incremental ones after it. A new account, or one whose last full backup is more than a week old, gets a full backup that night. A full backup is never deleted while an incremental backup you keep builds on it, so a few extra days may be kept.
Remote destinations: SFTP and S3-compatible storage
Under Remote destinations on the Backup Configuration page, add as many destinations as you like. After every backup run the new archives are uploaded to each destination that is on, failed uploads are retried, and old copies are removed by the same retention rules. Passwords and keys are stored encrypted.
Add an SFTP server
- Under Add an SFTP server fill in Name, Host, Port, User, and either a Password or a Private key (without a passphrase).
- Set the Folder on the server. It is created if missing; backups go in dated sub-folders.
- Click Add SFTP server, then Test. The test connects, writes, lists, reads and deletes a small file. The server's host key is pinned on the first test, and a changed key is refused afterwards (Forget host key clears it after a reinstall).
- Click Turn on.
Add S3-compatible storage
- Under Add S3-compatible storage fill in Name, Endpoint, Region, Bucket, an optional Folder in the bucket, the Access key and Secret key.
- Tick Use path-style addressing for MinIO and most self-hosted storage; leave it off for AWS S3, Wasabi and Backblaze B2. For Cloudflare R2 use the endpoint
https://ACCOUNT.r2.cloudflarestorage.comand the regionauto. - Click Add storage, then Test, then Turn on.
The table shows each destination's status, when it last received an upload, and how many files and how much space it holds. Backups there lists what is stored on it.
Keep a copy on this server: once at least one destination is on, you can turn this off to save disk space. Local copies are then removed after every destination has them. Customers then cannot restore from their Backup page; restore from the remote copy instead.
Restore an account
- Open Backup > Backup Restoration. Stored backups lists days; expand a day to see each account with its size, type (full or incremental) and time saved.
- Click Restore on the account. PanelFi opens the same review page the Transfer Tool uses, showing what is in the backup.
- If the account was terminated, choose the package and options and click Restore account. The backup holds the account's password, so it keeps working unless you set a new one.
- If the account still exists, the page offers Restore into <account>: tick Files and mail (files from the backup replace current ones; files added since are kept) and/or Databases (each database is emptied and loaded again), then Restore.
To restore from a remote destination, use Restore from remote storage on the same page: pick a destination to browse the backups stored there, then click Restore on one. PanelFi downloads it, and any backups it builds on, and opens the same review page.
To bring back domains, email accounts, DNS records and passwords of an existing account as well, terminate the account first and restore the whole backup. You can also Download or Delete a stored backup. A backup file can be restored on another PanelFi server with the Transfer Tool (see Migration and transfers).
Disaster recovery: restore every account on a new server
If a server is lost, its accounts can be rebuilt on a new one from a remote destination:
- Install PanelFi on the new server (see Requirements and installation) and sign in.
- In Backup > Backup Configuration, add the same SFTP or S3 destination and press Test.
- In Backup > Backup Restoration, under Restore from remote storage, pick the destination and click Restore every account.
- PanelFi restores the newest backup of every account it finds there, in the background, with their passwords. Accounts that already exist on the new server are skipped. The page shows how many were restored, skipped and failed.
- Point DNS (or the old IP address) at the new server. AutoSSL issues certificates again by itself.
Test this once before you need it: restore one account from your remote destination on a spare server.
RapidBackup: customers restore for themselves
RapidBackup lets customers bring back their whole account, or just files, databases, email accounts, DNS zones or cron jobs, from the server's backups through a restore queue (like JetBackup), without opening a ticket. It uses the nightly backups you configure here: restore points appear as they are made, and the daily retention decides how many are available. Customers can also create a restore point on demand. See Customer backups and RapidBackup. Whether a customer sees it is controlled per package in the Feature Manager.
Notes and limits
- Customers can download their own backups and start one from their Backup page (while local copies are kept).
- Watch the free-space figure on the page; incremental backups need far less space than full ones.
- Backups on the same disk as the sites do not survive a disk failure. Use a second disk, a remote destination, or both.
Migration and transfers
Where to find it: Server panel > Transfers > Transfer Tool
Move hosting accounts into PanelFi from a cPanel and WHM server (over SSH, or from a cpmove or full-backup file) or from CyberPanel. The old server is only read from; nothing on it changes. This page lists what comes across and what does not.
What it does
The Transfer Tool moves accounts here from a cPanel and WHM server: the account, its domains, website files, databases, email accounts with their mail, forwarders, DNS records and cron jobs. CyberPanel is supported over SSH too. For the overall migration plan see Migrate from cPanel.
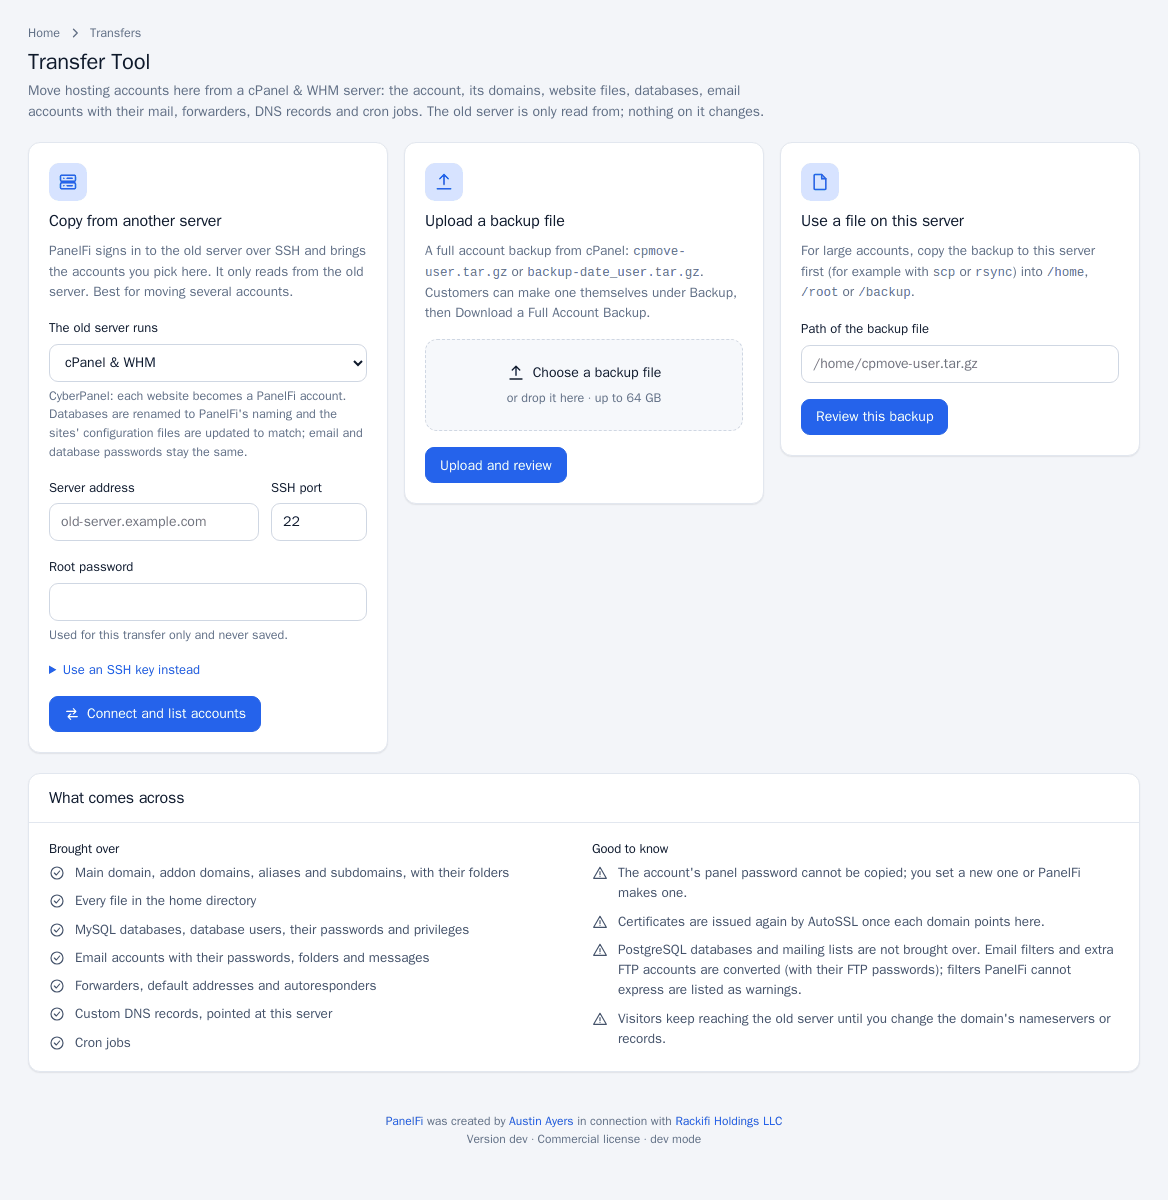
What comes across, and what does not
Brought over
- Main domain, addon domains, aliases and subdomains, with their folders.
- Every file in the home directory.
- MySQL databases, database users, their passwords and privileges.
- Email accounts with their passwords, folders and messages.
- Forwarders, default addresses and autoresponders.
- Custom DNS records, pointed at this server (records that pointed at the old server's address now point here).
- Cron jobs, copied as they were. Check their commands: program paths such as PHP differ between servers.
- Email filters and extra FTP accounts are converted (with their FTP passwords); filters PanelFi cannot express are listed as warnings.
Not brought over
- The account's panel password cannot be copied: you set a new one, or PanelFi makes one and shows it in the report. Email and database passwords stay the same where the old format allows; any that cannot be carried over get new passwords listed in the report (update the site's configuration file with a new database password).
- Certificates are not copied. AutoSSL issues new free certificates once each domain points at this server.
- PostgreSQL databases (PanelFi hosts MySQL/MariaDB) and Mailman mailing lists.
- Forwarders that pipe mail to a program or discard it, wildcard subdomains, and addon domains with a name PanelFi cannot host.
- Resellers: a cPanel reseller account comes across as a regular hosting account; create a reseller in the Reseller Center if needed (see Resellers).
- Database names must start with the account prefix here; databases or users that do not fit are skipped and listed.
Anything skipped appears under Not brought over on the review page and under Things to check in the final report.
Copy from another server over SSH
Best for moving several accounts. PanelFi signs in to the old server and reads from it.
- Open Transfers > Transfer Tool, card Copy from another server.
- Choose what The old server runs: cPanel and WHM or CyberPanel (other panels are listed as coming soon).
- Enter the Server address and SSH port, and either the Root password (used for this transfer only, never saved), or press Use an SSH key instead. With a key, run the shown command on the old server as root so this server's key may sign in, leave the password empty, and later run the shown removal command to take the access away; or paste a private key of your own (with its passphrase if needed).
- Click Connect and list accounts.
- Tick the accounts to copy. Rows with a problem show it. For CyberPanel, first choose One account per CyberPanel user or One account per website, then pick usernames and owners (you, an existing reseller, or a new reseller made under you).
- Under Transfer settings choose the Package (limits come from it; anything over a limit is skipped and listed) and what to bring over: files and mail folders, databases, email accounts and forwarders, custom DNS records, cron jobs.
- Click Copy selected accounts. Accounts are copied one after another; you can leave the page and the transfer keeps running.
Restore from a backup file
- In Upload a backup file, choose or drop a full cPanel backup (
cpmove-user.tar.gzorbackup-date_user.tar.gz), up to the size limit shown, then click Upload and review. Customers can make one themselves under Backup, Download a Full Account Backup. - For large accounts, copy the file to the server first (for example with scp or rsync) into
/home,/rootor/backup. In Use a file on this server enter the Path of the backup file and click Review this backup. - The review page, What is in this backup, lists main domain, addon domains, aliases, subdomains, file count and size, databases and users, email accounts, forwarders, cron jobs, the old server's address and the Not brought over notes.
- Pick the Package, set a New panel password (and confirm) and click Start transfer. For a PanelFi backup the button reads Restore account.
Read the report
When it finishes, each account shows Transferred or Failed with the reason. Copy the new panel password, new email passwords and new database passwords from the report; they are shown only there (the panel password can be changed later on the account's page). Use Open account to go to it. Recent transfers lists runs until the panel restarts or a day after they finish.
After the transfer: switch DNS
Visitors keep reaching the old server until you change the domain's nameservers at the registrar, or update its A record, to point at this server (see DNS zones). AutoSSL then issues certificates by itself (see AutoSSL). Lowering the TTL a day before the move shortens the switch-over.
Notes and limits
- The old server is only read from; nothing on it changes.
- Accounts are copied one after another.
- On CyberPanel, databases are renamed to
username_nameandwp-config.phpand similar files are updated in the copy. - Restoring a stored PanelFi backup uses the same review page; see Backups.
Server panel: mail, databases and server
Email server administration
Where to find it: Server panel > Service Configuration > Mail Server Configuration ; Server panel > Email > Hostname Email Deliverability ; Mail Queue Manager ; Mail Delivery Reports ; Greylisting ; Server panel > Service Configuration > FTP Server Configuration
Set the limits and spam protections of the mail server (Postfix and Dovecot), check that the server hostname can send mail others accept, watch the queue and delivery attempts, and switch greylisting on or off.
Mail server limits and protections
Settings here apply to every domain on the server.
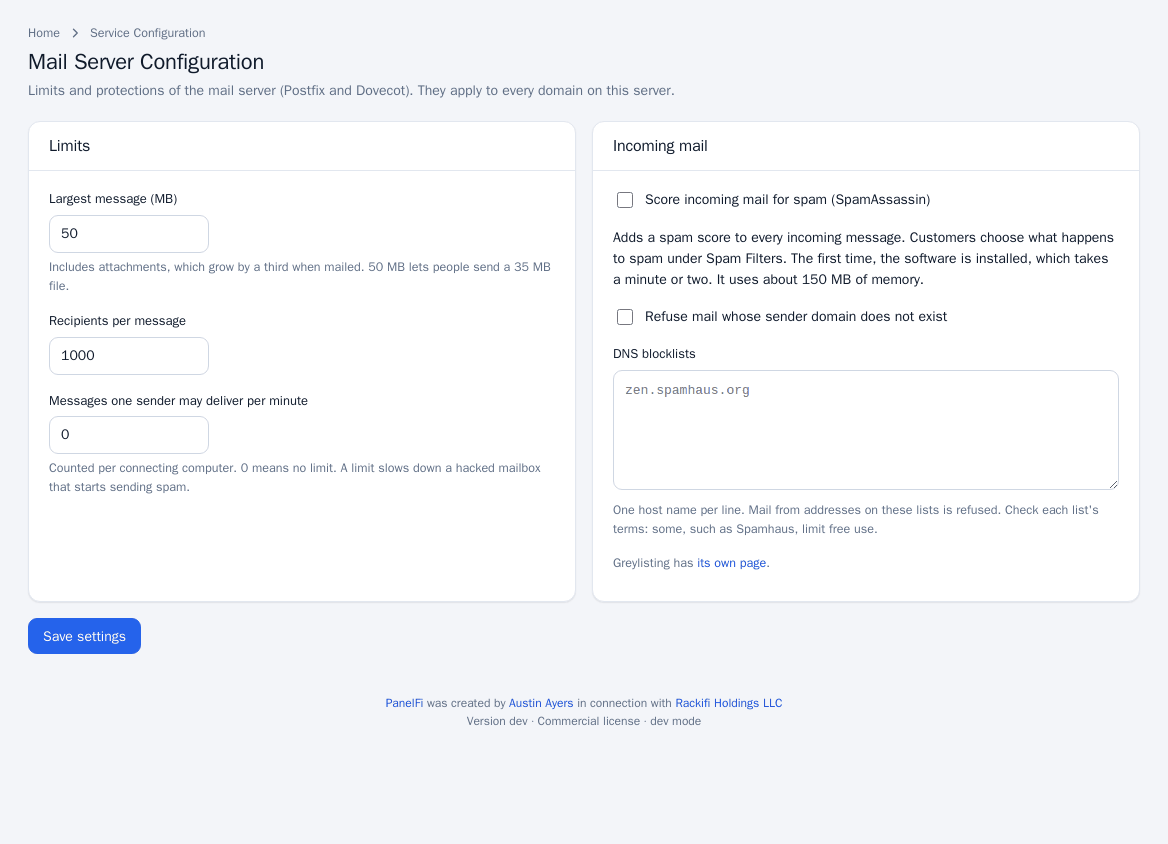
- Open Service Configuration > Mail Server Configuration.
- Under Limits set the Largest message (MB) (attachments grow by a third when mailed, so 50 MB lets people send a 35 MB file), Recipients per message, and Messages one sender may deliver per minute (counted per connecting computer; 0 means no limit; it slows down a hacked mailbox that starts sending spam).
- Under Incoming mail optionally turn on Score incoming mail for spam (SpamAssassin). It adds a spam score to every message; customers choose what happens to spam under Spam Filters. The first time it is installed, taking a minute or two, and it uses about 150 MB of memory. A status badge shows Running or Not running.
- Optionally enable Refuse mail whose sender domain does not exist and list DNS blocklists, one host name per line. Check each list's terms: some, such as Spamhaus, limit free use.
- Click Save settings.
Hostname email deliverability
Bounces, cron and system notices are sent as the server's hostname, and other mail servers check that hostname when this server connects. This page checks the records they look at, in public DNS.
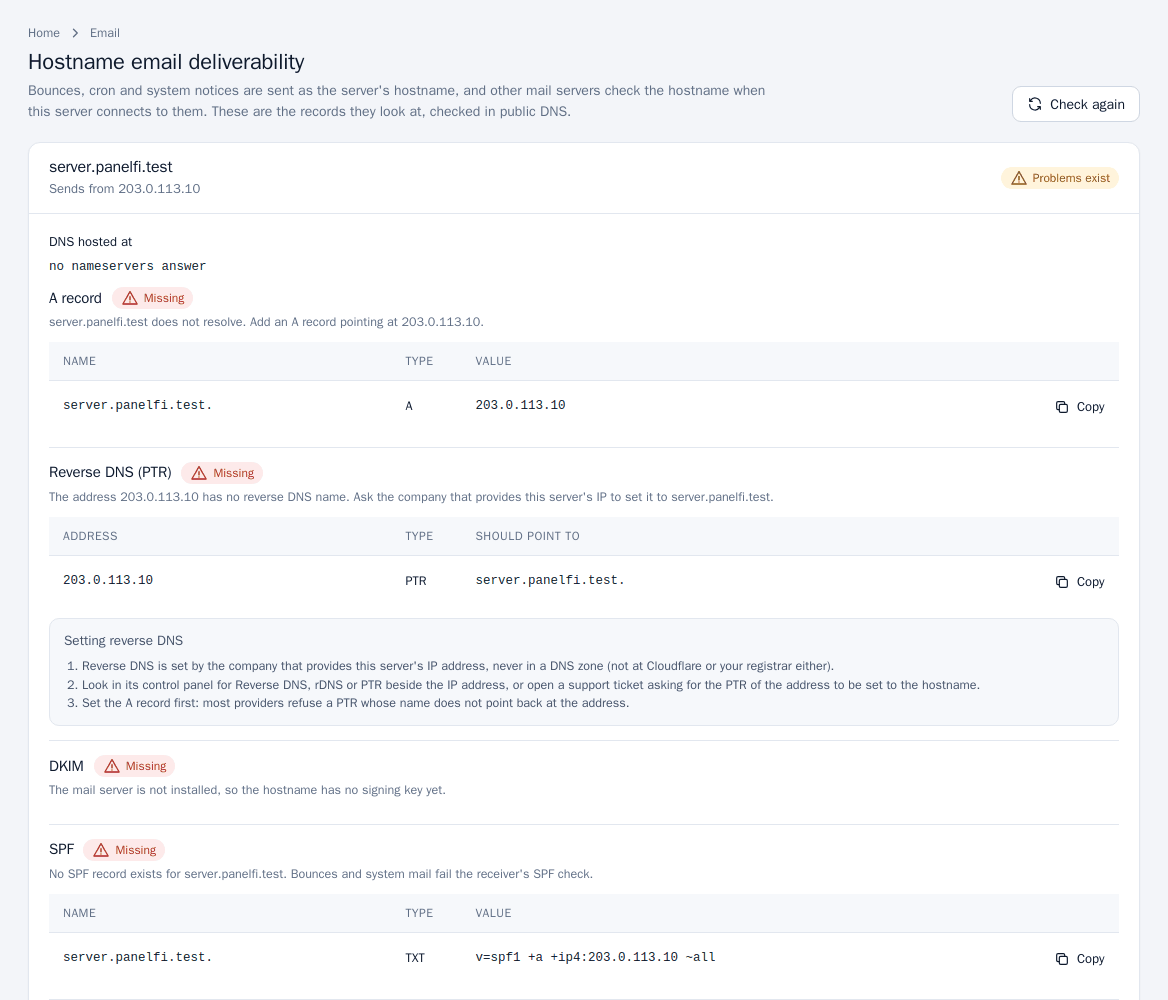
- Open Email > Hostname Email Deliverability. The header shows the hostname, the address it sends from and an overall Valid or Problems exist result.
- Each check (A record, reverse DNS (PTR), DKIM and SPF) shows its status, an explanation and what public DNS returns. For a failing one, a table gives the name, type and value to add, with a Copy button.
- If the hostname's zone is on this server and it is authoritative, click Add the missing records to <zone>. Otherwise add them at the DNS host shown (the page lists steps for it). Reverse DNS (PTR) cannot be added here; it is set at your hosting provider, and the page shows steps.
- Click Check again after changing DNS.
Mail Queue Manager
Lists messages waiting for delivery: age and ID, sender, recipients, size and status. Deferred messages are retried automatically for up to five days. Use Retry all now to try again immediately, Delete on a message, or Delete all (type delete to confirm; senders are not told).
Mail Delivery Reports
Every delivery attempt of the mail system, newest first, with the reply of the receiving server. Use it to see why a message bounced. Messages still waiting are in the Mail Queue Manager.
Greylisting
Greylisting asks a mail server this server has not heard from before to come back in a few minutes. Real mail servers do; most spam software never tries twice.
- Open Email > Greylisting, set Ask new senders to come back after (seconds) (300 is usual) and turn it on. The first time, the greylisting software (postgrey) is installed.
- Use Save delay to change the delay or Turn greylisting off.
Mail your customers send through this server is never delayed, nor is mail from senders that delivered before. Large providers that send from many servers are on a built-in exception list. One-time codes and password-reset mail from new senders can arrive minutes late; if customers depend on them, leave greylisting off and rely on spam scoring.
FTP server
Service Configuration > FTP Server Configuration shows the Pure-FTPd settings (port 21 for FTP and explicit FTPS, passive ports 30000 to 30049, the panel's certificate, anonymous FTP off), the number of logins and a list of extra FTP accounts customers created. If it is not installed, run bash /usr/local/panelfi/share/ftp/install-ftp.sh as root. Open ports 21 and 30000 to 30049 in any firewall in front of the server.
Notes and limits
- The mail ports to open are 25, 465, 587, 993 and 995 (see Requirements and install).
- Per-domain DNS records for customers (SPF, DKIM, DMARC) are in the Customer panel: Email deliverability.
Databases (server panel)
Where to find it: Server panel > SQL Services > Manage Databases ; phpMyAdmin ; Show MySQL Processes ; Additional MySQL Access Hosts
See every customer database and who owns it, open phpMyAdmin as the administrator, end stuck MySQL connections and decide which remote hosts may connect to databases on this server.
Manage Databases
Lists every customer database with its owning account, size, users and creation date. Open phpMyAdmin signs you into phpMyAdmin with single sign-on (also available as the phpMyAdmin tile under SQL Services).
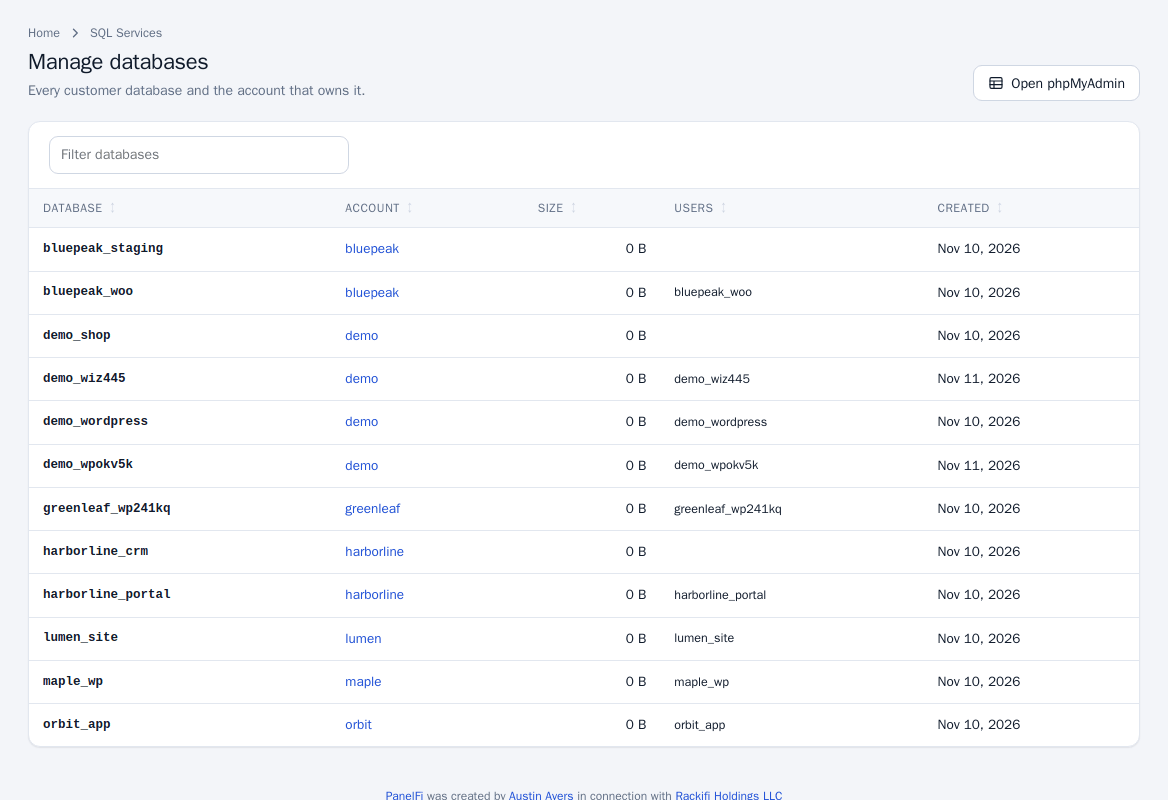
Show MySQL Processes
Every connection to the database server right now, longest-running first: ID, user, host, database, state, time and query. Click End on one that is stuck or is slowing the server, and Refresh to reload.
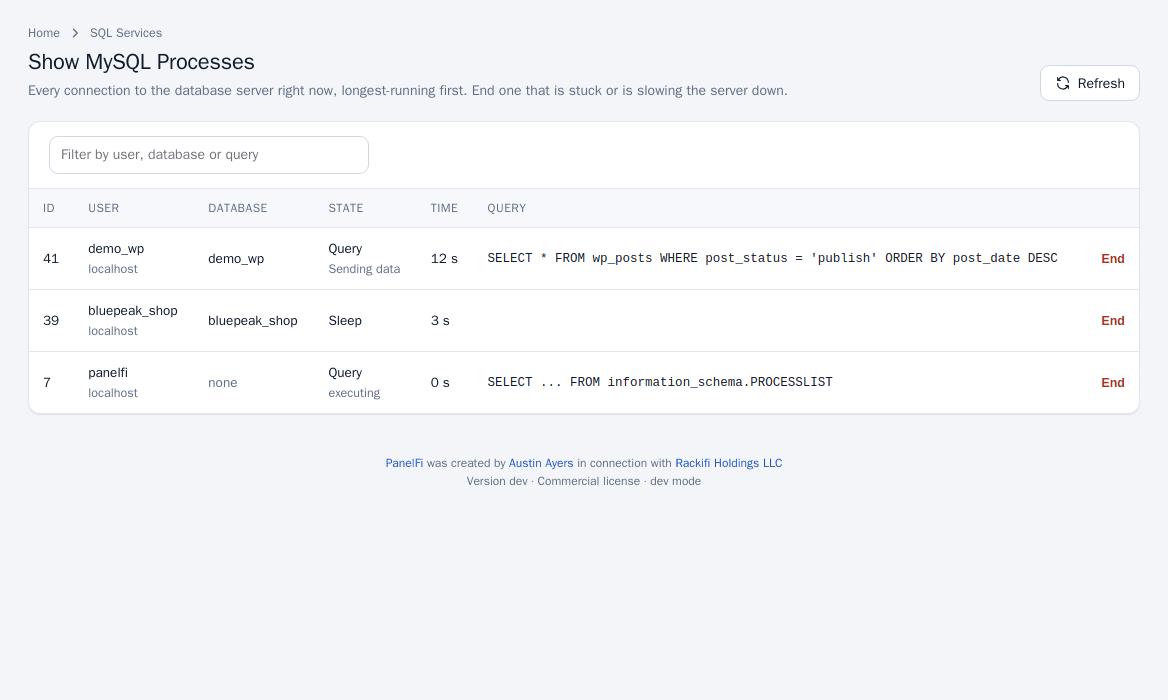
Allow remote database access
By default the database server only listens to this server itself. To let programs on other servers connect:
- Open SQL Services > Additional MySQL Access Hosts.
- Click Accept connections from other servers. The database server then listens on port 3306 on every address; PanelFi opens the port in the server's firewall when one is active. A firewall at your hosting provider has to allow it too.
- Under Allow a host for every account enter an Address or host name (use
%as a wildcard) and click Add host.
Only hosts on the lists can sign in, and only with a database user's own name and password. Hosts allowed for every account can be removed; Hosts added by accounts shows what customers added for themselves under Remote Database Access (see Remote database access). Refuse connections from other servers turns it off again.
Notes and limits
- Resellers do not have these tools.
- Customers create databases and users in their own panel: Databases.
Server status and system health
Where to find it: Server panel > Server Status > Server Dashboard ; Resource Usage ; Service Status ; Task Queue Monitor ; Server panel > System Health ; Server panel > System Reboot ; Server panel > Restart Services
Live charts of CPU, memory, network and disk; per-account resource usage; running services you can restart; running processes; disk usage; and a graceful reboot.
Server Dashboard
The home page of the server panel shows the hostname, OS, uptime and web server, plus tiles for CPU, Memory, Load (1, 5 and 15 minutes), Disk on /home, Network in and out with the process count, and Accounts (with suspended, domains and SSL failures). A warning appears if services are not running, linking to Service Status. Below are charts: CPU busy, Memory used, Network, Disk I/O, Load average and Bandwidth served by websites. Pick a time range above the charts.
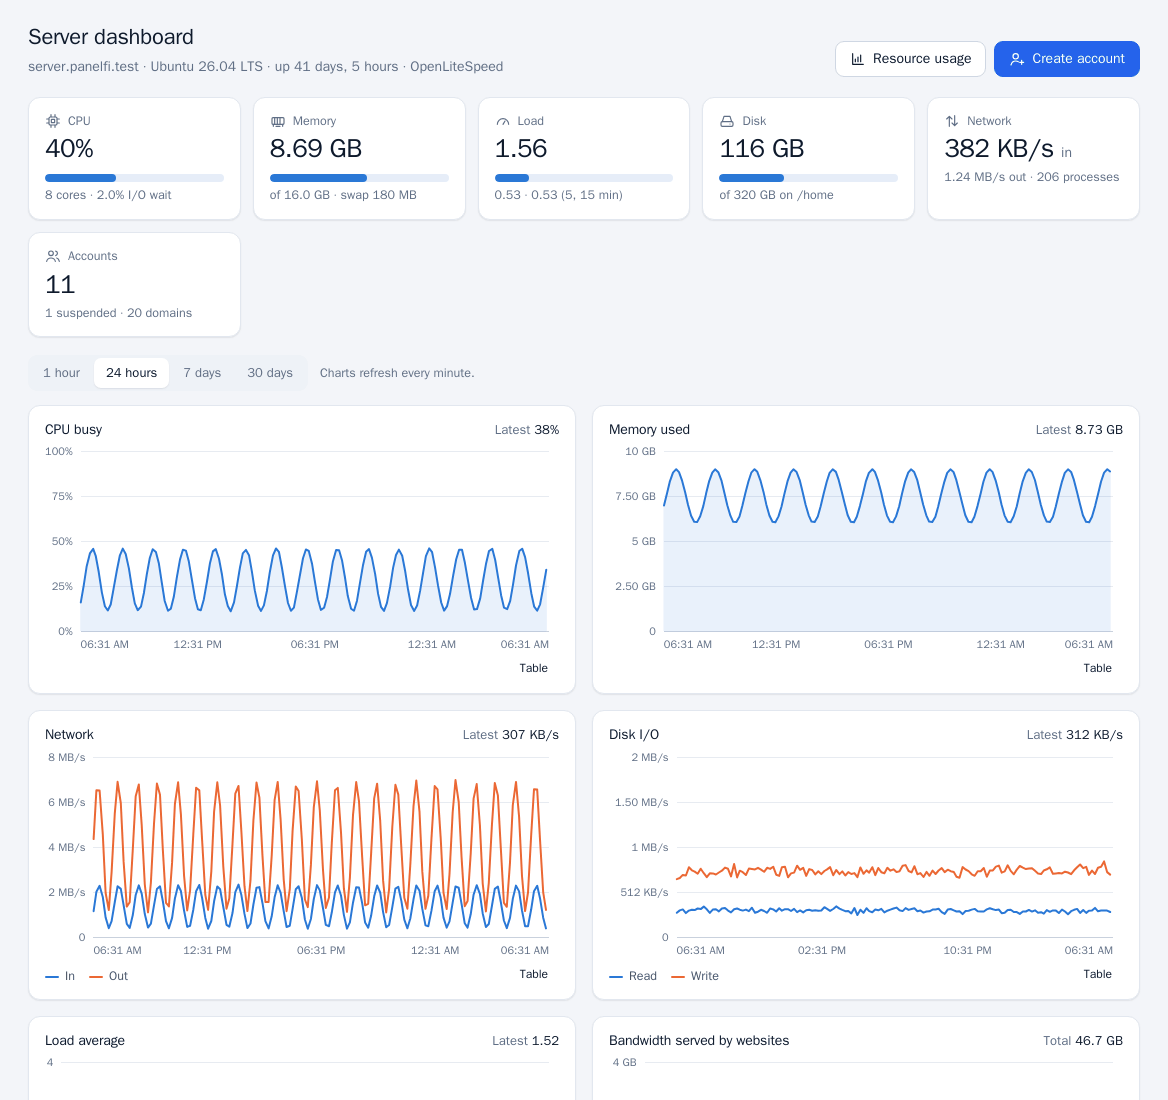
Resource Usage
One table of every account's CPU now and 24-hour average, memory, processes, bandwidth for the month against its limit, disk (files and databases) against its limit, files (inodes) and databases. CPU is a percentage of one core, so two full cores show 200%. Click a column to sort, or an account for its charts. Resellers see their own accounts only.
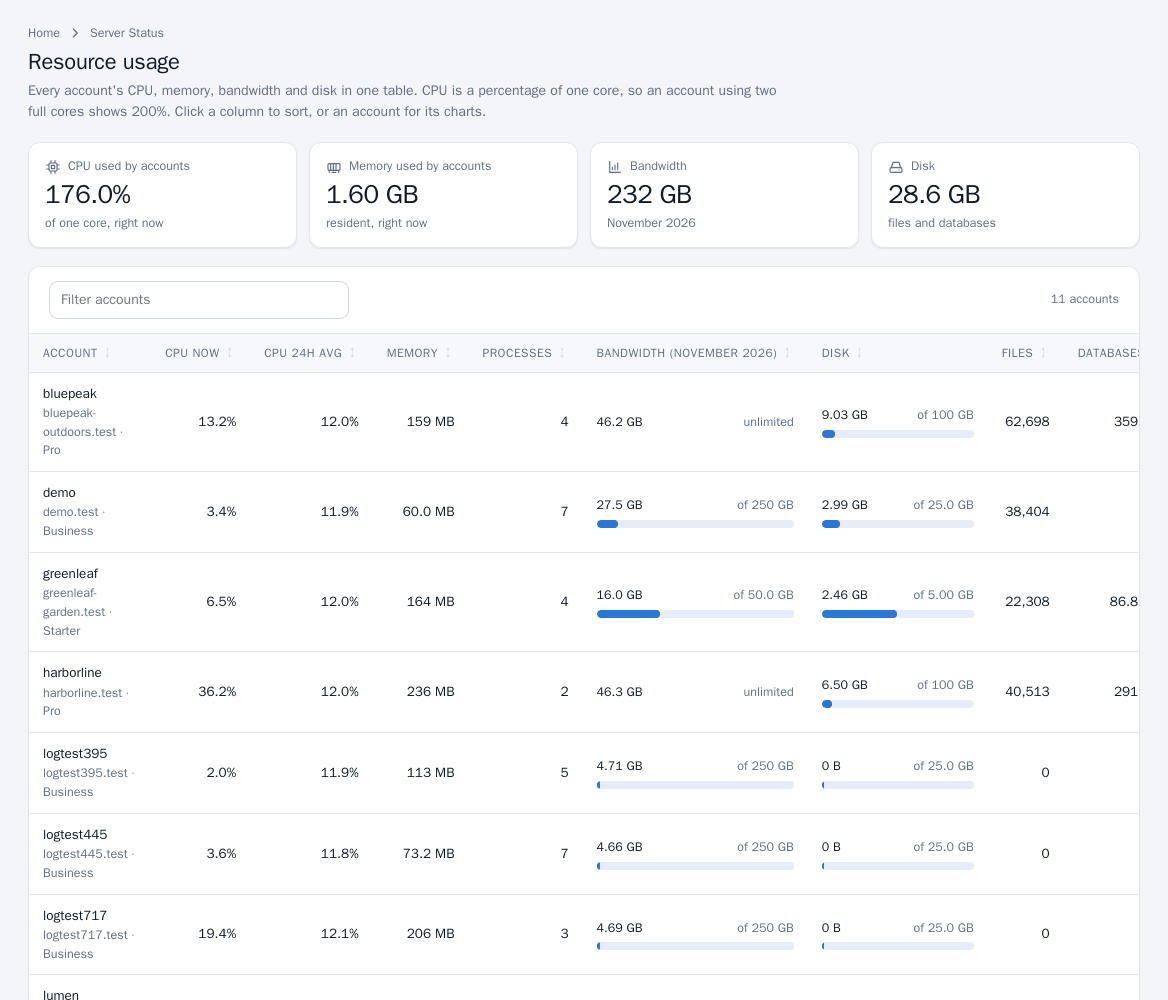
Service Status and restarting services
- Open Server Status > Service Status (the same page serves Service Manager and Restart Services).
- Each managed service shows whether it is Running and whether it starts at boot.
- Click Restart (or Start for a stopped one). Restarting the web server briefly pauses new connections; open ones finish.
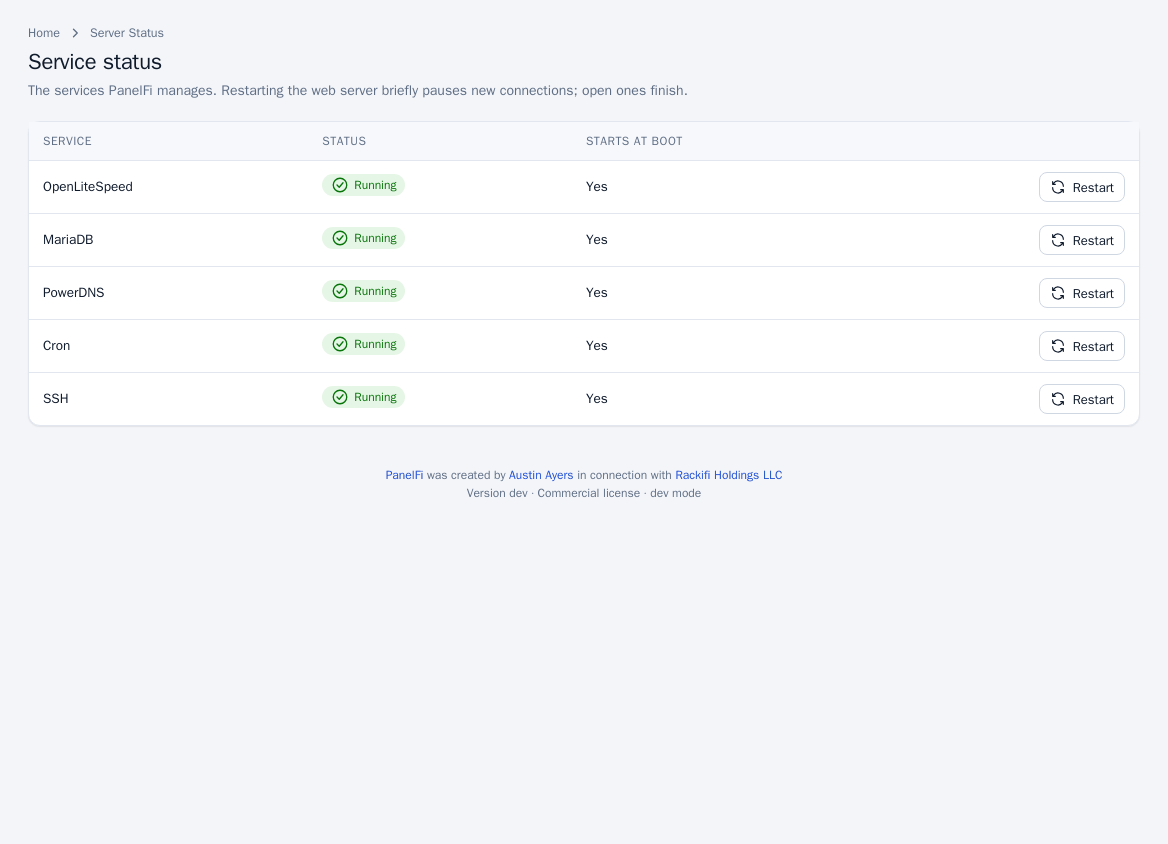
Task Queue Monitor
Opens the web server page at its background-job section, where a web server switch is tracked. See Web server.
Processes and disk usage
- System Health > Show Current Running Processes lists PID, user, CPU, memory, resident memory and command, sorted by CPU; Refresh reloads.
- System Health > Show Current Disk Usage opens the disks table in Server Information (mount, used, free, size, usage).
Graceful reboot
- Open System Reboot > Graceful Server Reboot.
- Type
rebootto confirm and click Reboot now.
Rebooting restarts the whole machine. Websites, email and the panel are offline until it comes back, usually within two minutes.
Get alerted
PanelFi can email you or post to a webhook when a service stops or a disk passes 90%; see Contact Manager.
Server settings
Where to find it: Server panel > Server Configuration > Basic Setup ; Tweak Settings ; Server Time ; Terminal ; Server panel > Networking Setup > Change Hostname ; Resolver Configuration ; Server panel > IP Functions ; Server panel > Support > Server Information
The server-wide defaults and behaviour switches: contact email, shared IP and nameservers, AutoSSL, two-factor enforcement, time zone, hostname, resolvers, extra IP addresses and the root terminal.
Basic Setup
Server-wide defaults used when accounts, zones and certificates are created.
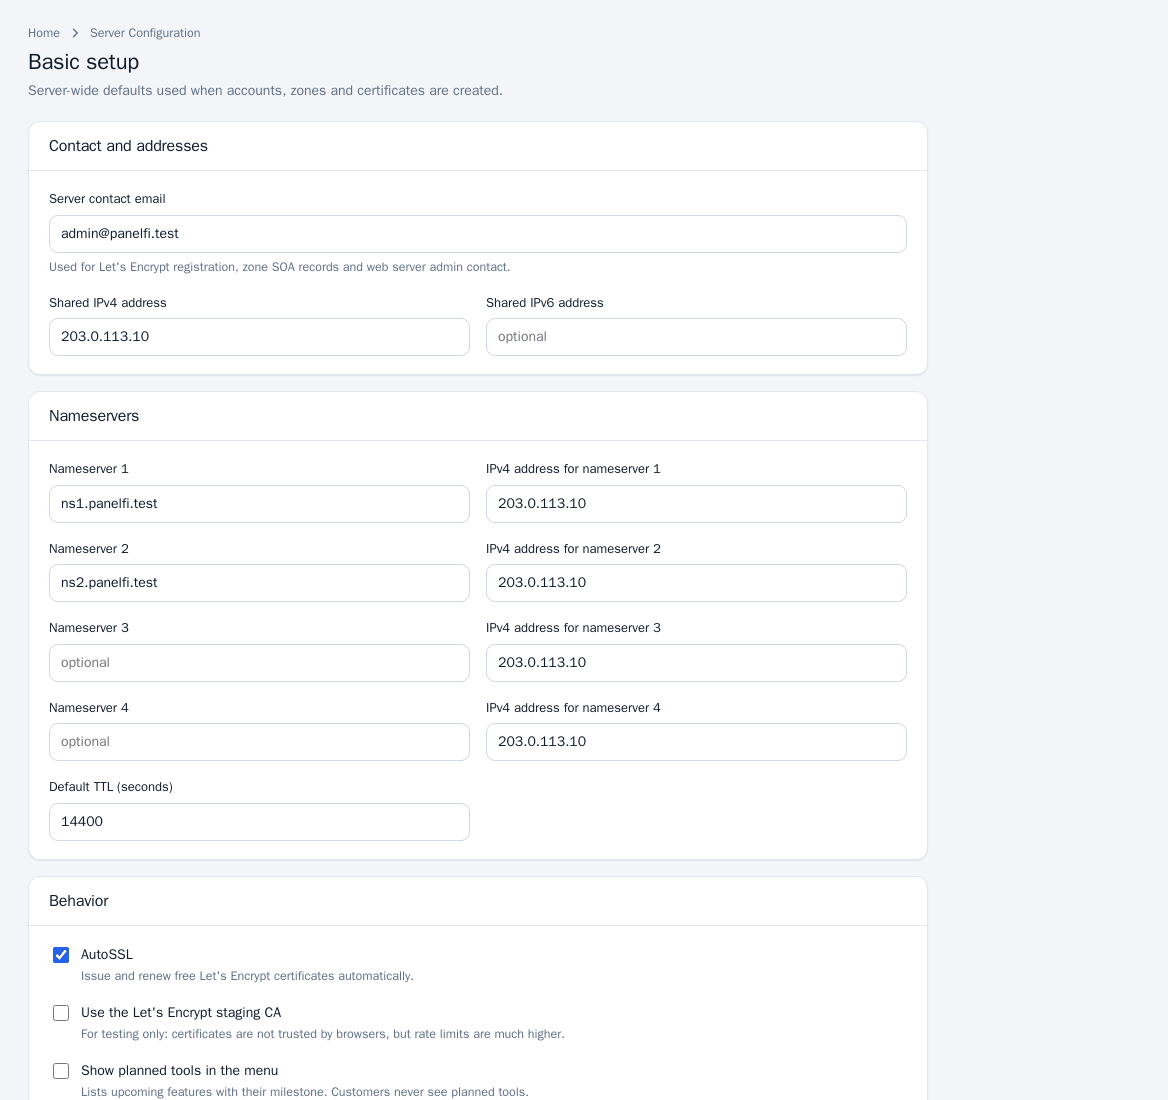
- Open Server Configuration > Basic Setup.
- Under Contact and addresses set the Server contact email (used for Let's Encrypt registration, zone SOA records and web server admin contact), the Shared IPv4 address and Shared IPv6 address.
- Under Nameservers enter up to four nameserver host names, each with its IPv4 address, and the Default TTL (seconds).
- Under Behavior choose AutoSSL, Use the Let's Encrypt staging CA (testing only: not trusted by browsers, much higher rate limits) and Show planned tools in the menu (customers never see planned tools).
- Click Save settings.
Tweak Settings
Settings that change how the panels behave for everyone.
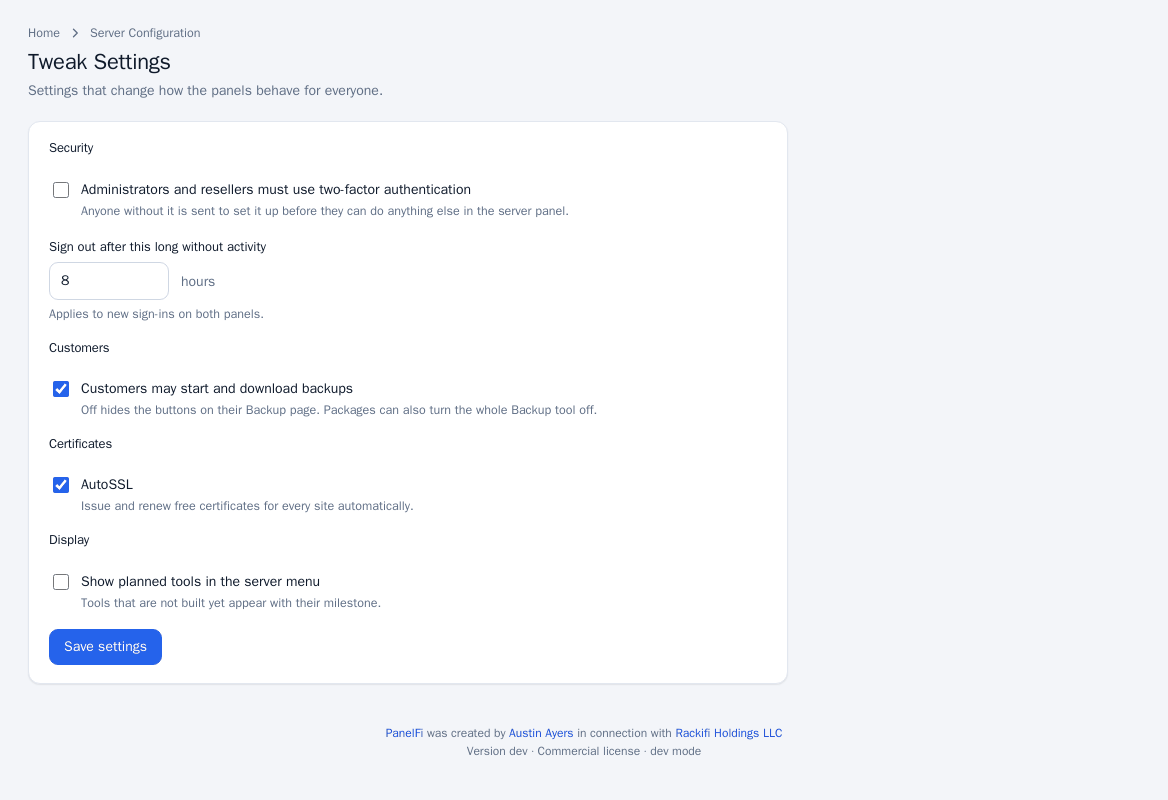
- Administrators and resellers must use two-factor authentication: anyone without it is sent to set it up before doing anything else in the server panel (see Administrator security).
- Sign out after this long without activity (hours): applies to new sign-ins on both panels.
- Customers may start and download backups: off hides those buttons on the customer Backup page. Packages can also turn the whole Backup tool off.
- AutoSSL and Show planned tools in the server menu, same as in Basic Setup.
Click Save settings to apply.
Server Time
Server Configuration > Server Time shows the clock, time zone and whether it is synchronized with a time server. Choose a Time zone and click Set time zone. Scheduled backups, cron jobs and log times follow it. If the clock is not synchronized, install or start a time service such as chrony or systemd-timesyncd.
Change hostname
Networking Setup > Change Hostname: enter the server's fully qualified name (at least three parts, such as server.example.com; it must not be a domain hosted for a customer) and click Change hostname. Point an A record for it at this server before requesting a panel certificate (see Custom and hostname certificates).
Resolver Configuration
The DNS servers this server asks when it looks up other domains, for example to deliver mail or issue certificates (not the nameservers of your hosted domains). Enter a primary, secondary and third resolver and click Save resolvers. A wrong address stops mail delivery and certificate renewals. If the operating system manages the resolvers, they are shown read-only; change them in its network settings.
IP addresses
- IP Functions > Show IP Address Usage lists the addresses on the server and which accounts use them (shared, dedicated or free).
- Add a New IP Address: enter an address your provider has routed to this server, a prefix length (usually 32 for an extra IPv4, 64 for IPv6) and the interface, then Add address. PanelFi brings it up now and at every boot; it does not edit the server's own network configuration, and only addresses added here can be removed here.
- Change Site's IP Address: choose an account and either the shared address or a free dedicated one, then Change IP address. The account's DNS A records and SPF entries move to the new address, and websites keep working throughout.
Server Information and Terminal
- Support > Server Information shows hostname, OS, kernel, uptime, web server, PanelFi version, processor, CPUs, load, memory, swap and disks.
- Server Configuration > Terminal is a command line on the server as root. Everything typed runs with full control of the server, so close the page when you are done. Opening and closing a session is recorded in the Audit Log.
Notes and limits
- These pages are root-only, except those listed for resellers in The two panels.
- Nameserver records and zones are covered in Nameservers.
Contact Manager (notifications)
Where to find it: Server panel > Server Contacts > Contact Manager
Choose what PanelFi tells you about, and where: by email and to a chat channel through a webhook (Discord, Slack and others).
What it does
PanelFi can notify the administrator when something needs attention. The same problem is not reported more than once an hour.
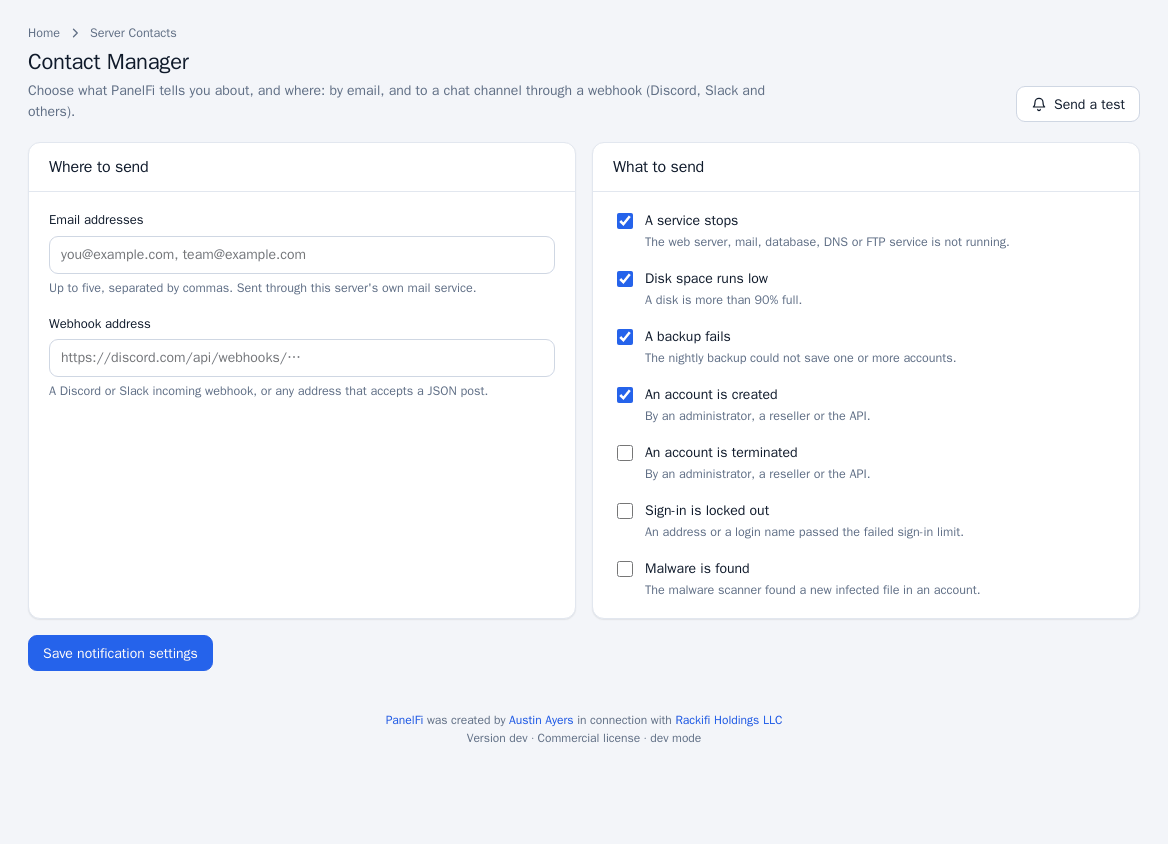
Set up notifications
- Open Server Contacts > Contact Manager.
- Under Where to send enter Email addresses (up to five, separated by commas; sent through this server's own mail service) and/or a Webhook address (a Discord or Slack incoming webhook, or any address that accepts a JSON post).
- Under What to send tick the events you want:
- A service stops (web server, mail, database, DNS or FTP is not running)
- Disk space runs low (a disk is more than 90% full)
- A backup fails (the nightly backup could not save one or more accounts)
- An account is created (by an administrator, a reseller or the API)
- An account is terminated (same)
- Sign-in is locked out (an address or login name passed the failed sign-in limit)
- Malware is found (the malware scanner found a new infected file)
- Click Save notification settings.
- Click Send a test to check delivery.
Notes and limits
- Malware owners can also be told directly; see Malware Scanner.
- Customers set their own contact email under Contact Information in the Customer panel (see Account security).
Server panel: API and integrations
API tokens and API shell
Where to find it: Server panel > Security Center > Manage API Tokens ; Server panel > Development > API Shell
A JSON REST API on the server panel's port (2087) lets billing software and scripts create, suspend, change and remove accounts. Create a token, try calls in the API Shell, then automate with curl.
What it does
The API lives under /api/v1 on the server panel (for example https://server.example.com:2087/api/v1). A token acts as the administrator or reseller who created it, with the same access. Resellers' tokens only see and manage their own accounts.
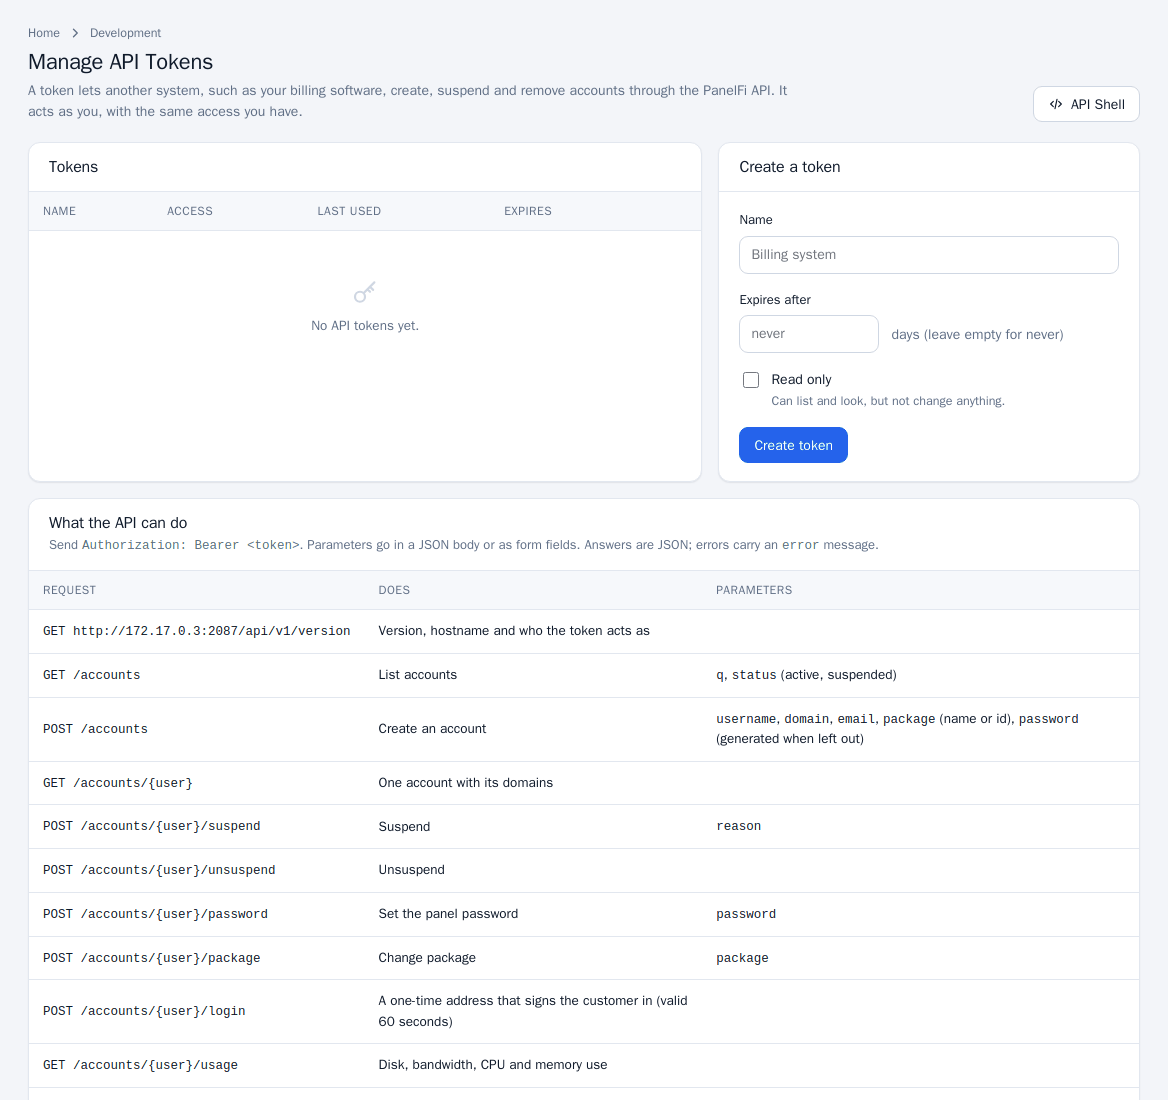
Create a token
- Open Security Center > Manage API Tokens.
- Under Create a token enter a Name, optionally Expires after (days) (empty for never) and tick Read only if it should only list and look.
- Click Create token. Copy the token now; it is not shown again. The page also shows a ready-made
curlexample. - The Tokens list shows access (Full or Read only), last use and address, and expiry. Revoke removes one.
Resetting an administrator's password revokes that administrator's tokens.
Call the API
Send Authorization: Bearer <token>. Parameters go in a JSON body or as form fields. Answers are JSON; errors carry an error message.
curl -H "Authorization: Bearer $TOKEN" https://server.example.com:2087/api/v1/accounts

curl -X POST -H "Authorization: Bearer $TOKEN" -H "Content-Type: application/json" \
  -d '{"username":"acme","domain":"acme.example","email":"[email protected]","package":"Starter"}' \
  https://server.example.com:2087/api/v1/accounts
Endpoints
| Request | Does | Parameters |
|---|---|---|
GET /version | Version, hostname and who the token acts as | |
GET /accounts | List accounts | q, status (active, suspended), fields=usage adds disk and bandwidth use to every account |
POST /accounts | Create an account | username, domain, email, package (name or id), password (generated when left out), owner (administrator tokens) |
GET /accounts/{user} | One account with its domains | |
POST /accounts/{user}/suspend | Suspend | reason |
POST /accounts/{user}/unsuspend | Unsuspend | |
POST /accounts/{user}/password | Set the panel password | password |
POST /accounts/{user}/package | Change package | package |
POST /accounts/{user}/login | A one-time address that signs the customer in (valid 60 seconds) | |
GET /accounts/{user}/usage | Disk, bandwidth, CPU and memory use | |
DELETE /accounts/{user} | Terminate the account | |
GET /packages | List packages | |
GET /domains | List every domain |
Reseller endpoints (administrator tokens only)
A reseller's token is refused on these.
| Request | Does | Parameters |
|---|---|---|
GET /resellers, GET /resellers/{name} | List resellers or show one | |
POST /resellers | Create a reseller login | username, password, email, max_accounts, disk_mb, bandwidth_mb |
POST /resellers/{name}/limits | Change limits | max_accounts, disk_mb, bandwidth_mb, email |
POST /resellers/{name}/suspend, /unsuspend | Suspend or restore the reseller and their accounts | |
POST /resellers/{name}/password | Set the reseller's password | password |
DELETE /resellers/{name} | Remove the reseller; their accounts move to a new owner | new_owner |
API Shell
Open Development > API Shell to try calls from the browser: choose GET, POST or DELETE, type the path after the base address, add a JSON body for POST and click Send. Examples for version, suspended accounts, packages and domains are one click away. Requests run as you, so changes are real.
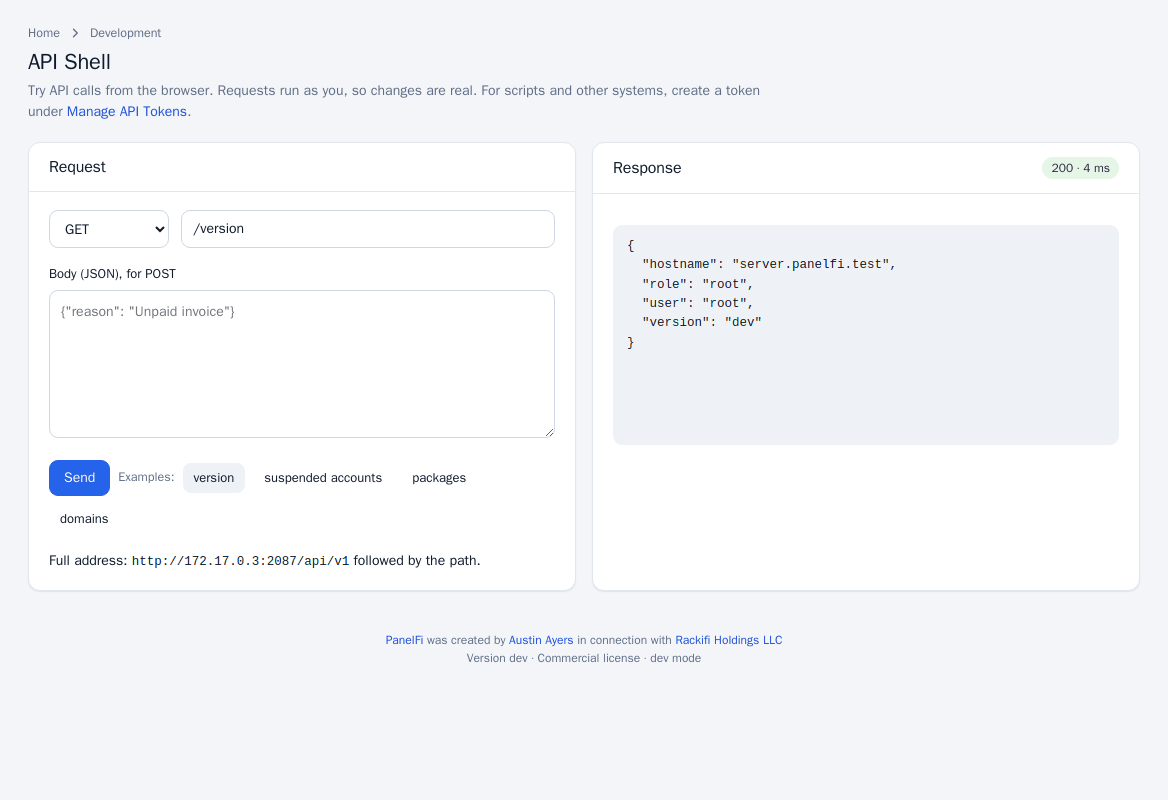
Notes and limits
- A read-only token can use GET only; other methods return 403.
- After repeated wrong tokens an address is blocked for a while; it also appears in the sign-in history (see Brute-force protection).
- When the panel is locked by a license problem, changes through the API are refused while reading still works; hosting keeps running (see Licensing and updates).
- The license-management partner API is a separate service: see Partner program and licensing.
WHMCS provisioning module
Where to find it: WHMCS > System Settings > Products/Services > Servers (module: PanelFi)
A provisioning module that lets WHMCS create and manage PanelFi hosting accounts and reseller logins through the PanelFi API. It needs WHMCS 8.0 or later and PHP 8.1 or later with curl.
What it does
The module talks to the PanelFi REST API (https://HOST:2087/api/v1) with an API token. It creates, suspends, unsuspends, terminates and changes accounts, syncs usage, and gives customers one-click sign-in. It has no dependencies other than the curl extension.
Install
- Copy the
modules/servers/panelfifolder to<whmcs>/modules/servers/panelfi. - In the server panel create an API token under Manage API Tokens (see API tokens and API shell). Use an administrator token, not a read-only one. A reseller's token can create hosting accounts for that reseller but cannot create resellers.
- In WHMCS go to System Settings > Products/Services > Servers and add a server: Module PanelFi; Hostname (or the IP field); Access Hash the API token (it can instead go in Password; the Access Hash is used first); Secure ticked for HTTPS; Port 2087; leave Username empty.
- Press Test Connection. WHMCS reports the PanelFi error if it fails.
- Create a server group if you want one, then create a product with module PanelFi and set the options below.
Product options
| Option | Meaning |
|---|---|
| Package name | Exact name of a PanelFi package. Hosting products need it. |
| Reseller product | Tick to create a reseller login instead of a hosting account. |
| Reseller: max accounts | Accounts the reseller may create. 0 or empty is unlimited. |
| Reseller: disk (MB) | Total disk the reseller may hand out in packages. 0 or empty is unlimited. |
| Reseller: bandwidth (MB) | Total monthly bandwidth the reseller may hand out. 0 or empty is unlimited. |
| Accept self-signed certificate | Skip certificate verification for this product's calls. |
Turn on "Automatically setup the product as soon as you receive payment" or the option you prefer; the module does not change how WHMCS triggers actions.
What each action does
| WHMCS action | PanelFi call |
|---|---|
| Create | POST /accounts with username, domain, password, email and package; the account's IP is saved as the service's dedicated IP. Reseller product: POST /resellers. |
| Suspend | POST /accounts/{user}/suspend (the reason is passed on). Reseller: POST /resellers/{name}/suspend, which also suspends the reseller's accounts. |
| Unsuspend | POST .../unsuspend. For a reseller, only the accounts the reseller's suspension suspended come back. |
| Terminate | DELETE /accounts/{user}. Reseller: DELETE /resellers/{name}?new_owner=<token owner>; the reseller's accounts are not deleted, they move to the owner of the API token. |
| Change Password | POST .../password |
| Change Package | POST /accounts/{user}/package. Reseller: POST /resellers/{name}/limits with the product's limits. |
| Usage update | GET /accounts?fields=usage |
| Log in to control panel | POST /accounts/{user}/login returns a one-time link, valid for 60 seconds. |
| Server sync / import | GET /accounts fills the WHMCS Import / Sync list. |
Every call is written to the WHMCS Module Log (System Logs, Module Log, with module logging on). The API token and passwords are masked. On failure the module returns the PanelFi error text, for example no package named Gold.
Reseller products
A reseller product creates a PanelFi reseller login with the limits you set; it does not create a hosting account. The reseller signs in at https://HOST:2087/ with the service username and password and creates their own customers and packages inside the limits. PanelFi has no one-time sign-in for resellers, so "Log in to the control panel" opens the sign-in page. Reseller accounts need a PanelFi edition that includes resellers; if the server refuses, the error says so.
Single sign-on and usage sync
- Customers: the client area shows Log in to control panel (one-time link) and Webmail (
https://HOST:2096/). Staff get the same link from the service page. - Staff: "Open the PanelFi server panel" opens the admin sign-in page; staff use their own administrator login.
- Usage: WHMCS runs
UsageUpdatefrom its daily cron. The module reads disk and bandwidth for all accounts in one call and updatesdiskusage,disklimit,bwusage,bwlimitandlastupdateintblhosting(MB). Disk includes databases; bandwidth is the current month; a limit of 0 is unlimited. Reseller services are skipped. - The service page in the WHMCS admin shows status (and suspend reason), package, IP, owner, disk and bandwidth against limits, and last login.
Self-signed certificates
Certificates are verified by default. If the panel uses a self-signed certificate, enter allow-self-signed in the Username field of the WHMCS server, or tick Accept self-signed certificate on the product. Prefer installing a real certificate (see Custom and hostname certificates). If Secure is unticked the token travels unencrypted, so use that only on a trusted network.
Troubleshooting
- "Could not reach the PanelFi server": check the hostname, that port 2087 is open from the WHMCS server, and the Secure setting.
- "invalid or expired API token": wrong, revoked or expired. Resetting an administrator's password revokes that administrator's tokens.
- "this token is read-only": create a token without the read-only option.
- "only a server administrator can manage resellers": use an administrator token for reseller products.
- "the owner of this token can no longer sign in": the token's owner is suspended or removed.
- "too many failed attempts": wait, then retry with the right token.
- "no package named ...": the product's package name must match exactly.
- Usage shows zero: disk is measured on a schedule, so a new account shows zero until the first check.
Looking for the module that sells and manages PanelFi licenses? That is a separate WHMCS licensing module; see Partner program and licensing.
Hooks and plugins
Where to find it: Server panel > Development > Manage Hooks ; Server panel > Plugins > Manage Plugins
Run your own scripts when something happens on the server (account created, suspended, backup finished and more), and install plugins that add menu links to both panels and bundle their own hook scripts.
Hooks
A hook is an executable file you put in an event's folder; it runs as root after the action, for example to tell a billing system about a new account.
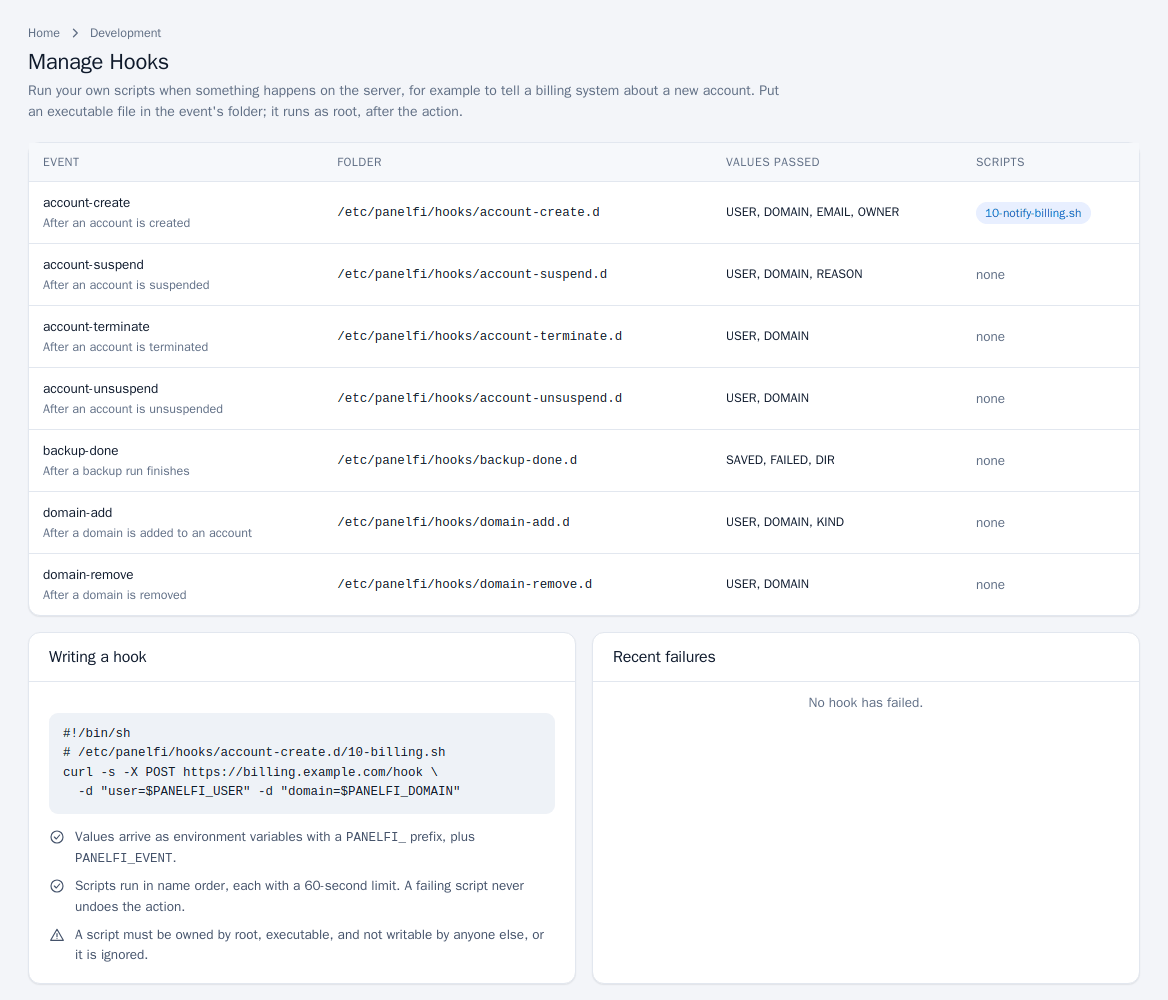
- Open Development > Manage Hooks. The table lists each event, when it runs, its folder, the values passed and the scripts present. The events are: account-create, account-terminate, account-suspend, account-unsuspend, domain-add, domain-remove and backup-done.
- Create an executable script in the event's folder (
/etc/panelfi/hooks/<event>.d/), for example:#!/bin/sh # /etc/panelfi/hooks/account-create.d/10-billing.sh curl -s -X POST https://billing.example.com/hook \ -d "user=$PANELFI_USER" -d "domain=$PANELFI_DOMAIN" - Reload the page: the script is listed under its event. Failures are listed under Recent failures.
- Values arrive as environment variables with a
PANELFI_prefix, plusPANELFI_EVENT. - Scripts run in name order, each with a 60-second limit. A failing script never undoes the action.
- A script must be owned by root, executable, and not writable by anyone else, or it is ignored.
Plugins
Plugins connect PanelFi to other software, such as a billing system. A plugin can add links to the menus of both panels and run its own scripts on the same events as hooks.
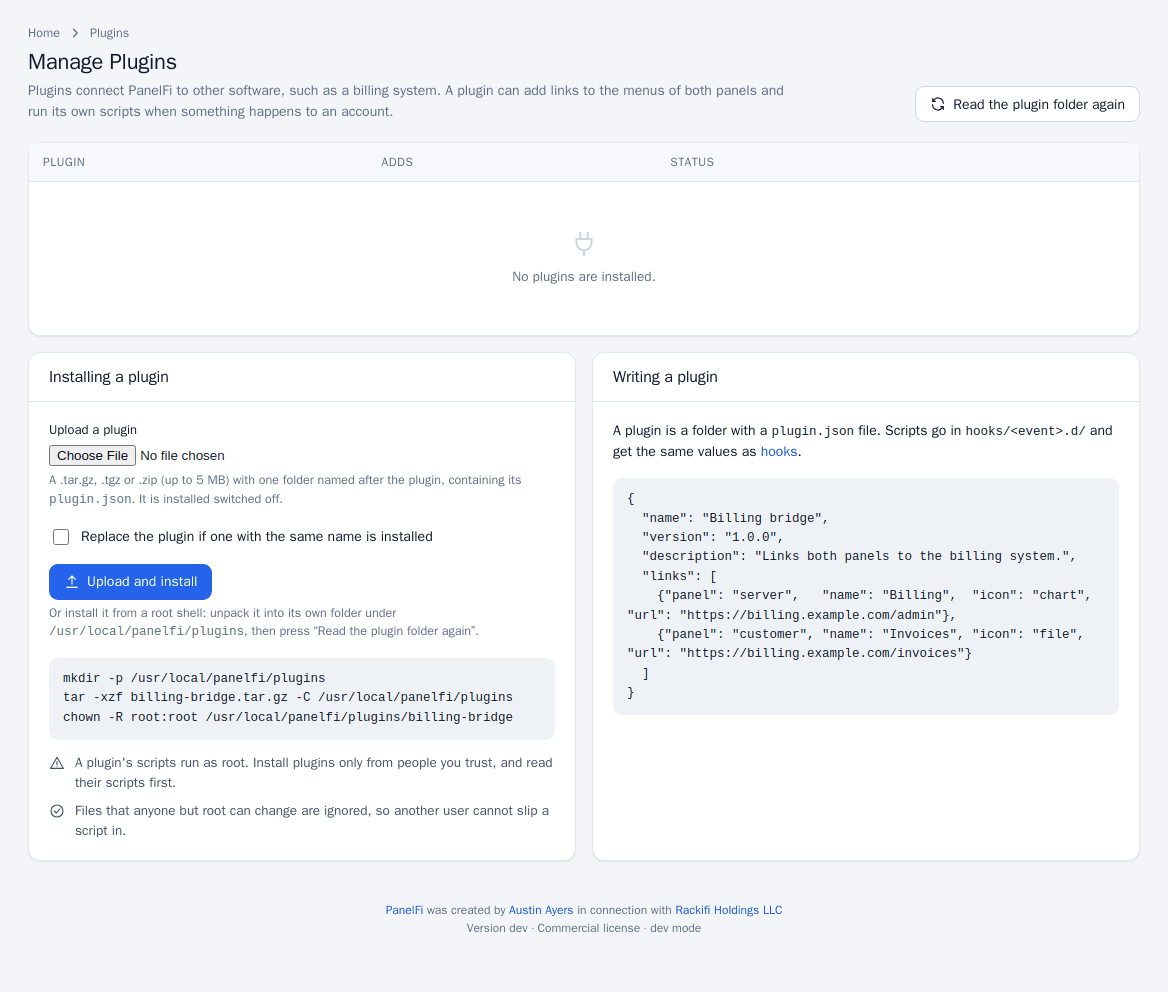
Install a plugin
- Open Plugins > Manage Plugins.
- Under Upload a plugin choose a
.tar.gz,.tgzor.zip(up to 5 MB) with one folder named after the plugin containing itsplugin.json. Tick Replace the plugin if one with the same name is installed to upgrade, then click Upload and install. It is installed switched off. - Or install from a root shell: unpack into its own folder under
/usr/local/panelfi/plugins, setchown -R root:rooton it, then click Read the plugin folder again. - Review the Adds column (links per panel, scripts per event) and click Switch on. Switch off reverses it.
Write a plugin
A plugin is a folder with a plugin.json file. Scripts go in hooks/<event>.d/ and get the same values as hooks.
{
  "name": "Billing bridge",
  "version": "1.0.0",
  "description": "Links both panels to the billing system.",
  "links": [
    {"panel": "server", "name": "Billing", "icon": "chart", "url": "https://billing.example.com/admin"},
    {"panel": "customer", "name": "Invoices", "icon": "file", "url": "https://billing.example.com/invoices"}
  ]
}
Links with a missing panel or a URL that is not a web address are left out and counted in the plugin's row.
A plugin's scripts run as root. Install plugins only from people you trust and read their scripts first. Files that anyone but root can change are ignored, so another user cannot slip a script in.
Notes and limits
- These pages are root-only.
- For calling PanelFi from outside, use the API; hooks go the other way and call out when events happen.