Move a Domain
Gives an addon domain or subdomain an account of its own, or hands it to another account. Its website, subdomains, mailboxes and mail, DNS records, certificate and site settings move with it; nothing is deleted and set up again.
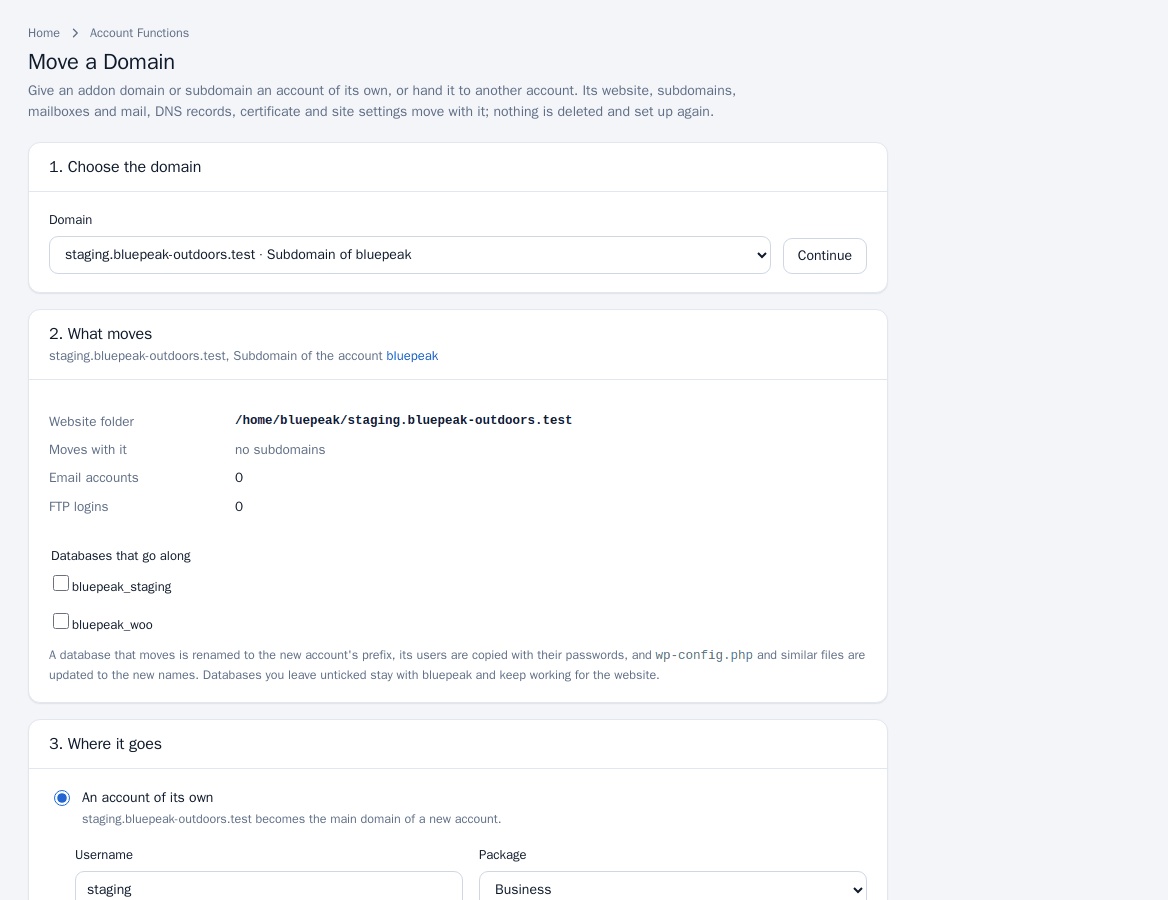
- Open Account Functions > Move a Domain. Under 1. Choose the domain pick the domain and click Continue.
- Under 2. What moves review the website folder, email accounts with their mail and passwords, FTP logins, and tick the databases that should go along. A database that moves is renamed to the new account's prefix, its users are copied with their passwords, and
wp-config.phpand similar files are updated. Databases you leave unticked stay with the original account and keep working for the website. - Under 3. Where it goes choose one of two options:
- An account of its own: the domain becomes the main domain of a new account. Enter a username, a package, optionally an owner (reseller) and a contact email. The new account's panel password is generated and shown once when the move is done.
- An existing account: the domain becomes an addon domain of that account, in a folder named after it.
- Click Move.
Cron jobs stay with the original account. An account's main domain cannot be moved this way; it moves with the account, by changing the account's owner on its page.
Skeleton Directory
The skeleton is a folder whose contents are copied into the home folder of every new account.
- Open Account Functions > Skeleton Directory.
- Under Add a file choose a file and a folder (relative to the account's home folder;
public_htmlis the website) and click Upload. - Remove entries with Remove.
A file named public_html/index.html or index.php replaces PanelFi's welcome page. Existing accounts are not changed, and transferred or restored accounts keep their own files. Links and special files are skipped.
Email All Users
- Open Account Functions > Email All Users. The page shows how many accounts have a contact email.
- Enter a Subject and a plain-text Message (up to 20,000 characters).
- Optionally tick Leave out suspended accounts, then click Send to all customers.
Each customer gets their own copy and does not see other addresses. The sender is the server contact email from Basic Setup, so set that first; the mail server must be installed.
Manage Shell Access
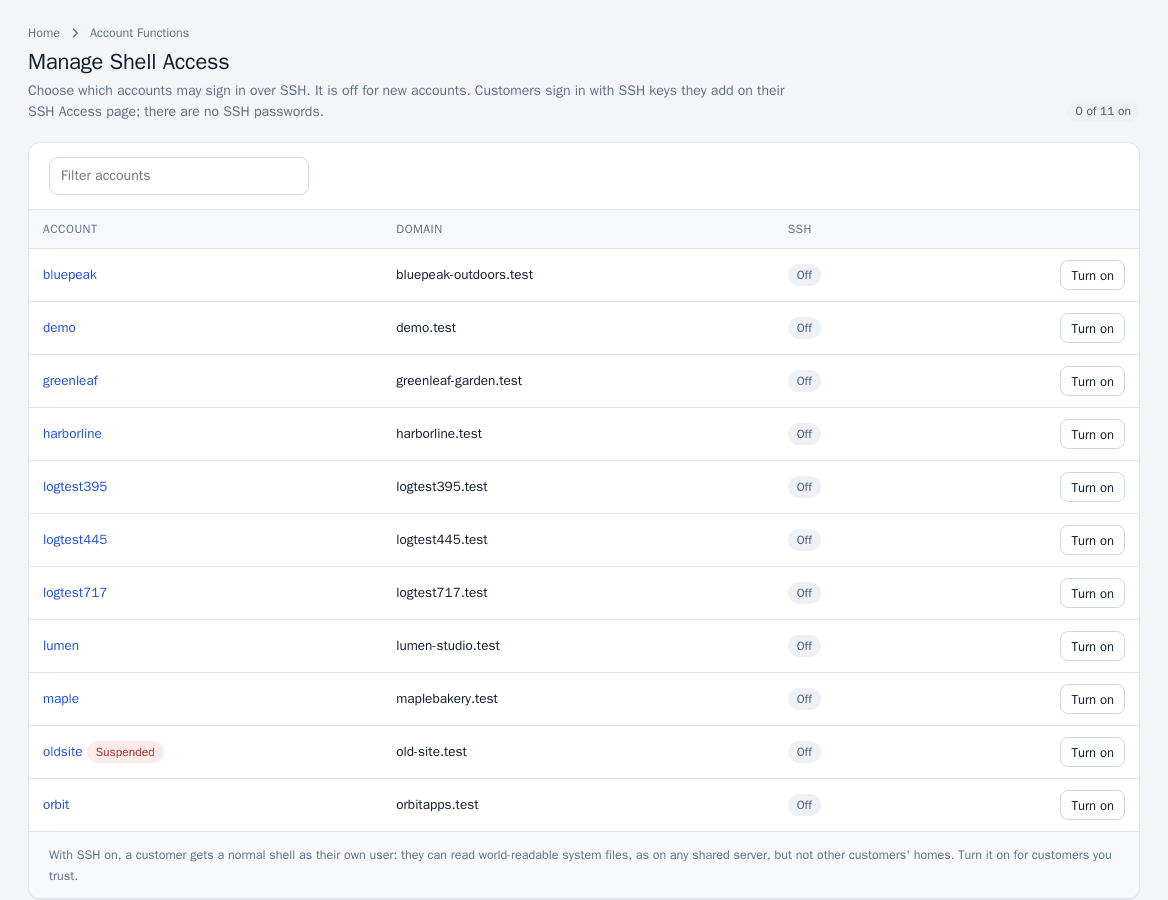
SSH is off for new accounts unless the package turns it on. Open Account Functions > Manage Shell Access and click Turn on or Turn off beside an account. Customers sign in with SSH keys they add on their SSH Access page; there are no SSH passwords. With SSH on, the customer gets a normal shell as their own user: they can read world-readable system files, as on any shared server, but not other customers' homes. Turn it on for customers you trust. See SSH and Terminal.
IP functions
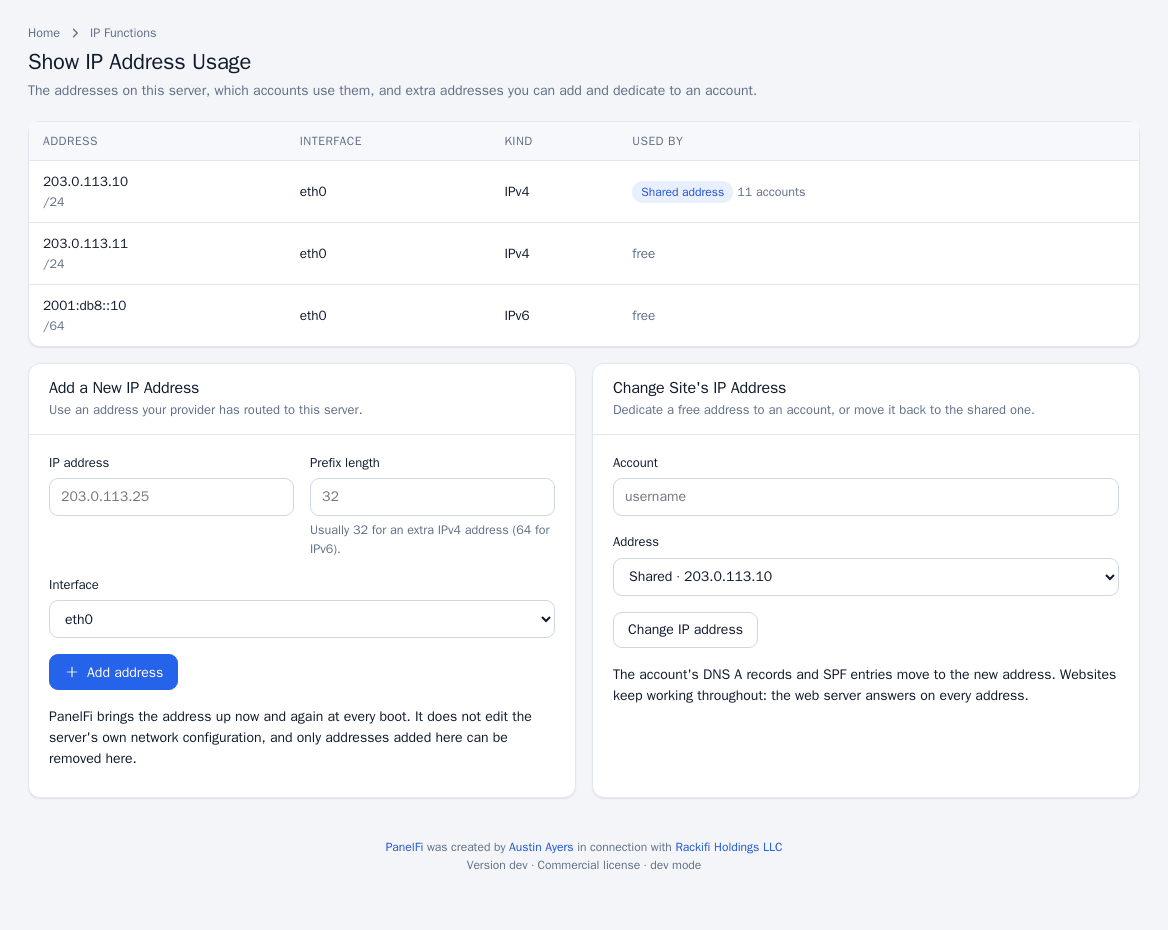
Open IP Functions > Show IP Address Usage to see the addresses on the server, which accounts use them (shared or dedicated) and which are free.
Add an IP address
- Use an address your provider has routed to this server.
- Under Add a New IP Address enter the IP address, the Prefix length (usually 32 for an extra IPv4 address, 64 for IPv6) and the Interface, then click Add address.
PanelFi brings the address up now and again at every boot. It does not edit the server's own network configuration, and only addresses added here can be removed here.
Change a site's IP address
- Under Change Site's IP Address enter the Account (username) and choose a free address, or Shared to move it back.
- Click Change IP address. The account's DNS A records and SPF entries move to the new address; websites keep working throughout.
If the shared address is not on any interface of this server, the page says so. Behind NAT that is expected; otherwise correct it under Basic Setup.