Where to find itServer panel › Account Functions › Create a New Account
Create an account
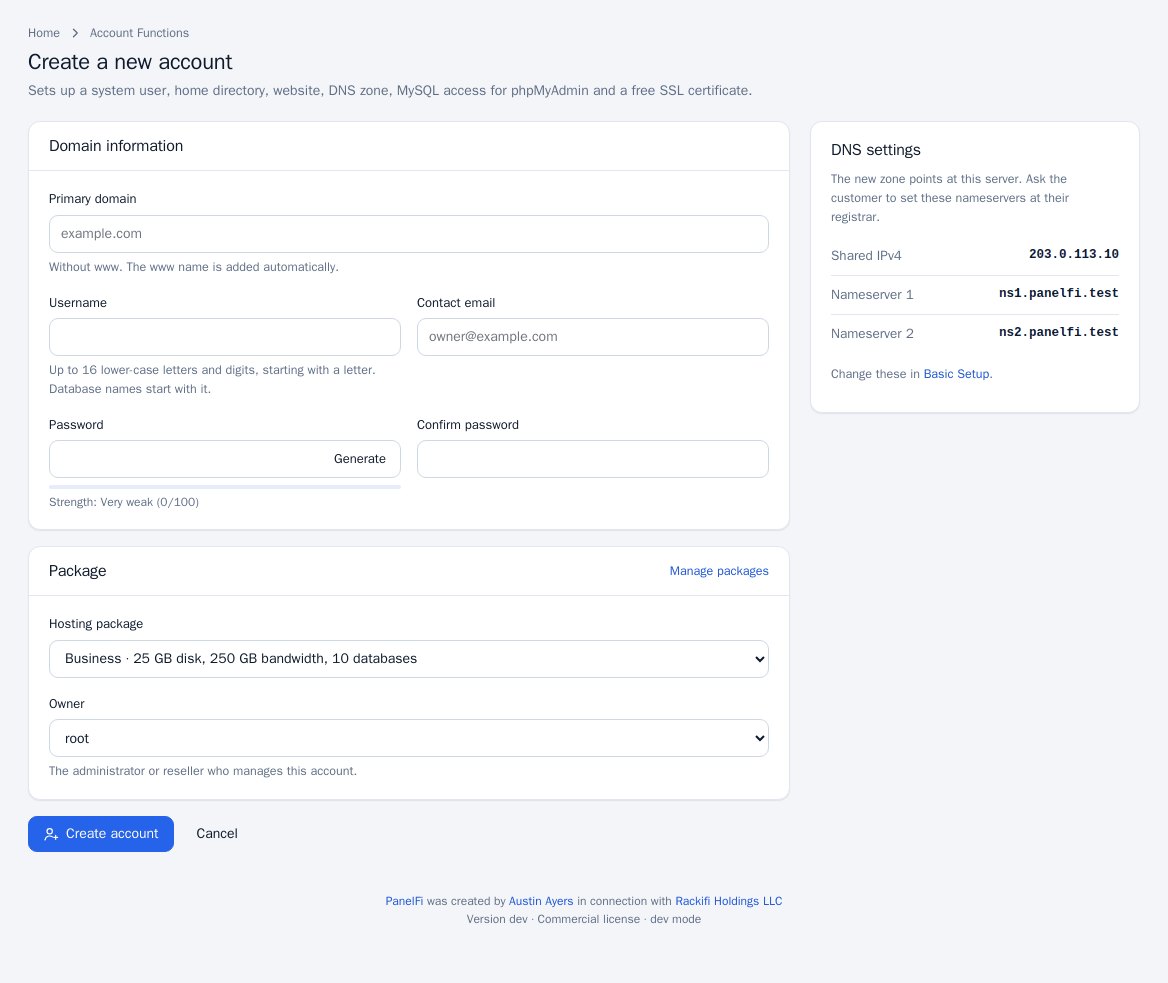
- In the Server panel open Account Functions > Create a New Account, or click Create account on the account list.
- Enter the Primary domain without
www; thewwwname is added automatically. - Enter a Username: up to 16 lower-case letters and digits, starting with a letter. Database names for the account start with it.
- Optionally enter the Contact email (used for notices to the customer; the account also appears in Email All Users only if it has one).
- Enter a Password and confirm it, or click Generate. Passwords must be at least 8 characters and cannot equal the username.
- Pick the Hosting package. The package decides the limits and which tools the customer sees; see Packages.
- Administrators can set the Owner: themselves or a reseller. Resellers always own the accounts they create.
- Click Create account. A live log shows each step. When it finishes you land on the account's page.
What the panel sets up
- A system user and home directory, a website and a DNS zone for the domain pointing at the server's shared IPv4 address (or a dedicated address if the package gives one).
- MySQL access through phpMyAdmin and a free SSL certificate (AutoSSL; it is issued once the domain's DNS points at the server).
- Files from the Skeleton Directory, if you set one; otherwise PanelFi's welcome page.
The panel shows the nameservers the new zone lists. Ask the customer to set these nameservers at their registrar (they are set in Basic Setup).
Notes and limits
- The domain must not already be hosted on the server, and some reserved names are refused.
- On the Free edition the server holds 3 accounts; creating a fourth is refused. A suspended license blocks new accounts. See Licensing and updates.
- A reseller can create accounts only up to the limits you set for them in the Reseller Center.
- If the package has the dedicated IP option and no IPv4 address is free, creation fails; add an address first (IP functions).