Sign in to the Server panel
- Open
https://your-hostname:2087(orhttps://server-ip:2087). Accept the browser warning about the self-signed certificate on the first visit. - Enter the username
rootand the password printed at the end of the install (also in/root/panelfi-login.txtwhen it was generated). - Click Log in. Until setup is finished the panel opens the wizard with no menu.
If two-factor authentication is on for the login, a second screen asks for the 6-digit code from your authenticator app. If you lost your phone, enter one of your recovery codes in the same field. See Two-factor and security. Repeated failed sign-ins from one address are rate limited.
Complete the Initial Setup Wizard
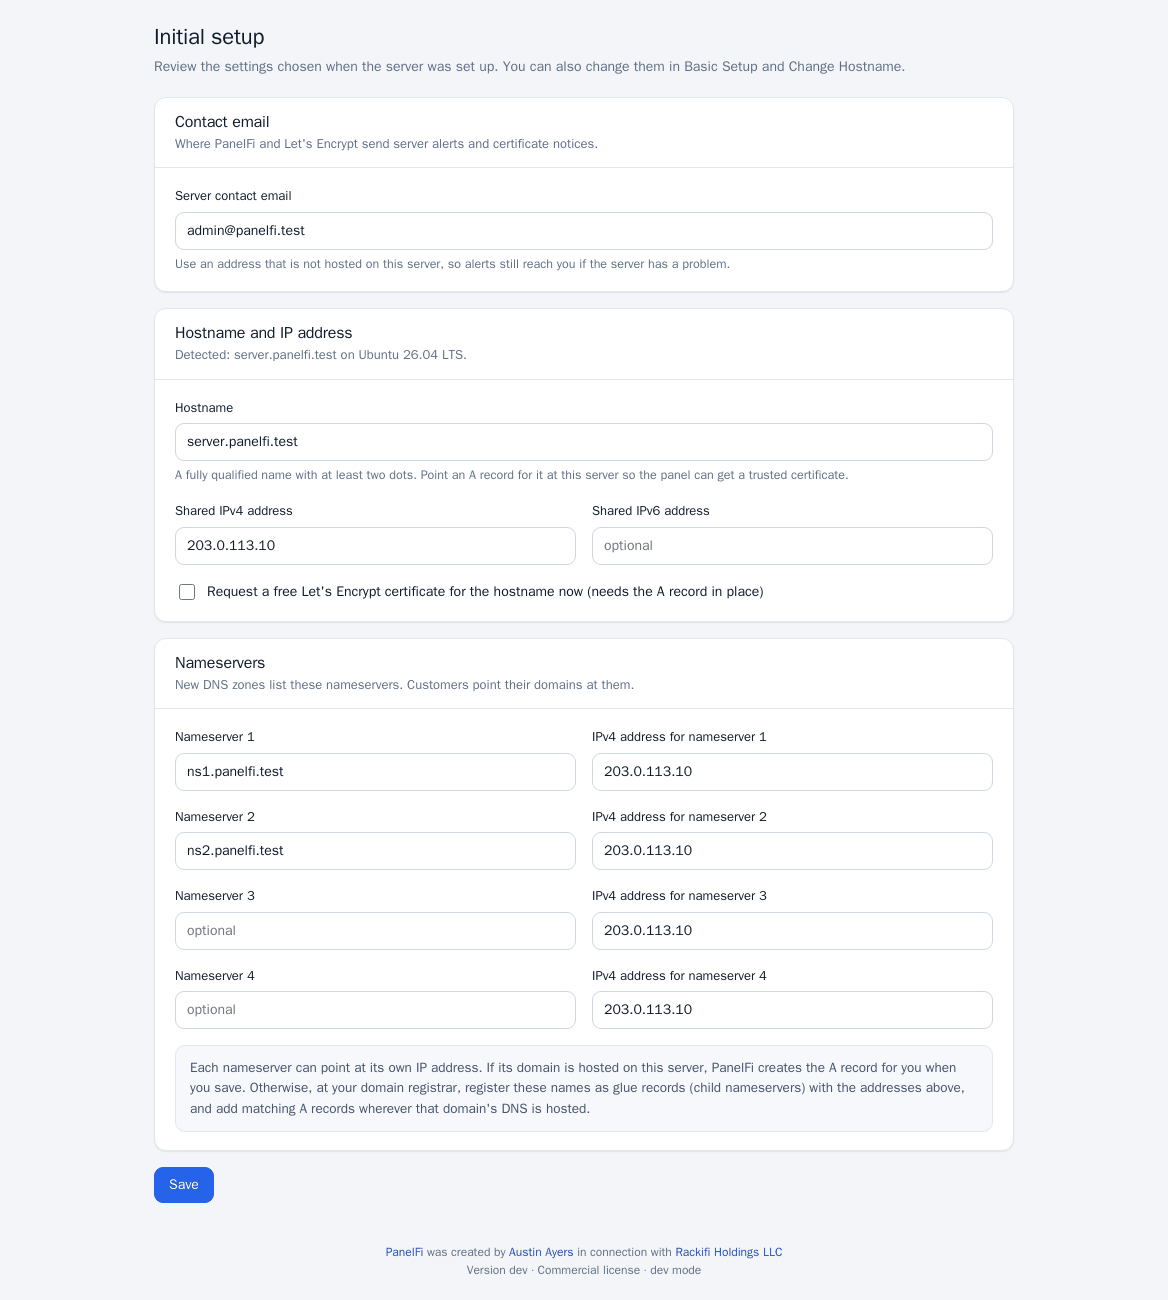
The wizard is one page with four parts. Everything in it can be changed later in Basic Setup and Change Hostname.
- License. Tick I have read the license notice. Optionally paste a license key; leave it blank to run PanelFi Free (up to 3 hosting accounts). You can add a key later under Licensing & Billing.
- Contact email. The address PanelFi and Let's Encrypt use for server alerts and certificate notices. Use an address that is not hosted on this server.
- Hostname and IP address. The hostname must be fully qualified with at least two dots. Enter the shared IPv4 address (and optionally IPv6); the wizard shows what it detected. Create an A record for the hostname at your DNS provider first, then tick Request a free Let's Encrypt certificate for the hostname now to replace the self-signed certificate.
- Nameservers. The names that new DNS zones list, for example
ns1.example.comandns2.example.com, each with an IPv4 address. Customers set these at their registrar.
Click the save button at the bottom. PanelFi saves the settings, applies the hostname if it changed, requests the certificate in the background if you asked for it, and opens the dashboard. Check SSL/TLS > Manage AutoSSL a minute later to see the certificate.
Basic Setup afterwards
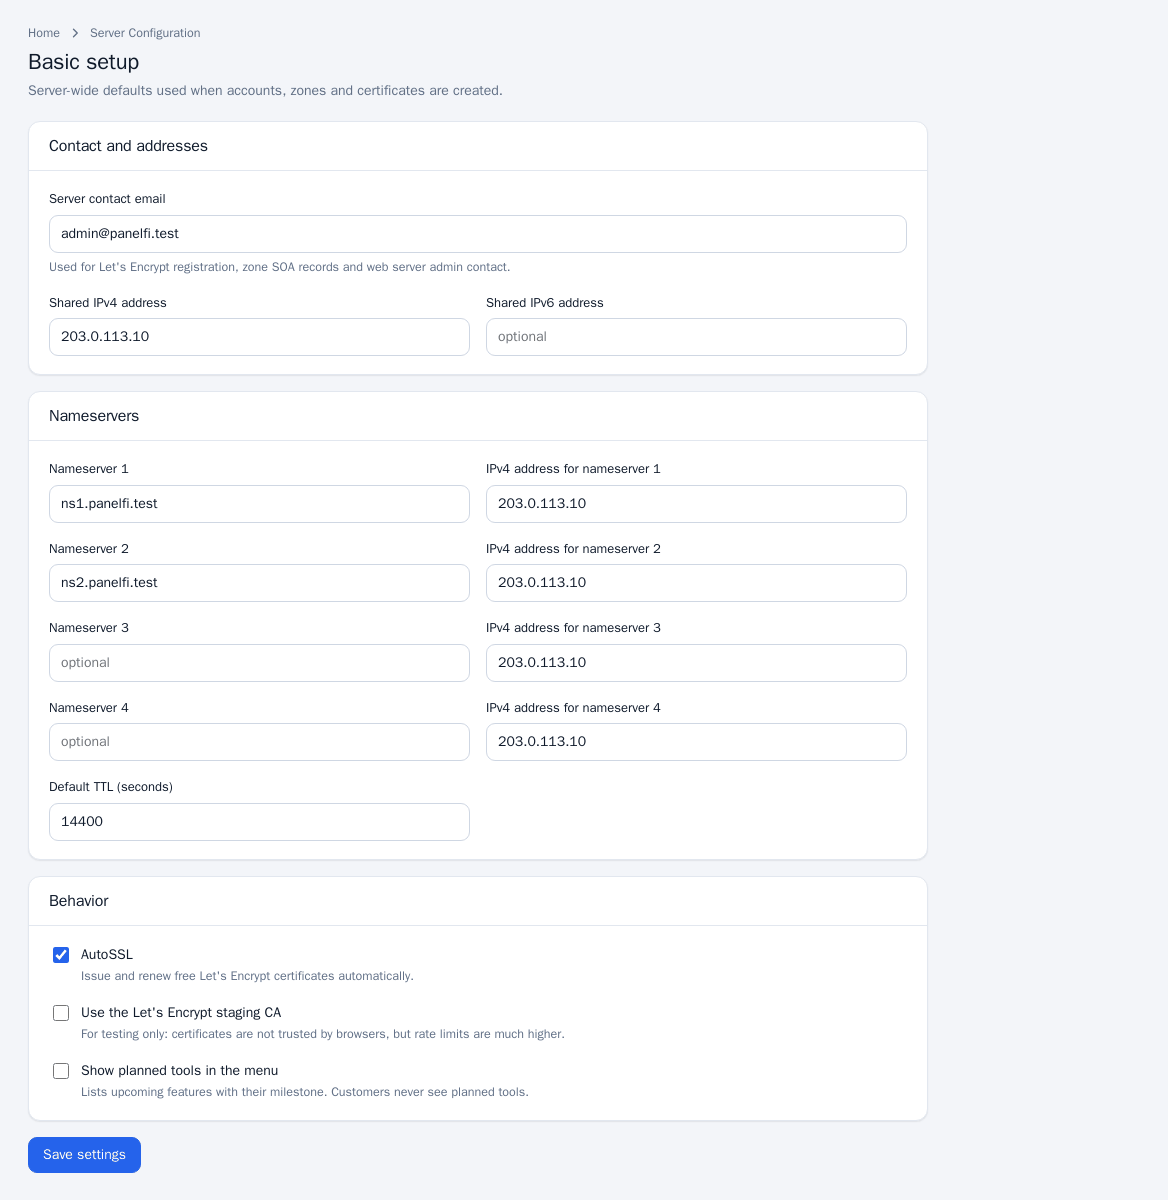
Open Server Configuration > Basic Setup any time to change the contact email, shared IPv4/IPv6 address, the four nameservers with their addresses, the default zone TTL, whether AutoSSL is on, and the Let's Encrypt staging option (for testing only).
Next steps
- Review the sample packages and make your own: Packages.
- Create your first hosting account: Create an account.
- Set up backups and two-factor authentication for the root login: Backups, Two-factor and security.
Notes
The Server panel is on port 2087 and the Customer panel on port 2083. Customers sign in on 2083 with their hosting username, not on the Server panel.