Two-factor authentication
Adds a 6-digit code from an authenticator app (Google Authenticator, Microsoft Authenticator, 1Password, Aegis) to your server-panel login. It works with any app, needs no text messages and works offline.
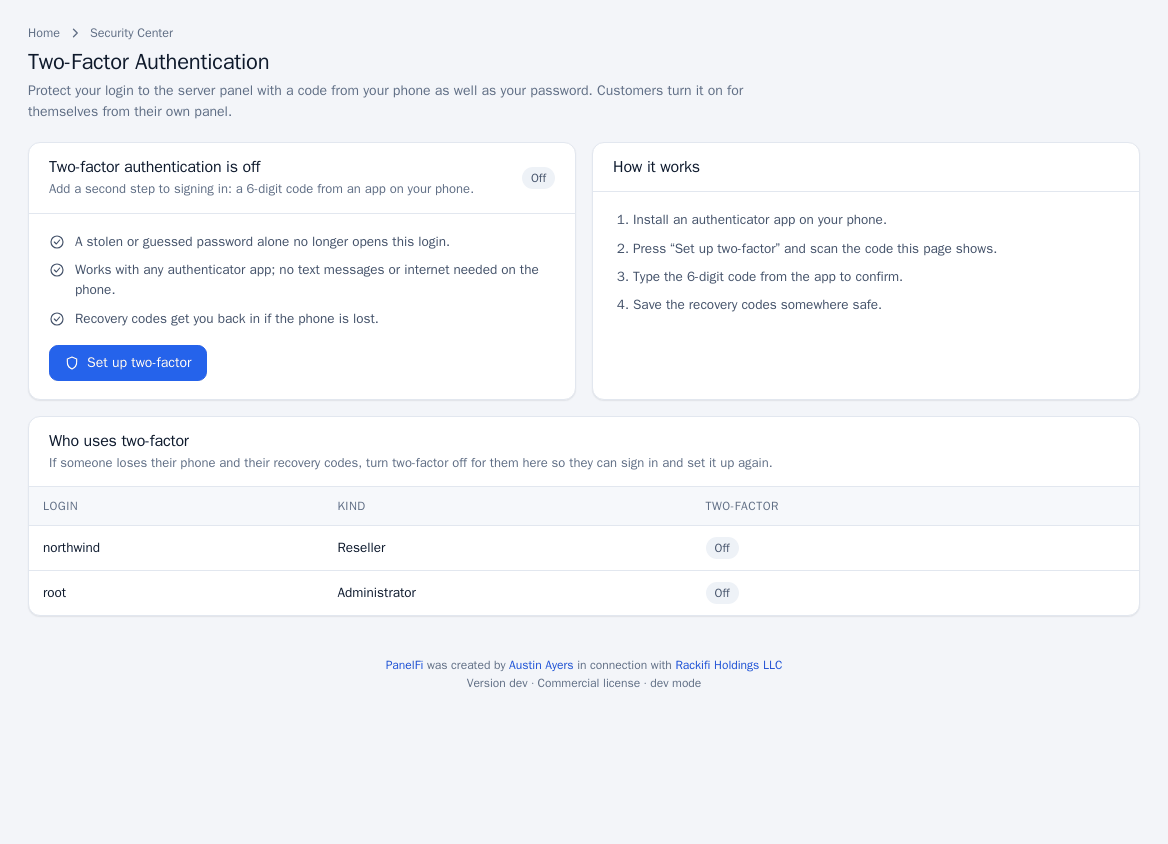
- Open Security Center > Two-Factor Authentication and press Set up two-factor.
- Scan the QR code, or add an account by hand using the key shown (time-based, 6 digits).
- Type the Code shown in the app and click Turn on two-factor.
- Save the recovery codes that appear. Each signs you in once if you lose your phone and they are shown only that time.
Once on, the page shows when it was turned on and how many recovery codes are left. Enter your Current password to Make new recovery codes (this cancels the old ones) or to turn it off. Administrators with full access also get a Who uses two-factor table where Turn off resets the second step for an administrator or customer who lost their phone and recovery codes, so they can set it up again. Customers set up their own in the Customer panel (see Account security).
Security Advisor
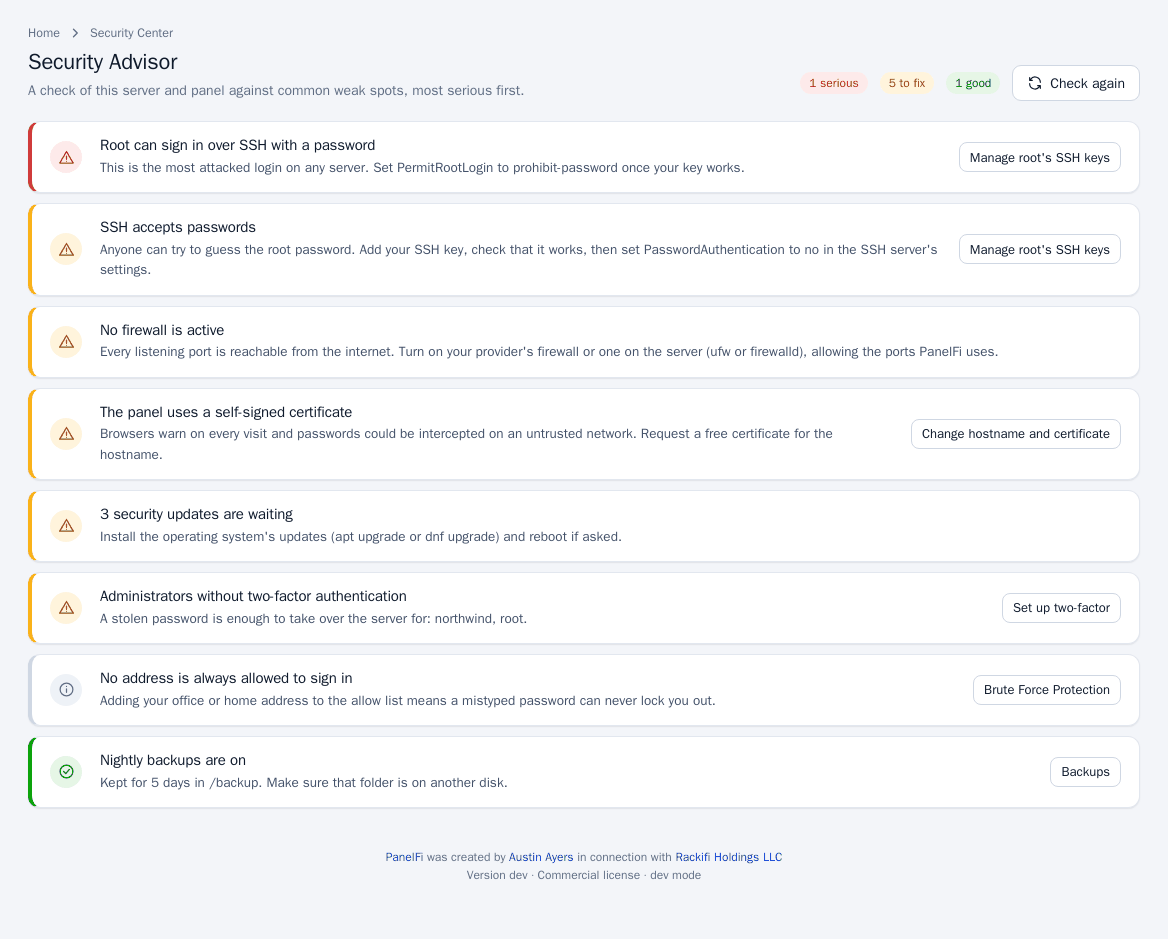
A check of the server and panel against common weak spots, most serious first. The header counts serious, to fix and good results; each finding has a title, an explanation and, where it helps, a link to the page that fixes it. Click Check again after changing something.
Root's SSH keys
Lists the keys allowed to sign in over SSH as root (/root/.ssh/authorized_keys), with name, type and fingerprint.
- Open Security Center > Manage Root's SSH Keys.
- Under Add a key, paste the Public key (the contents of your
.pubfile; make one withssh-keygen -t ed25519) and click Add key. Never paste a private key. - Use Remove to delete a key.
Keys are safer than a root password; once yours works, turn password sign-in off in the SSH server's settings.
Audit log
Security Center > Audit Log lists every change made in either panel, newest first, including failed logins: when, who, IP, action, target and detail. The latest entries are shown.
Administrators and password
Under Server Configuration > Administrators & Password the root administrator sees everyone with full access to the server panel (username, email, last login and address).
- Add administrator: enter Username, Email and Password (Generate makes one), then Add.
- Change password next to a login: enter the new password and confirm. Changing your own also asks for your current password.
- Remove deletes another administrator (you cannot remove yourself).
Resellers see only a form to change their own password. Resellers themselves are managed in the Reseller Center (Resellers).
Grant support access
Gives someone helping you a temporary administrator login to the panel. It ends on its own, and everything they do is in the audit log under the support user.
- Open Support > Grant Support Access.
- Choose How long: 4 hours, 1 day, 3 days or 7 days.
- Optionally tick Send the login to PanelFi support (needs your license key under Licensing & Billing) and add a ticket number and note.
- Click Grant support access. The address, username and password are shown once; pass them on privately. Renew with a new password makes a new password and signs the old session out; End access now ends it immediately.
The support login is a full administrator of the panel (not an SSH login). Only grant it to people you trust and end it when the work is done.
Notes and limits
- Security Advisor, audit log, SSH keys and two-factor administration are root-only; resellers only see tools listed for them in The two panels.
- Failed sign-ins and lockouts are covered in Firewall and brute-force protection.